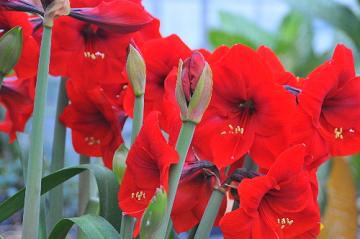
 With proper care, amaryllis will bloom year after year. Bring the pot in before the first frost and place in a dark location. Withhold water so leaves have a chance to dry completely. Then cut them off close to the top of the bulb. Amaryllis needs to rest for at least a month before the plant is started back into growth. It takes an additional six to eight weeks for the plant to flower.
When you are ready for amaryllis to resume growth, water thoroughly and place the plant in a warm, sunny location. Do not water again until the roots are well developed because bulb rot is a concern. Amaryllis needs temperatures between 50 and 60 degrees during the period before flowering. Higher temperatures can weaken leaves. The flower bud may start to appear right away or the plant may remain dormant for a period of time, but eventually all mature bulbs do bloom if they have been given proper care during the growing season. Keep the plant in a cool location and out of direct sunlight when the flower buds begin to show color so that the flowers last longer. Amaryllis can remain in bloom for about a month. (Ward Upham) Video of the Week:Upcoming Events: Kansas Turfgrass Conference in conjunction with KNLA Mark the date to attend the Kansas Turfgrass Conference in conjunction with KNLA on December 6, 7 & 8 in Topeka. The conference is an excellent way to learn about turf, nursery and landscape management, visit with old friends, network with new ones, and see all the latest equipment and supplies from local and national vendors. The conference has been approved for Commercial pesticide recertification hours: 1 Core hour 3A - 8 hrs 3B - 9 hrs International Society of Arboriculture CEUs and GCSAA education points will also be available by attending the conference. Take advantage of the discounted preregistration rate and register by November 22! Download a copy of the program, get exhibitor information, or register online http://2016ktf.eventbrite.com
Fruit: |
AuthorsCynthia Domenghini runs the Horticulture Response Center in the Department of Horticulture and Natural Resources at Kansas State University. Other contributors include K-State Extension Specialists. Archives
March 2024
Categories
All
|
| K-State Research and Extension Horticulture Newsletter |
|


 RSS Feed
