|
Calling ALL Kansas Gardeners! Share your experiences gardening in Kansas. Whether you are a beginner or life-long gardener you have a story to tell. Answer a few questions and be featured in our Garden Spotlight in an upcoming newsletter. Contact Cynthia at cdom@ksu.edu if you’d like to find out more. 2024 Kansas Turf and Ornamentals Field Day August 1, 2024, at Rocky Ford Turfgrass Research Center in Manhattan, KS. https://www.k-state.edu/turf/events/2024TurfFieldDayProgram.pdf Sedgwick County Spring Garden Fair  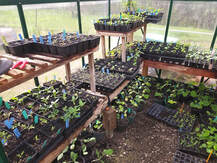
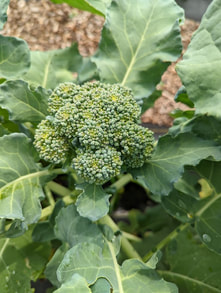 Environmental stress such as temperature fluctuations can cause cole crops including cauliflower and broccoli to bolt. “Bolting” refers to premature flowering and negatively affects the taste. Ensure cool season vegetables are receiving consistent moisture, especially with the heat and wind we’ve experienced lately. One-inch of water per week is typically enough for these crops. You can test the moisture of the soil by inserting your finger to a depth of one inch.
Continue fertilizing every two to three weeks until harvest. Fertilizer can be applied on the soil surface next to the rows of plants. This technique is called “side dressing”. Use a high nitrogen source of fertilizer such as blood meal. Lawn fertilizers could be used but cut the rate in half. Do NOT use lawn fertilizers that include weed killers or preventers. 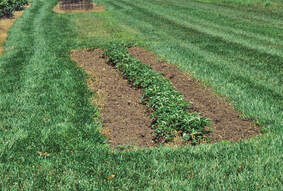 June-bearing strawberries should not be fertilized until renovation (after harvest) and again in late August or early September.
Everbearing and day-neutral strawberries bear fruit in spring and again in the fall. They benefit from an application of nitrogen-rich fertilizer this time of year. Unless a soil test suggests otherwise, add a layer of compost or organic fertilizer such as blood meal next to the plant rows. A high nitrogen fertilizer such as 27-3-4 at a rate of 1 ½ tsp per hill can be used but if using a lawn fertilizer, ensure it does not contain weed killers or preventers. Irrigate immediately after adding the fertilizer. Brambles can be fertilized now as well using the same method as above. For synthetic fertilizers apply ½ cup for every 10 row feet. 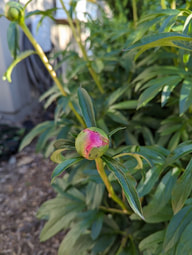 I currently have two varieties of peonies growing in my landscape. One is fully leafed out and preparing to bloom, while the other is still small and buds are just starting to develop. I noticed ants crawling on the more developed buds which is common and no cause for concern.
Peonies produce nectar on the outside of buds which attracts ants looking for an early season food source. There is a myth that ants are necessary to get the buds to open. Blooms are not dependent upon ants, rather ants depend on the blooms for sustenance. Ants are not problematic for the blooms and insecticide is absolutely NOT warranted. In fact, some sources state ants help deter pests that would cause harm to the blooms. As the blooms reach their peak, ants typically move to their next food source. Gardeners who intend to harvest peony flowers for the home, should cut before the bloom is fully opened, preferably early in the morning. Buds will continue to open once placed in a vase of water. If ants are present when harvesting, hold the stem, upside-down, close to the bloom and gently shake to dislodge ants. The blooms can also be lightly washed to remove ants. 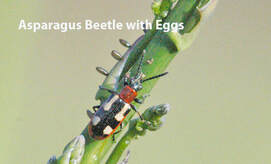 Watch for asparagus beetles now to gain control before the problem grows.
Description: Adult beetles are ¼ inch long with cream-colored markings over the metallic blue-black and red body. Life Cycle: Adult beetles emerge from the soil in early spring and travel to new shoots where they feed and mate. Females secure up to 30 eggs, on end, to the tips of asparagus spears. Eggs are dark brown in color and positioned in rows. Larvae hatch in about one week and are 1/3 inch long. The larvae resemble slugs and are green to gray in color with black heads and legs. After feeding for a couple of weeks, larvae burrow into the soil and pupate. Within two weeks, adult beetles emerge and begin feeding. Beetles overwinter in plant debris. There are two generations of asparagus beetles each year. Damage: Asparagus beetles feed on spears of asparagus as well as ferns. The black stain left behind the feeding larvae does not make asparagus inedible, but unsightly and perhaps undesirable. Leaves and tender buds near the growing tip are often damaged through feeding. Control: Always begin with prevention in mind. Clean up plant debris at the end of the growing season to remove the overwintering habitat. During the active season, monitor plants regularly, primarily in the afternoon. Remove beetles/larvae/eggs by hand and place in a bucket of soapy water. Horticultural oil and insecticidal soaps can be used for those who prefer organic methods of control. Carbaryl (Sevin) and permethrin are two synthetic control options but note the wait time for harvest after application. 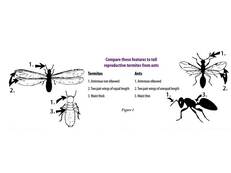 We have received some questions about recognizing the difference between termites and ants. Both may have wings, are able to swarm and are of a similar size. Here are some distinguishing characteristics to help identify each. If you suspect the presence of termites, it is important to get professional guidance.
Ants:
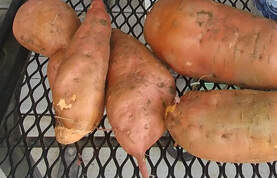 Sweet potatoes are very heat tolerant and low maintenance making them a great crop for the summer garden. Keep in mind the harvest time for sweet potatoes is in September, so areas designated for this crop will not be available to plant until then.
Sweet potato slips (unrooted shoots) can be purchased from a garden center and planted directly into the garden in late May (or right before school gets out.) Slips will develop roots once planted. Students can help grow slips for the school garden by placing a whole sweet potato in a bucket of sand. Keep the bucket in a warm location under lights. Shoots will begin to emerge from the sand and can be removed to plant in the garden. Another option is to suspend a sweet potato in a jar of water to promote shoot growth. Students can try both methods and make observations. (KSRE Garden Guide – Sweet Potato) (KSRE School Garden Guide – Sweet Potatoes)  Don’t let all of your efforts to establish an outdoor learning lab go to waste during the summer! As the school year winds down here are some tips to get volunteers in order so the school garden will be ready when students return.
KSRE Planning for Summer Break |
AuthorsCynthia Domenghini runs the Horticulture Response Center in the Department of Horticulture and Natural Resources at Kansas State University. Other contributors include K-State Extension Specialists. Archives
March 2024
Categories
All
|
 RSS Feed
