Video of the Week:
How to Choose the Best Poinsettia
Fruit:
Mouse Damage to Fruit Trees/Plants
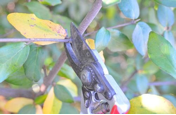
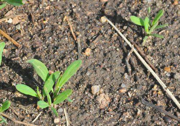
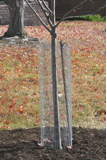
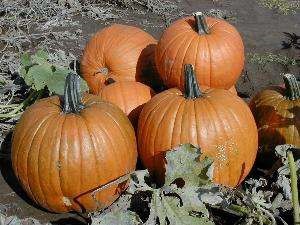
Be on the lookout for mouse tunnels around your fruit plants. Trunks and roots of apple trees are among the favorite meals for mice. There is probably no damage yet. But if we receive enough snow to cover winter food supplies, mice will begin to feed on the lower area of tree trunks and roots. This feeding may be severe enough to girdle tree trunks and kill the trees.
Mice like to hide in dead grass and weeds around the trees, especially close to the trunks. They will often tunnel near the soil surface and feed on the tree bark. You can check for mice by placing baited mouse traps in PVC or other pipe near your trees. Insert the traps far enough so that pets are unable to reach the trap. Check the stations about once a week and reset traps if necessary.
Mouse damage can be severe enough to kill trees that are old enough to bear fruit. Clear dead grass and weeds away from your trees and monitor for mice if you are using mulch around your fruit plants. (Ward Upham)
Flowers:
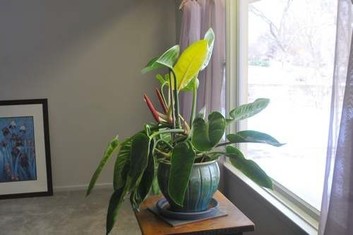
Poinsettia Care
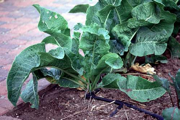
Modern poinsettia varieties stay attractive for a long time if given proper care. Place your poinsettia in a sunny window or the brightest area of the room, but don't let it touch cold windowpanes. The day temperature should be 65 to 75 degrees F with 60 to 65 degrees at night. Temperatures above 75 degrees will shorten bloom life, and below 60 degrees may cause root rot. Move plants away from drafty windows at night or draw drapes between them to avoid damage from the cold.
Poinsettias are somewhat finicky in regard to soil moisture. Avoid overwatering because poinsettias do not like "wet feet." On the other hand, if the plant is allowed to wilt, it will drop leaves. So how do you maintain proper moisture? Examine the potting soil daily by sticking your finger about one inch deep into the soil. If it is dry to this depth, the plant needs water. When it becomes dry to the touch, water the plant with lukewarm water until some water runs out of the drainage hole, then discard the drainage water. (Ward Upham)
Poinsettias are somewhat finicky in regard to soil moisture. Avoid overwatering because poinsettias do not like "wet feet." On the other hand, if the plant is allowed to wilt, it will drop leaves. So how do you maintain proper moisture? Examine the potting soil daily by sticking your finger about one inch deep into the soil. If it is dry to this depth, the plant needs water. When it becomes dry to the touch, water the plant with lukewarm water until some water runs out of the drainage hole, then discard the drainage water. (Ward Upham)
Ornamentals:
Controlling Volunteer Trees
Though trees are a vital part of our landscapes, there are situations where volunteer trees need to be controlled. This is often a case of the wrong plant in the wrong place. If the tree is still small and a desirable species, you may want to consider transplanting in the spring. If it is not, active control measures would be in order.
Most trees resprout after cutting though some don't. Cutting those that don't resprout is an effective control method. For example, eastern redcedar is a very common species that will not resprout after cutting. Those that do resprout include Siberian elm, hackberry, Osage orange (hedgeball), oak, ash, aspen, cottonwood, maple, sycamore, willow and
many more. These trees will either need to be dug out or the cut stump treated with herbicide after cutting.
Note that when we say volunteer trees, we mean those that come from seed rather than suckers that originate from the roots of an existing tree. The recommendations given in the remainder of this article are designed to kill these volunteer trees. Using herbicides on suckers will damage and very possibly kill the original tree. Trees that commonly
produce suckers include tree of heaven, honeylocust, black locust, hackberry, western soapberry, cottonwood, aspen, poplar, willow and boxelder. It is also possible for larger trees of the same species to be root-grafted. Even though root-grafted trees are not suckers, they do share materials between the individual root systems and therefore herbicides used to treat one tree can be passed to its neighbor.
Let's say we have a tree we want to control that is a volunteer and there are no other trees of the same species close enough to be root-grafted that we do not wish to harm. What do we do? If the tree is any size, you probably do not want to dig it out. That leaves using a herbicide on the cut stump. Basal treatments are also possible but that is beyond the scope of this article. First decide what herbicide to use.
Triclopyr and glyphosate are the herbicides most commonly available to homeowners. Triclopyr is found in many brush killers and glyphosate is found in Roundup as well as numerous other products. Read the label before purchasing to make sure that a cut stump treatment is listed.
Most often the undiluted product is applied to the stump immediately after cutting. A paint brush is often used for the
application though some people will dip their pruning shears in the products immediately before cutting. Regardless, it is important that the stump is treated immediately or at least within 5 minutes. Note that a paint brush with foam rather than bristles is less likely to drip.
Trees do not need to be actively growing to be controlled. Actually this time of year is a very good time to treat as long as applications are made when the temperature is above freezing. (Ward Upham)
Miscellaneous:
Ice Melters
There are five main materials that are used as chemical deicers: calcium chloride, sodium chloride (table salt), potassium chloride, urea, and calcium magnesium acetate.
Calcium chloride is the traditional ice-melting product. Though it will melt ice to about -25 degrees F, it will form slippery, slimy surfaces on concrete and other hard surfaces. Plants are not likely to be harmed unless excessive amounts are used.
Rock salt is sodium chloride and is the least expensive material available. It is effective to approximately 12 degrees F, but can damage soils, plants and metals. Potassium chloride can also cause serious plant injury when washed or splashed on foliage. Both calcium chloride and potassium chloride can damage roots of plants.
Urea (carbonyl diamide) is a fertilizer that is sometimes used to melt ice. Though it is only about 10% as corrosive as sodium chloride, it can contaminate ground and surface water with nitrates. Urea is effective to about 21 degrees F.
Calcium magnesium acetate (CMA), a newer product, is made from dolomitic limestone and acetic acid (the principal compound of vinegar). CMA works differently than the other materials in that it does not form a brine like salt but rather helps prevent snow particles from sticking to each other or the road surface. It has little effect on plant growth or concrete surfaces. Performance decreases below 20 degrees F.
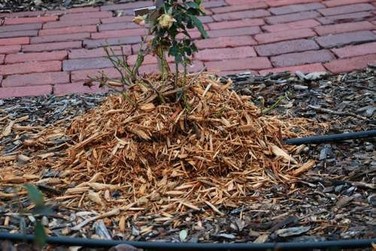
Limited use of any of these products should cause little injury. Problems accumulate when they are used excessively and there is not adequate rainfall to wash or leach the material from the area. Since limited use is recommended it is best to remove the ice and snow by hand when possible. When these products are applied, practice moderation. Resist the temptation to over apply just to make sure the ice and snow melts. Keep in mind this can damage concrete surfaces as well as the plants and grass growing along the walks and driveways. These problems are normally latent and do not show up until spring or summer. (Ward Upham)
Calcium chloride is the traditional ice-melting product. Though it will melt ice to about -25 degrees F, it will form slippery, slimy surfaces on concrete and other hard surfaces. Plants are not likely to be harmed unless excessive amounts are used.
Rock salt is sodium chloride and is the least expensive material available. It is effective to approximately 12 degrees F, but can damage soils, plants and metals. Potassium chloride can also cause serious plant injury when washed or splashed on foliage. Both calcium chloride and potassium chloride can damage roots of plants.
Urea (carbonyl diamide) is a fertilizer that is sometimes used to melt ice. Though it is only about 10% as corrosive as sodium chloride, it can contaminate ground and surface water with nitrates. Urea is effective to about 21 degrees F.
Calcium magnesium acetate (CMA), a newer product, is made from dolomitic limestone and acetic acid (the principal compound of vinegar). CMA works differently than the other materials in that it does not form a brine like salt but rather helps prevent snow particles from sticking to each other or the road surface. It has little effect on plant growth or concrete surfaces. Performance decreases below 20 degrees F.
Limited use of any of these products should cause little injury. Problems accumulate when they are used excessively and there is not adequate rainfall to wash or leach the material from the area. Since limited use is recommended it is best to remove the ice and snow by hand when possible. When these products are applied, practice moderation. Resist the temptation to over apply just to make sure the ice and snow melts. Keep in mind this can damage concrete surfaces as well as the plants and grass growing along the walks and driveways. These problems are normally latent and do not show up until spring or summer. (Ward Upham)
Using Old Garden Seed
Seed catalogs seem to come earlier every year, and many gardeners already have begun to receive them. Garden seed can be expensive, and you may want to consider using seed from previous years. Seed stores best if kept in a cool, dark, dry location. Try a zip-locked plastic bag or a plastic jar such as a reused peanut butter jar to keep seed dry.
Seed will be viable longer if kept between 40 and 50 degrees F. Temperatures a bit lower than 40 degrees are fine as long as they are not sub-freezing. Therefore a refrigerator is a better choice than a freezer which can prove detrimental to seed longevity if there is too much moisture in the seed. Seed that has 8% or less moisture can be frozen without harm and will actually store much longer than seed stored above freezing. Seeds dried to 8% or less moisture will break instead of bending when folded. Those that have a hard seed coat such as corn and beans will shatter rather than mashing when struck with a hammer.
If your seed is not dry enough for freezing, what should you do? The easiest answer is to store your seed under cool, not freezing, conditions. Drying seeds is a rather involved process and beyond the scope of this article. However, if you would like to try, an excellent reference on an effective procedure is given in the book “Seed to Seed” by Suzanne Ashworth.
Crop groups vary in seed longevity. Use the following as a guide for seed stored under cool, dry conditions.
Crucifers (cabbage, cauliflower, broccoli): 4 to 5 years
Corn: 2 to 3 years
Lettuce, endive: 4 to 5 years
Spinach, beets, carrots and chard: 2 to 3 years
Cucurbits: Squash, melons (including watermelon): 4 to 5 years
Tomatoes: 4 years
Peppers: 2 years
Onion, parsley, parsnip and salsify: 1 year
If you are unsure of viability and have plenty of seed, there is an easy method of determining how good your seed is. Place 10 seeds on a paper towel moistened with warm water and cover with a second moistened towel. Roll up the towels and place inside a plastic bag with enough holes for air exchange but not so many that the towels dry quickly.
Place the bag in a warm place such as the top of a refrigerator. Re-moisten towels with warm water as needed. After the first week, check for germination. Remove sprouted seed and check again after another week. Add these numbers together to determine the percent germination. (Ward Upham)
Contributors: Ward Upham, Extension Associate


 RSS Feed
