Video of the Week:
Soil Testing
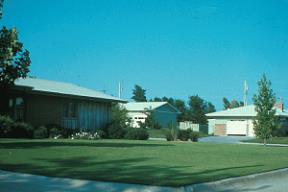
Turfgrass:
Lawn Calendar for Warm-Season Grasses
Following is a lawn calendar for Zoysiagrass and Bermudagrass. Buffalograss, also a warm-season grass, is covered in a separate article.
March
Spot treat broadleaf weeds if necessary. Treat on a day that is 50 degrees F or warmer. Rain or irrigation within 24 hours of application will reduce effectiveness.
April
Apply crabgrass preventer between April 1 and April 15, or apply preventer when the eastern redbud is in full bloom. If using a product with prodiamine (Barricade), apply two weeks earlier. Crabgrass preventers must be watered in before they will start to work.
May – August 15
Fertilize with 1 lb. of nitrogen per 1,000 square feet per application. Follow the recommendations on the bag. More applications will give a deeper green color, but will increase mowing and lead to thatch buildup with zoysiagrass. Bermudagrass can also have problems with thatch buildup but thatch is less likely with Bermuda than zoysia.
Bermudagrass – Use two to four applications.
Zoysiagrass – Use one to two applications. Too much nitrogen leads to thatch buildup.
One Application: Apply in June.
Two Applications: Apply May and July.
Three Applications: Apply May, June, and early August.
Four Applications: Apply May, June, July, and early August.
June
If grubs have been a problem in the past, apply a product containing imidacloprid by mid July. Imidacloprid can be applied as early as mid May if there are problems with billbugs or May beetle grubs. These products kill the grubs before they cause damage. They are effective and safe but must be watered in before they become active. June is a good time to core aerate a warm-season lawn. Core aeration will help alleviate compaction, increase the rate of water
infiltration, improve soil air exchange and help control thatch.
Late-July through August
If you see grub damage, apply a grub killer. If Imidacloprid has been applied, this should not be necessary. Grub killers must be watered in immediately.
Late October
Spray for broadleaf weeds if they are a problem. Treat on a day that is at least 50 degrees F. Rain or irrigation within 24 hours reduces effectiveness.
Use the rates listed on the label for all products mentioned. (Ward Upham)
Lawn Calendar for Buffalograss
General Comments
Buffalograss has become more popular in recent years due to its reputation as a low-maintenance grass. Buffalograss does require less water and fertilizer than our other turfgrasses but often has problems competing with weeds in eastern Kansas. Buffalograss is an open growing grass that will not shade the soil as well as most of our other turfgrasses. Weeds are often the result. A regular mowing schedule can reduce broadleaf weed problems as most broadleaves cannot survive consistent mowing. Those that do either have a rosette growing pattern (dandelions, shepherds purse) or are “creepers” (henbit, chickweed, spurge). Annual grasses such as crabgrass or foxtail can also be a problem. A good weed preventer (prodiamine, pendimethalin or dithiopyr) may be needed prevent problems.
March
Spot treat broadleaf weeds if necessary. The most important treatment for broadleaf weeds should be in late October to early November well after the buffalograss is dormant. Treatments are much more effective then than in the spring as the weeds are smaller and the weeds are sending energy, as well as the herbicide, to the roots. Treatments in March are to take care of any “escapes” missed in the fall spraying. Spray early enough in March that the buffalograss is still dormant. Look at the base of the plants to make sure there is no green. Treat on a day that is 50 degrees F or warmer. Rain or irrigation within 24 hours of application will reduce effectiveness. Use a combination product such as Trimec, Weed-B-Gon or Weed-Out. Weed Free Zone is also good and will give quicker results under cool conditions.
April
Apply crabgrass preventer between April 1 and April 15, or apply preventer when the eastern redbud is in full bloom. If using a product with prodiamine (Barricade), apply two weeks earlier. Crabgrass preventers must be watered in before they will work. Avoid using broadleaf herbicides as the buffalograss is greening up as injury can result. The buffalograss will not be killed but growth will slow making the buffalograss less competitive with weeds.
June
Fertilize with 1 lb. of nitrogen per 1,000 square feet during June. More applications will give a deeper green color, but will encourage weeds. If it is felt that a second application is needed, apply in July.
If grubs have been a problem in the past, apply a product containing imidacloprid by mid July. Imidacloprid can be applied as early as mid May if there are problems with billbugs or May beetle grubs. These products kill the grubs before they cause damage. They are effective and safe but must be watered in before they become active. Again, I would only treat if grubs have been a problem in the past. Note that the whole area may not need to be treated. The beetles that lay the eggs for the grubs are attracted to lights and moist soil and those areas are most likely to be infested.
Late-July through August
If you see grub damage, apply a grub killer. If imidacloprid has been applied or if grubs have not been a problem in the past, this should not be necessary. Grub killers must be watered in immediately.
Late October to Early November
Spray for broadleaf weeds if they are a problem. Look carefully as our winter annuals such as chickweed and henbit are small and easily overlooked. Use a product that contains 2,4-D as it increases effectiveness on dandelions. Treat on a day that is at least 50 degrees F. Rain or irrigation within 24 hours reduces effectiveness.
Use the rates listed on the label for all products mentioned. (Ward Upham)
Fruit:
Growing Blueberries
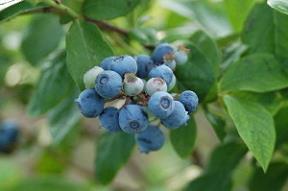
Blueberries are not native to Kansas but will grow in the eastern half of the state with good preparation. They are related to azaleas and rhododendrons and require an acid pH, preferably 4.8 to 5.2. Blueberries do not have root hairs, so watering and mulching are important. It is best to start planting preparations a year ahead of time to allow for pH adjustment, weed control, and the addition of organic matter. The first step is a soil test to determine how much the pH needs to be reduced. For a pH up to 5.5, the addition of sphagnum peat moss at the rate of 2 cubic feet per 100 square feet will be adequate. For a pH 5.5 to 6.0, add 1 pound of sulfur per 100 square feet of bed in addition to the peat moss. For a pH 6.0 to 6.5, add 1.5 pounds of sulfur per 100 square feet of bed. For pH levels above 6.5, use 2 pounds of sulfur per 100 square feet of bed and double the amount of sphagnum peat moss suggested earlier. Do not use aluminum sulfate to correct a high pH because excessive levels of aluminum can be toxic to blueberries. For each 0.5 movement up the pH scale from 6.5, add an additional pound of sulfur. Sulfur can be applied as a dust, but pelletized sulfur is much easier to spread.
Treat only the row. Row width should be 8 feet. Blueberries are normally spaced about 5 feet within the row. Sulfur takes time to react, so allow as much time as possible between sulfur application and planting. Blueberries will bear more if you plant more than one variety.
Recommended varieties vary, but you may want to try Bluecrop because it is adaptable. Patriot also seems to do well. You may want to try some other varieties.
Blueberries should be mulched. Sawdust is the traditional material, but straw and wood chips will work as well. Mulch to a depth of about 3 inches.
Blueberries must be irrigated. Soils should be kept moist but never waterlogged. Adding peat moss to the planting row will elevate the planting bed enough that standing water should not be an issue. An elevated bed will dry out more quickly, so there must be a means of adding water. Trickle irrigation works well. Watering twice a week during the summer with enough water to wet the soil 8 inches deep should be sufficient except under extreme heat. Watering once a week may be enough during the cooler spring and fall weather.
As you might guess, there is more to growing blueberries than can be included in a short article. Dr. Art Gaus from the University of Missouri shared this instruction sheet on how to grow blueberries more than 25 years ago. It is still excellent information on blueberry culture. You can access it by going to: http://www.hfrr.ksu.edu/doc3091.ashx Blueberries require commitment. Anything less than excellent preparation and care will result in failure. (Ward Upham)
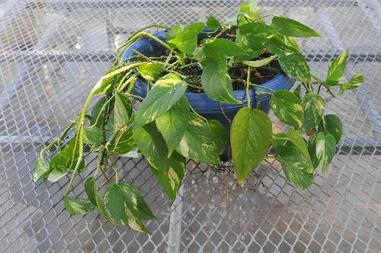
Blueberries in Containers
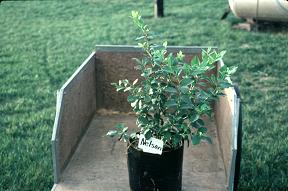
Growing blueberries in containers is becoming more popular. Chosen varieties are usually half-high plants that are a cross between highbush and lowbush blueberry species. Plants can be as small as 18 inches tall and wide (Top Hat), but typically are larger. Here are several tips for producing container grown blueberries:
Acid soil pH: Blueberries need an acid pH between 4.8 and 5.2. Sphagnum peat moss is very acid and often used in large quantities in soil mixes for acid-loving plants. In fact, blueberries can be grown in peat moss alone if nutrients are provided but that is an involved process. A 50/50 mix of peat moss and potting soil is recommended. This will provide nutrients and weight so the plant is less likely to blow over in wind.
Container size: Though containers as small as 2 gallons can be used for half-high blueberries, a larger container will be more stable in the wind and provide a larger moisture reserve during hot, dry weather.
Watering: Blueberries do not have root hairs, so they are not efficient in picking up water. Potting soil should be kept moist. This will likely be the most challenging aspect of growing blueberries in containers. A large container will not need to be watered as frequently as a small one.
Winter care: Though plants are winter hardy, the roots are not. Move pots into an unheated, attached garage or bury them in the soil or mulch enough to bury the pot in early November. Water them periodically during the winter. Use your finger to determine if the soil is moist one inch deep. If not, then water until some flows out the bottom of the pot.
Varieties: Though blueberries will produce some fruit if only a single variety is grown, two varieties will increase the potential fruit crop. Suggested varieties include Top Hat and Northsky. Each should reach about 18 inches high, though Northsky will likely grow wider than Top Hat. Northblue is another choice that should produce more fruit than either Top Hat or Northsky but should reach 2 to 3 feet high. North Country is intermediate in size at 18 to 24 inches high and should produce a moderate amount of fruit.
Wind protection: Wind protection will decrease the amount of water these plants need and reduce the chances of leaf scorch.
Exposure: Blueberries do best with a minimum of 6 to 8 hours of sunlight a day. Try a northern or eastern exposure. (Ward Upham)
Vegetables:
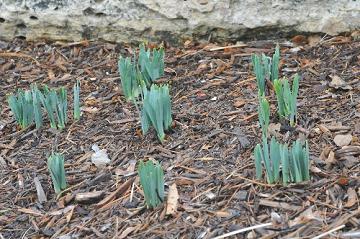
Cure the Itch by Planting Peas
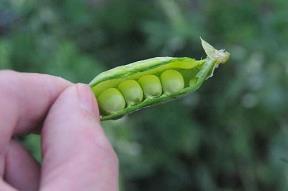
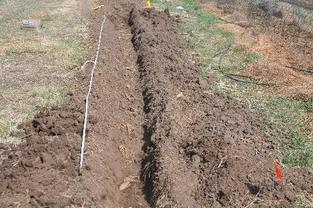
If you are tired of winter and hunger for spring, try planting peas as soon as the soil dries and the soil temperature reaches 40 degrees. We have several types of peas we can plant in Kansas. Probably the most common is the shelling pea and the old standard in this group is Little Marvel. Though Little Marvel is still on our recommended list, we have a number of others that do well including Green Arrow, Knight, Maestro, Burpeeana and Mr. Big. All of these are early maturing types that allow us to harvest a crop before the hot weather arrives and stops production. Snow peas are those commonly used in stir-fry that have a crisp edible pod. Recommended varieties include Dwarf Grey Sugar and Mammoth Melting Sugar. Sugar snap peas resemble shelling peas but have a thick, fleshy pod and can be eaten fresh, steamed or cooked. Like snow peas, they are not shelled but eaten pod and all. We recommend Sugar Bon, Sugar Ann, Super Sugar Snap and Sugar Sprint.
Peas should be planted shallow, about one-half inch deep, to encourage rapid germination and emergence. Seed in the row should be spaced 2 inches apart. Many people often plant two rows 6 to 8 inches apart so the floppy plants can support one another. For some older varieties, this may not be enough. They may need trellising to support the growing vines. Fencing may be needed to keep rabbits away. (Ward Upham)
Peas should be planted shallow, about one-half inch deep, to encourage rapid germination and emergence. Seed in the row should be spaced 2 inches apart. Many people often plant two rows 6 to 8 inches apart so the floppy plants can support one another. For some older varieties, this may not be enough. They may need trellising to support the growing vines. Fencing may be needed to keep rabbits away. (Ward Upham)
Flowers:
Iris Leaf Spot Control Starts Now
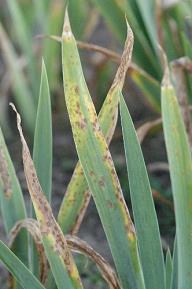
Now is a good time to begin control measures for iris leaf spot by removing old, dead leaves. Iris leaf spot is a fungus disease that attacks the leaves and occasionally the flower stalks and buds of iris. Infection is favored by wet periods during the spring, and emerging leaves eventually show small (1/8- to 1/4-inch diameter) spots. The borders of these spots are reddish, and surrounding tissue first appears water-soaked, and then yellows. Spots enlarge after flowering and may coalesce. The disease tends to be worse in wet weather and may kill individual leaves. Though the disease will not kill the plant directly, repeated attacks can reduce plant vigor so that the iris may die from other stresses. Spores are passed to nearby plants by wind or splashing water.
Because this disease overwinters in old leaves, removal and destruction of dead leaves will help with control. For plants that had little infection the previous year, this may be all that is needed. Plants that were heavily infected last year should be sprayed with chlorothalonil (Bravado Fungicide, Fertilome Broad Spectrum Landscape & Garden Fungicide, Ortho Garden Disease Control, GardenTech Daconil, Bonide Fungonil, Bravo Flowable Fungicide) or myclobutanil (Immunox, Immunox Plus) starting when leaves appear in the spring. Repeat sprays every seven to 10 days for four to six sprays. Iris leaves are waxy, so be sure to include a spreader-sticker in your spray to ensure good coverage. (Ward Upham)
Because this disease overwinters in old leaves, removal and destruction of dead leaves will help with control. For plants that had little infection the previous year, this may be all that is needed. Plants that were heavily infected last year should be sprayed with chlorothalonil (Bravado Fungicide, Fertilome Broad Spectrum Landscape & Garden Fungicide, Ortho Garden Disease Control, GardenTech Daconil, Bonide Fungonil, Bravo Flowable Fungicide) or myclobutanil (Immunox, Immunox Plus) starting when leaves appear in the spring. Repeat sprays every seven to 10 days for four to six sprays. Iris leaves are waxy, so be sure to include a spreader-sticker in your spray to ensure good coverage. (Ward Upham)
Miscellaneous:
Don't Work Wet Soil
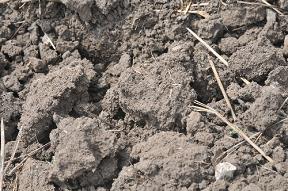
Resist the temptation to work any soil if it is wet. Doing so destroys the structure of the soil resulting in clods that may not break down all summer. To determine if a soil is too wet to work, grab a handful and squeeze. If water comes out, it is much too wet. Even if no water drips out, it still may not be dry enough to work. Push a finger into the soil you squeezed. If it crumbles, it is dry enough, but if your finger just leaves an indentation, more time is needed. Be sure to take your handfuls of soil from the depth you plan to work the soil because deeper soils may contain more moisture than the surface.
If tree planting is in your future, you may want to work the soil as soon as it is dry enough to work. You may then protect that area from becoming too wet by covering with a tarp if rain is forecast near the planting date. (Ward Upham)
If tree planting is in your future, you may want to work the soil as soon as it is dry enough to work. You may then protect that area from becoming too wet by covering with a tarp if rain is forecast near the planting date. (Ward Upham)
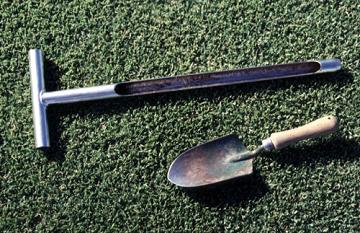
Repotting Houseplants
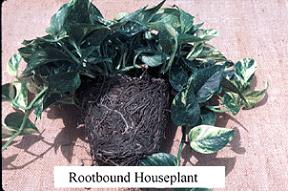
As outdoor plants break dormancy and start to grow in response to the longer days and warmer spring temperatures, houseplants usually put on a spurt of growth as well. Eventually, these indoor plants out-grow their containers and need to be repotted. To check if your plants are becoming root bound and need a larger pot, inspect the root system.
First, knock the plant out of its pot. Watering several hours before this operation will allow the plant to be removed more easily. On pots that are 8 inches in diameter or less, place one hand over the top of the pot with the stem of the plant passing between two fingers, and turn the plant upside down. Then rap the edge of the pot against a table. The root ball should come away from the pot. On pots that are more than 8 inches in diameter, a bit more encouragement may be needed. Place the pot on its side and rap the top edge of the pot with a rubber mallet. Turn the plant a few degrees, and repeat the procedure until the root ball releases.
Once the plant is free, take a look at the root ball. If you see a clear network of roots, the plant needs to be moved to a larger pot. If the original pot is less than 10 inches, move up an inch in size; if 10 inches or larger, increase the size 2 inches. If the pot has one or several large holes in the bottom for drainage, cover the holes with pot shards (pieces of a broken clay pot) or gravel so that the potting mix is not washed out during watering.
It is essential that the plant sit at the same level it was in the old pot. Add enough potting mix to the bottom of the pot to ensure this. This mix will need to be firmed before the plant is placed on top of it so it doesn't settle over time. After the plant is placed, fill in around the original root ball with potting soil. Again, firm this soil with a slender stick, or tap the bottom of the pot on the table. If this firming is not done, new soil will be so light and airy that water will tend to move through it rather than through the whole root ball.
Water the plant thoroughly after repotting, but be especially careful not to overwater for about two weeks. The new soil tends to stay wet until roots penetrate. Overwatering can lead to rot. Most plants need to be repotted annually though vigorous growers may need to move up sooner. Slow-growing plants may stay in the same pot for more than a year. (Ward Upham)
Contributors: Ward Upham, Extension Associate


 RSS Feed
