K-State Research and Extension Horticulture Newsletter
  • Newsletters
  • About
  • Contact
  • Pest of the Week

Horticulture Newsletter, No. 39

9/29/2014

0 Comments


Video of the Week:
Storing and Preserving Peppers

Fruit:
Fruit Planting Preparation

tarp over garden plot
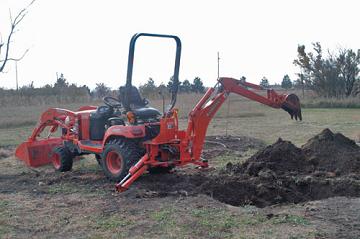
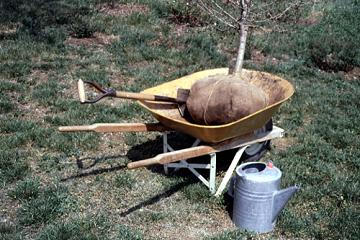
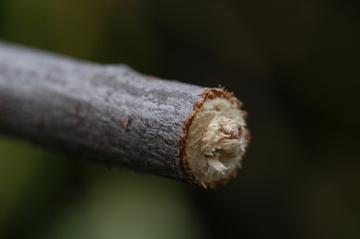
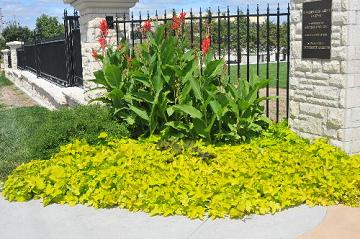
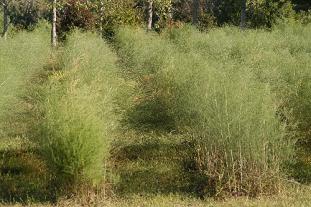
If you plan to develop or add to your fruit garden next year, now is a good time to begin preparing the planting site. Grass areas should be tilled so grass does not compete with the fruit plants for soil moisture and nutrients. Have the soil analyzed for plant nutrients. Your local K-State Research and Extension agents have information to guide you in taking the soil sample. From that sample, the agent can provide recommendations on what and how much fertilizer to add to correct nutrient deficiencies. Organic materials such as compost, grass clippings, leaves, hay, straw or dried manure, can be tilled into the soil to help improve its condition. Time and weather conditions generally are more suitable in the fall than in the late winter and spring for preparing soil. If fruit plants can be set by early April, they will have developed a stronger root system to support plant growth than they would if planted later.

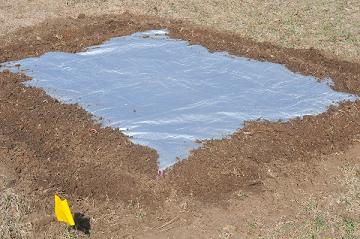
If there are only a few plants to be planted, consider tarping each planting area to guard against a wet spring, delaying planting after plants are shipped and received.  (Ward Upham)


Flowers:
Fertilize Spring-flowering Bulbs

tulips
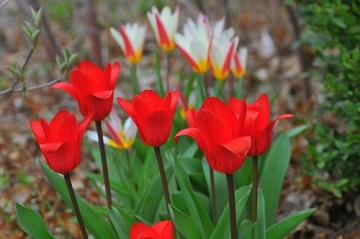
October is the month that existing beds of spring-flowering bulbs such as daffodils and tulips are fertilized. If bulbs have been fertilized in the past, there is often plenty of phosphorus and potassium in the soil. It is best to use a soil test to be certain. If the soil needs phosphorus and potassium, use a complete fertilizer (such as 10-10-10, 9-9-6, etc.) at the rate of 2.5 lbs. per 100 square feet. This would equal 1 rounded teaspoon per square foot. If phosphorus and
potassium are not needed, blood meal makes an excellent fertilizer. It should be applied at the rate of 2 pounds per 100 square feet or 1 teaspoon per square foot. Turf fertilizers such as a 27-3-3 or 30-3-3 can be used, but cut the rate by a third.   (Ward Upham)

Ornamentals:
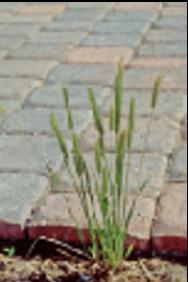
Questions on Ornamental Grass

ornamental grasses in the fall
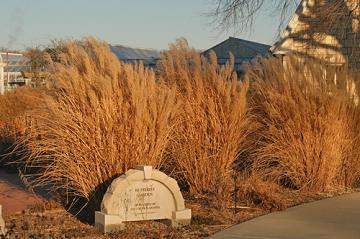
We are starting to receive questions on whether it is best to cut back ornamental grasses in the fall or spring. As a rule, ornamental grasses should not be cut back while green because they need time to move the energy found in the foliage into the roots. Even when browned by cold weather, most gardeners will leave the foliage until spring because of the interest it adds to winter landscapes. Early March is the preferred time to cut back these plants. However, dry foliage is extremely flammable and should be removed in the fall from areas where it is a fire hazard.

Another question we often receive is whether we can divide ornamental grasses in the fall. Spring is the preferred time because divisions done in the fall may not root well enough to survive the winter. (Ward Upham)


Pests:
Itch Mites

pin oak marginal leaf galls
A recent telephone conversation sparks this inclusion in this week’s newsletter. The caller related an uncomfortable situation that was diagnosed as chiggers. Apparently, he was familiar with chiggers and related that his current situation “seemed different.” He then went on to describe his red welts as having tiny, centralized blisters. It had been several years ago, but I recalled something like that from the past. I asked whether he had been around pin oak trees. “Yes, 3 large pin oaks on my property.”        

While I lay no claim to having expertise in medical matters associated with arthropods, I am offering this heads up: it is possible that there will be a rash (pun intended) of reports regarding red welts with a centralized blister.

While people often receive a pleasurable soothing, satisfying relief by itching (for instance a mosquito bite), in this instance, itching is painful.

The causative agent is the oak leaf itch mite (OLIM), Pyemotes herfsi. Refer to Extension Publication MF 2806, Oak leaf itch mite. It details a very interesting relationship between female OLIMs which parasitize the larvae of a midge fly responsible for causing marginal galls on oak leaves.

[Point of interest: the recent caller did not find marginal galls on the leaves, but rather pocket galls along the main veins on the underside of leaves. These vein pocket galls are caused by another type of midge.  It is conceivable that the OLIM parasitized the larvae of these closely-related midge species. It has been suggested that OLIM (perhaps out of necessity) are opportunistic, having been found parasitizing/feeding on the eggs of periodical cicadas.]

When the female OLIMs leave the marginal galls, anybody under the oak tree becomes a prime target. Or, because they are very small and light in weight, the OLIMs are easily carried (by air currents) to more distant places bringing them into people contact. Lastly, people have reported reactions after raking leaves.

Bites are not felt. Rather, itching reportedly begins 10-16 hours after exposure. Also, there apparently are different degrees of sensitivity (between individuals) ranging from no reaction to severe. Consult Extension Publication MF 2806, Oak leaf itch mite for relief remedies from oak leaf itch mite bites.  (Bob Bauernfeind)


Miscellaneous:
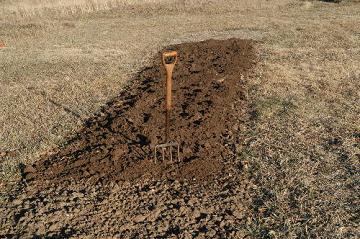
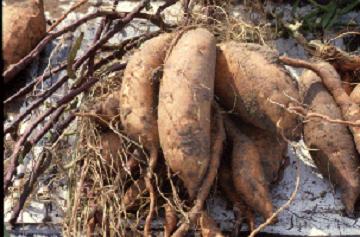
Fall a Good Time for Soil Testing

soil testing tools
Though we often think of soil testing as a spring chore, fall can actually be a better time. Soil-testing laboratories are often very busy during the spring resulting in a longer turnaround from submission to recommendations. Also, soils in the spring are often waterlogged, making taking samples difficult. If your soil test suggests more organic matter, fall is a much better season because materials are more available than in the spring, and fresher materials can be used without harming young tender spring-planted plants.

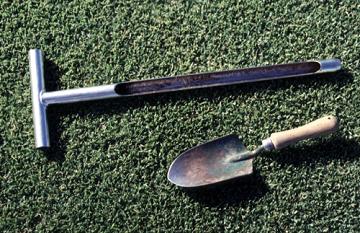
Begin by taking a representative sample from several locations in the garden or lawn. Each sample should contain soil from the surface to about 6 to 8 inches deep. This is most easily done with a soil sampler. Many K-State Research and Extension offices have such samplers available for checkout. If you don’t have a sampler, use a shovel to dig straight down into the soil. Then shave a small layer off the back of the hole for your sample. Mix the samples together in a clean plastic container and select about 1 to 1.5 cups of soil. This can be placed in a plastic container such as a resealable plastic bag.

Take the soil to your county extension office to have tests done for a small charge at the K-State soil-testing laboratory. A soil test determines fertility problems, not other conditions that may exist such as poor drainage, poor soil structure, soil borne diseases or insects, chemical contaminants or damage, or shade with root competition from other plants. All of these conditions may reduce plant performance but cannot be evaluated by a soil test. (Ward Upham)


Call "Kansas One Call" Before Digging

digging
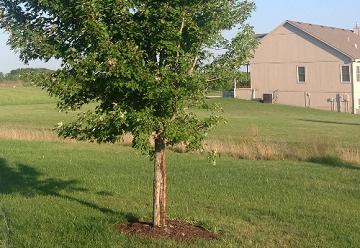
Most people don’t know what is buried under their property.  Always call Kansas One Call before planting or setting fence. You may reach them at 811. Actually, people should never dig deeply enough by hand to hit a gas line while planting a tree unless a large tree spade is used.  When hand digging, make the hole just deep enough so that the tree sits slightly above nursery level. To determine the depth of the hole, measure the distance from the root flare (point where trunk and roots meet) to the bottom of the root ball. If the flare isn't visible (very common), remove enough soil or media so that it is.

The width of the planting hole is also very important. It should be two to three times the width of the root ball. Loosening the soil outside the hole so it is five times the diameter of the root ball will allow the tree to spread its roots faster. (Ward Upham)

Contributors: Bob Bauernfeind, Entomologist; Ward Upham, Extension Associate

0 Comments

Horticulture Newsletter 2014, No. 38

9/23/2014

0 Comments


Video of the Week:
Hydrangea Paniculat or PeeGee

Vegetables:
Rotation of Vegetable Crops

vegetable garden
Rotating vegetable crops is a standard way of helping prevent disease from being carried over from one year to the next. Rotation means that crops are moved to different areas of the garden each year. Planting the same crop, or a related crop, in the same area each year can lead to a build-up of disease. Also, different crops vary in the depth and density of the root system as well as extract different levels of nutrients. As a rule, cool-season crops such as cabbage, peas, lettuce and onions have relatively sparse, shallow root systems and warm-season crops such as tomatoes, peppers and melons have deeper, better developed root systems. Therefore, it can be helpful to rotate warm-season and cool-season crops.

As mentioned earlier, it is also a good idea to avoid planting closely related crops in the same area as diseases may be shared among them. For example, tomatoes, potatoes, peppers and eggplant are closely related. Also, broccoli, cauliflower, cabbage and brussels sprouts share many characteristics in common. Therefore, do not plant cabbage where broccoli was the previous year or tomatoes where the peppers were.

So, why is this important to bring this up in the fall? Now is the time to make a sketch of your garden so that the layout is not forgotten when it is time to plant next year. (Ward Upham)

Ornamentals:
Preventing Sunscald on Thin-Barked Trees

sunscald on bark
Many young, smooth, thin-barked trees such as honey locusts, fruit trees, ashes, oaks, maples, lindens, and willows are susceptible to sunscald and bark cracks. Sunscald normally develops on the south or southwest side of the tree during late winter. Sunny, warm winter days may heat the bark to relatively high temperatures. Research done in Georgia has shown that the southwest side of the trunk of a peach tree can be 40 degrees warmer than shaded bark. This warming action can cause a loss of cold hardiness of the bark tissue resulting in cells becoming active. These cells then become susceptible to lethal freezing when the temperature drops at night. The damaged bark tissue becomes sunken and discolored in late spring. Damaged bark will eventually crack and slough off.           

Trees often recover but need TLC — especially watering during dry weather. Applying a light-colored tree wrap from the ground to the start of the first branches can protect recently planted trees. This should be done in October to November and removed the following March. Failure to remove the tree wrap in the spring can prove detrimental to the tree. (Ward Upham)

Flowers:
Amaryllis, Bringing it back into Bloom

amaryllis
With proper care, amaryllis will bloom year after year. Bring the pot in before the first frost and place in a dark location. Withhold water so leaves have a chance to dry completely. Then cut them off close to the top of the bulb. Amaryllis needs to rest for at least a month before the plant is started back into growth. It takes an additional six to eight weeks for the plant to flower.

When you are ready for amaryllis to resume growth, water thoroughly and place the plant in a warm, sunny location. Do not water again until the roots are well developed because bulb rot is a concern.  Amaryllis needs temperatures between 50 and 60 degrees during the period before flowering. Higher temperatures can weaken leaves. The flower bud may start to appear right away or the plant may remain dormant for a period of time, but eventually all mature bulbs do bloom if they have been given proper care during the growing season. Keep the plant in a cool location and out of direct sunlight when the flower buds begin to show color so that the flowers last longer. Amaryllis can remain in bloom for about a month. (Ward Upham)

Miscellaneous:
Harvesting and Curing Black Walnuts

Black walnuts being run over by tractor
Black walnuts are ready to be harvested when the hull can be dented with your thumb. You can also wait until the nuts start falling from the tree. Either way it is important to hull walnuts soon after harvest. If not removed, the hull will leach a stain through the nut and into the meat. The stain will not only discolor the meats but also give them an off flavor.

There are several ways to hull walnuts including running them through a corn sheller or pounding each nut through a hole in a board. The hole must be big enough for the nut but smaller than the hull. An easier way is to run over the nuts with a lawn tractor. This will break the hull but not crack the nut.

Note that walnut hulls contain a dye that will stain concrete, your hands or about anything else it touches. Wear gloves as the stain is almost impossible to remove. Wash hulled nuts by spreading them out on the lawn or on a wire mesh and spraying them with water or placing them in a tub of water. If you place them in a tub, the good nuts should sink. Those that float are probably not well-filled with kernels. Next, dry the nuts by spreading them in layers no more than three deep in a cool, shady and dry place such as a garage or tool shed. Drying normally takes two weeks. (Ward Upham)

Stratification

stratification of acorns
Most woody plants produce seed that will not germinate immediately after harvest. Normally this is because of one of three reasons:

     - Seed is immature and needs more time to develop;
     - A mechanical barrier is keeping water from reaching the seed;
      - A physiological block is inhibiting germination.

Immature seed needs time to complete development and does not require special treatment. The water barrier and/or physiological block require special treatments to prepare the seed for germination. One such treatment is stratification. Stratification is a process whereby seed is given the moisture and temperature conditions normally found in its natural environment. Seeds that are shed in early fall often require a warm, moist stratification period before the seed will germinate. Those that drop later in the fall may respond to cool, moist conditions. In Kansas, the most common stratification needed is the cool, moist type. The amount of time required for stratification varies with the plant species. For example, apple requires 75 days, red oak needs 30 to 45 days and sugar maple should have 60 to 90 days. All three of these species require cool, moist conditions. If unsure of the amount of time required for a specific species, 3 to 4 months usually is sufficient.

For cool stratification, temperatures just above freezing are best, with a range between 35 and 45 degrees considered ideal. Temperatures higher and lower than this are less effective. The minimum temperature at which stratification occurs is reported to be 23 degrees, and the maximum is 62 degrees.

Stratification should be done in a medium that is moist but not soggy. If there is too little moisture, the seed coat does not take up the water needed. Too much reduces the amount of oxygen available to the seed. If peat moss is used, a ratio of 1 or 1 1/4 parts water to 1 part air-dried peat moss by weight is recommended. When wetting peat moss, use warm water, which is absorbed more quickly than cold.

Small amounts of seed can be stratified by placing the seed in moist peat moss inside a plastic bag and placing the bag in the refrigerator. Small seeds can be placed between two sheets of cheesecloth so they are not lost in the medium. Larger amounts of seed can be placed in a plastic container or wooden box. Place layers of seed between layers of moist sand or a mixture of sand and peat moss. Bury the container outside so the top is even with the soil surface, and cover with leaves or straw. Alternatively, the container may be placed in an unheated garage or root cellar. (Ward Upham)

0 Comments

Horticulture Newsletter 2014, No. 37

9/16/2014

0 Comments


Video of the Week:
Cuttings to Grow Inside for the Winter

Turfgrass:
Lawn Seeding Deadline Nears

Picture
September is the best month to reseed cool-season lawns such as tall fescue and Kentucky bluegrass. However, you can get by with an early to mid-October planting for tall fescue. October 15 is generally considered the last day for safely planting or overseeding a tall fescue lawn in the fall. If you do attempt a late seeding, take special care not to allow plants to dry out.  Anything that slows growth will make it less likely that plants will mature enough to survive the winter.

Seedings done after the cut-off date can be successful, but the success rate goes down the later the planting date. Late plantings that fail are usually not killed by cold temperatures but rather desiccation. The freezing and thawing of soils heave poorly rooted grass plants out of the ground, which then dry and die. Keeping plants watered will help maximize root growth before freezing weather arrives. (Ward Upham)

Ornamentals:
Planting Trees in the Fall

Picture
The fall season can be an excellent time to plant trees. During the spring, soils are cold and may be so wet that low oxygen levels inhibit root growth. The warm and moist soils associated with fall encourage root growth. Fall root growth means the tree becomes established well before a spring-planted tree and is better able to withstand summer stresses. However, certain trees do not produce significant root growth during the fall and are better planted in the spring. These include beech, birch, redbud, magnolia, tulip poplar, willow oak, scarlet oak, black oak, willows, and dogwood.

Fall-planted trees require some special care. Remember, that roots are actively growing even though the top is dormant. Make sure the soil stays moist but not soggy. This may require watering not only in the fall but also during the winter months if we experience warm spells that dry the soil. Mulch also is helpful because it minimizes moisture loss and slows the cooling of the soil so root growth continues as long as possible. Evergreens should be moved earlier in the fall than deciduous plants. They need at least six weeks before the ground freezes for the roots to become established. (Ward Upham)

Miscellaneous:
Adding Organic Materials Directly to the Garden

Picture
If the severe summer weather has brought an early end to your garden, consider adding organic materials directly to the soil rather than composting. Materials such as residue from lawn renovation, rotted hay, or rotted silage can be added and then tilled in. Coarser materials such as tree leaves or garden residue should be shredded. A lawn mower with a bagging attachment can be used to shred this material and collect it in one operation.

Organic materials can be spread to a depth of about 3 inches and tilled in. Be sure the soil is not too wet before tilling.  During warm weather, the material will decompose quickly and the process can be repeated every two weeks. Later in the fall, it may take longer. This process can be repeated from now until late November to early December.

Remember that organic matter helps almost any soil. It improves clay soil by improving tilth, aeration and how quickly the soil takes up water. In sandy soils, it acts as a sponge by holding water and nutrients. (Ward Upham)

Garlic Planting Time

Picture
October is a good time to plant garlic (Allium sativum) if you want large quality cloves next summer. Apply 3 pounds of 10-10-10 fertilizer per 100 square feet and mix into the soil before planting or fertilize according to soil test. Plant individual cloves point up and spaced 6 inches apart and 1 to 2 inches deep. The larger the clove planted, the larger the bulb at harvest. Water in well and mulch with straw to conserve soil warmth and encourage good establishment. Harvest will not occur until next summer.  Test dig when the lower 1/3 of the foliage is yellow.  If the cloves have segmented, it is time to harvest.  If they haven't segmented, wait another week or two.

Elephant garlic (Allium ampeloprasum) should also be planted now. It is a plant with a milder garlic flavor and is actually a closer relative to the leek than to true garlic. (Ward Upham)

Moving Houseplants Inside for the Winter

Picture
Many people with houseplants move some of them outside for the summer to give them better growing conditions and help them recover from the stress of an indoor environment. But as fall approaches and night temperatures approach 50 F, it is time to think about bringing plants inside for the winter.

Plants that have spent the summer outside should be inspected for insects and disease before bringing them inside. A sharp spray from a garden hose can remove insects or mites from houseplant foliage.

Insects in the potting soil can be forced out by soaking the pot in a tub of lukewarm water for about 15 minutes.

Houseplants that have been kept outdoors are accustomed to receiving much more sunlight than they do indoors. So how do we help houseplants acclimatize to the lower light levels inside? Houseplants brought in from outside should be started out in an area of the home that receives plenty of light, and then gradually moved to their permanent, darker location. This process should take four to eight weeks depending on the degree of difference in light levels between the initial and final location of the plant.

Understanding plant processes allows us to anticipate potential problems. Acclimatization gives houseplants a greater chance of retaining leaves and avoiding the stress of completely replacing them. (Ward Upham)

Pests:
Twig Girdlers

Picture
We are starting to see damage from twig girdlers as evidenced by fallen twigs up to 3 feet long. The beetle Oncideres cingulata is most likely the culprit. Host trees include elm, oak, linden, hackberry, apple, pecan, persimmon, poplar, sour gum, honey locust, dogwood, and some flowering fruit trees. This insect is distributed throughout the eastern United States from New England to Florida and as far west as Kansas and Arizona. Adults are long-horned beetles with a grayish-brown bodies that are stout and cylindrical. The larvae are also cylindrical with small heads and shiny exteriors. Larvae can be up to an inch long and are light brown to brownish-gray.

Girdled twigs often remain on the tree until a strong wind blows them down. Large infestations can result in a high percentage of girdled twigs. Though this may reduce the vigor and appearance of the tree, the overall effect on the tree's health is not severe. Twigs are unsightly and do not fall all at once, so clean up is a drawn out process.

This beetle has a one-year life cycle. Late in the growing season, the female deposits eggs in small scars chewed through the bark and then chews a continuous notch around the twig, girdling it. The notch is cut below the site of egg deposition apparently because the larva is unable to complete development in the presence of large amounts of sap. Girdled twigs die and fall to the ground where the eggs hatch.

Girdled twigs look like a beaver has chewed on them, only in miniature. The outside of the twig is smoothly cut, but the center of the twig appears broken. The larvae begin feeding on dead wood inside the twigs the following spring and continue through most of the summer. Pupation takes place inside the feeding cavity. Development is completed during August when the adult emerges to repeat the cycle.

Though adults feed on the bark of host twigs, damage is minimal until the female starts girdling.  Chemical control is impractical, so gather and dispose of fallen twigs in the fall or spring to destroy the larvae inside. Often, natural mortality is high because fallen twigs are excessively dry or carry too many larvae per twig. (Ward Upham)

Contributors: Ward Upham, Extension Associate

0 Comments

Horticulture Newsletter 2014, No. 36

9/9/2014

0 Comments


Video of the Week:
Tips for Using Drop or Broadcast Spreaders

Vegetables:
Harvesting Sweet Potatoes

Picture
Sweet potatoes should be harvested no later than the first fall freeze because cold temperatures can damage the sensitive roots. However, you may want to harvest earlier if you prefer a smaller sweet potato. Test dig a hill to see if they are the size you want.

Sweet potatoes should be cured after being dug. The digging process often damages the tender skin, and curing helps these small wounds heal. Place the roots in a warm, humid location for 5 to 10 days immediately after digging. A location with a temperature around 85 to 90 degrees is ideal. A space heater can be used to heat a small room or other area. Raise the humidity by placing moist towels in the room. The curing process not only heals wounds but also helps convert starches to sugars. This process improves the texture and flavor of the roots.

Sweet potatoes should be stored above 55 degrees. Storage at temperatures below that injures the roots, shortens storage life and gives them an off flavor. (Ward Upham)

Ornamentals:
Planning for Spring Color

Picture
I know what you are thinking…no way, wrong season. But you’d be mistaken. Now is the time to start thinking about your psychological need for color when winter seems like it will never end. You know the feeling, it’s dreary and cold outside and you just can’t wait for some green. As soon as you see those first little leaves poking out of the ground, you can’t help but get full of anticipation for the change of seasons. Every year you probably think, I wish I had thought ahead to plant some bulbs last fall so I’d have some of this color in my yard. Right?  Well, now is the time to do some thinking, planning, buying and planting. Not just for the best selection and healthiest bulbs, but for your mental and spiritual well being in six months! [This is a good selling point for your spouse…or just me enabling your plant habit.]

First of all, what can you plant now (September to November—before the ground freezes) that will emerge in the spring? From first appearance to last appearance we have crocus, grape hyacinth (Muscari), daffodil, hyacinth and tulip. Before we get carried away with the garden possibilities, it’s important to know a few things about choosing, planting and caring for bulbs. For the best show you’ll want to purchase the largest bulbs you can find that are appropriate for that variety. Healthy bulbs will be firm, have a thin, papery covering on the outside, be free of bruises, mechanical damage and/or signs of mold or mildew. Avoid bulbs with green tips peeking out since these plants are coming out of dormancy too early. Follow the directions on the bulb package for planting depth. They may benefit from some fertilizer and, like other plants, will need a little water in the winter.

Technically a “corm” rather than a “bulb,” crocus are the first to bloom in the spring and are sold alongside other spring-flowering bulbs in stores. They are short little plants that range in color from dark blue, purple, white, cream, yellow and orange. Grape hyacinths are hot on the tails of crocus and complement them nicely with their bottle-brush heads in blues and whites. Daffodils are next and come in many colors and petal types, most often yellow and single, but there are plenty of really neat cultivars. They are great for naturalizing (spread randomly around the garden and let them grow at their own pace) and deer avoid them.

Hyacinth and tulip are among the last to put on a big show of early spring color. As you know, the common oriental hyacinth is very fragrant. If you aren’t able to plant any in the fall, there are always some in full bloom available for impulse purchase near checkout lanes at the grocery store. Indulge yourself, my friend.

Tulips come in many, many sizes and colors. I freely admit to being overwhelmed by choice when it comes to tulips, but you can’t really go wrong with them in the landscape. Just remember that they look amazing when massed together for big swaths of color. Tulips require a long chilling period so get them in the ground as soon as possible. They may also require more frequent dividing in order to maintain large blooms in subsequent years. Or, you can always replant with fun, new selections.

If you just don’t get around to planting any bulbs this year, never fear. You can always purchase some in the spring for container gardens or forcing indoors (hello January project). With a little planning ahead and working in your yard (or containers) while it’s beautiful out this coming season, you can enjoy a great show next spring. You’ll be so grateful that you got some bulbs planted this fall—get to it!  (Cheryl Boyer)

Pests:
Budworm on Garden Plants

Picture
If you have noticed a small hole in the buds of some of your flowers, you may have tobacco (geranium) budworm (Helicoverpa virescens).  Though a number of flowers can serve as hosts, geraniums and petunias are most commonly attacked. The larva of this insect damages the buds by boring into them before they open. The caterpillars feed on the flowers for about a month and then drop to the soil to pupate. There are normally two generations per year, with the second causing the most harm. The striped caterpillars vary widely in color with green, red, light brown and dark forms possible. The color of the larva is related to the color of the flowers on which they feed. The adult of this insect is a moth.

Damaged buds often fail to open. Those that do will show evidence of feeding on the petals. Damage normally peaks in late summer because of increased numbers from the second generation.

Control of the budworm is difficult. Handpicking at dusk can be effective on small plantings. For larger plantings, chemical control may be the only practical option. Look for products with synthetic pyrethroid active ingredients such as permethrin, esfenvalerate, cyfluthrin, bifenthrin, lambda-cyhalothrin or related compounds. Spinosad (Borer, Bagworm, Leafminer and Tent Caterpillar Spray; Captain Jack's Dead Bug Brew) is also recommended.

Severe winters can be a natural form of control from one year to the next. Temperatures below 20 degrees F are hard enough to kill overwintering pupa. Because pupal cases are usually 2 to 6 inches deep, most exposed areas in Kansas will provide good control during a cold winter. Microclimates next to heated buildings may allow survival. (Ward Upham)


Miscellaneous:
Ornamental Sweet Potatoes

Picture
We often receive the question as to whether ornamental sweet potatoes are safe to eat. The answer is yes. Note that they are chosen for ornamental qualities rather than flavor and so may not have the quality of our traditional types. (Ward Upham)

Harvesting and Roasting Sunflower Seeds

Picture
Sunflowers are usually ready to be harvested beginning in mid-September and into October. Seed heads can ripen on the plant, but they will need protection from birds. Try covering the heads with a paper sack or cheesecloth once the petals start turning brown. Use a twist tie or rubber band to secure the covering. This will not only help keep birds out but will prevent ripened seeds from dropping out of the head.

Check for maturity by looking for the following signs:
        – Florets in the brown center of the flower disk should be shriveled.
        – Heads should have turned down.
        – The backside of the head should be lemon yellow.

The ultimate check, of course, is to pull a few seeds to see if they have turned black with white stripes, the typical color. Empty shells usually indicate a lack of pollination earlier in the year. If heads are to remain uncovered, harvest when a few seeds start turning black and white. The flavor will not be good as when seeds are allowed to ripen on the plants, but fewer seeds will be lost.

Cut the heads and place in a paper sack. Some people prefer to cut the heads with about a foot of stem attached and hang them upside down in a dry, well-ventilated area. A paper bag or cheesecloth can be placed over the heads to prevent seeds from dropping as they dry. Seeds can be easily removed from dry heads by rubbing gently.

Roasting Seeds:
Raw, mature seeds may be prepared at home by covering unshelled seeds with salted water (2quarts of water to 1/4 to 2 cup salt). Bring to a boil and simmer 2 hours, or soak in the salt solution overnight. Drain and dry on absorbent paper.

Put sunflower seeds in a shallow pan in a 300-degree F oven for 30 to 40 minutes or until golden brown, stirring occasionally. Take seeds out of the oven and add 1 teaspoon of melted butter or margarine, or cooking oil per 1 cup of seeds if they are to be eaten immediately. Stir to coat. Put on an absorbent towel. Salt to taste. (Ward Upham)

Reblooming Thanksgiving and Christmas Cacti

Picture
Christmas Cactus (Schlumbergera bridgesii) and Thanksgiving Cactus (Schlumbergera truncate) are popular flowering holiday plants. Both are epiphytes native to the jungles of South America. Epiphytic plants grow on other plants and use them for support but not for nutrients. Though these cacti are different species, they will hybridize and produce varying stem shapes. Christmas cactus normally has smooth stem segments. Thanksgiving Cactus has hook-like appendages on each segment.

Flowering will not occur unless induced by temperature and light treatment. If the temperature is held at 50 to 55 degrees F, flowering will occur regardless of day length. But flowering usually is not uniform. Temperatures below 50 degrees F prevent flowering. Nights greater than 12 hours long and temperatures between 59 and 69 degrees also can generate flowers. Twenty-five consecutive long nights is enough for flower initiation. Nights will naturally become greater than 12 hours close to the fall equinox, which is on September 23 this year. A plant receiving natural sunlight but no artificial light during night hours, will have this 25-day requirement met about October 20. It takes an additional nine to 10 weeks for flowers to complete development and bloom.

Both of these cacti like bright indirect light. Too much sun may cause leaves to turn yellow. Common household temperatures are fine. Keep soil constantly moist but not waterlogged. These plants seem to flower best if kept a little pot bound. If you need to repot, try waiting until spring. (Ward Upham)

Contributors: Cheryl Boyer, Nursery Crops Specialist; Ward Upham, Extension Associate

0 Comments

2014 Horticulture Newsletter, No. 35

9/2/2014

0 Comments


Video of the Week:
Tips on Harvesting Pears

Turfgrass:
Little Barley in Lawns

Little Barley
Many people mistake little barley (Hordeum pusillum) for a little foxtail because the foxtail and little barley seedheads are similar. However, little barley is a winter annual that comes up in late September - October and spends the winter as a small plant. It thrives in the cooler spring temperatures, forms seed heads and dies out usually by July. Foxtail, on the other hand, is a summer annual that does well in hot weather. Also, foxtail will not produce seedheads until mid- to late-summer.

So, why are we talking about little barley now? Because now is the time to control it for next year.  The best control for little barley is a thick lawn that is mowed high enough that sunlight does not hit the soil. Little barley seed will not germinate in such conditions. Overseeding now can thicken up a tall fescue lawn and prevent a little barley infestation. However, if you do not plan to overseed, preemergence herbicides can be used to provide at least partial control of this weed.

The only preemergence herbicide that I know is labeled specifically for little barley is Surflan. It is also sold under the name of Weed Impede by Monterey Lawn and Garden. Surflan can only be used on warm-season grasses (bermudagrass, buffalograss, zoysiagrass) and tall fescue grown in warm-season areas such as Kansas. However, Dimension (dithiopyr), is labeled for barley (Herodium spp.) which would include little barley and therefore can be used to keep this weed under control. Because little barley is a winter annual, apply the preemergence herbicide now and water in to activate. If overseeding, do not apply any preemergence herbicide as it will interfere with the germination of tall fescue. (Ward Upham)

Vegetables:
Asparagus and Rhubarb in the Autumn Season

Asparagus in late summer
Harvest is long past but now is the time asparagus and rhubarb plants build up needed reserves for the next year. Be sure to water during dry weather and keep plants weed free. Foliage should be left until all green is gone. It can then be removed or left for the winter to help collect snow. (Ward Upham)

Weird Squash

weird squash
Occasionally we receive a call from someone who has a squash (or cucumber or melon) that just doesn’t look like what was supposedly planted.   They often wish to know if that fruit had cross-pollinated with another vegetable close by.          

In such cases, the gardener is assuming that cross-pollination will affect the fruit.  Such is not the case.  The characteristics of the fruit is determined by the mother plant and is not affected by cross-pollination.  However, there will be a problem if seed is saved for the next year from a flower that was cross-pollinated.  All bets are off on what you will get if that happens.

So, how do we end up with this weird vegetable?  Though it could be that the gardener had forgotten exactly what he planted, more likely is that the seed he bought had been accidentally cross-pollinated before packaging.  Another possibility is that it came from seed that came from fruit that had rotted in the garden the previous year.  Regardless, don’t worry about planting different cultivars of squash or cucumbers or melons close to one another.  Though cross-pollination sometimes occurs, the fruit will not be affected.  (Ward Upham)

Fruit:
Storing Apples

Apples
You can enjoy apples from January to June – with the right conditions. Some apple cultivars can be stored for longer periods than others. Some cultivars will stay in firm, crisp condition for about 6 to 8 months with good storage conditions. The approximate length of time cultivars will keep well under refrigerated conditions are as follows:

        Wealthy: 60 days
        Paulared: 90 days
        Gala: 120 days
        Jonathan: 120 days
        Grimes Golden: 120 days
        Golden Delicious: 150 days
        Empire:150 days
        Delicious: 160 days
        Braeburn: 180 days
        Idared: 200 days
        Rome Beauty: 220 days
        Winesap: 220 days
        Fuji: 240 days
        Granny Smith: 240 days
        Arkansas Black: 240 days

The condition of the apples and how they are stored will strongly influence the storage period.  Some guidelines to help assure good quality and maximum storage life of apples include:

        * Store only the best quality.
        * Pick as they are first maturing.
        * Avoid skin breaks, disease or insect damage, and bruises on individual fruit.
        * Store in a plastic bag to help retain moisture in the apples. The bag should have a few small holes for air exchange. The bags of apples may be stored in boxes to prevent bruising if they must be stacked or moved from time to time.
        * Refrigerate at about 35 degrees F. An extra refrigerator works well.
        * Sort about every 30 to 40 days to remove fruit that may be beginning to rot. (Ward Upham(-

Ornamentals:
Trees Coloring Early

tree showing fall colors
We are seeing a number of trees, especially maples, that are showing fall colors early. Often it is not the whole tree but sections. As a rule, we consider early coloration as bad news as it often means the tree is under a great deal of stress. However, this year, many of the trees showing coloration look perfectly healthy. We think what has happened is the trees have come through a cooler than normal early summer and never hardened off to hot temperatures. Also, many areas are very dry including some that had heavy rains in June. Now that the weather has changed, the tree is simply entering dormancy early.

The tree has had plenty of time to store the energy reserves it needs to survive the winter. So, do we need to do anything? Yes, we do. Keep the soil moist as many trees have had root systems damaged from the last couple of years. We need to give that root system time to recover. This is especially important for areas that are still experiencing drought or have had so much rain earlier in the summer that soils were saturated for a period of time. Lack of oxygen from saturated soils is just as damaging to a root system as lack of water. (Ward Upham)

Mycosphaerella Leaf Spot on Ash

Mycosphaerella leaf spot
We are now seeing this disease in the Emporia and Manhattan areas.  With all the concern about Emerald Ash Borer (EAB), many people may assume the trees are being attacked by EAB.  However, EAB has only been confirmed in Johnson, Leavenworth and Wyandotte counties.

Mycosphaerella leaf spot causes small, brown spots that enlarge to become blotches and may result in early leaf drop. Though this disease looks serious, it is not. Defoliation this late in the growing season will not hurt the health of the tree. Therefore, because this disease appears sporadically and tree health is not harmed, we do not recommend treatment. Furthermore, treatment would have to be preventative and applied before the disease had infected the leaves. Applying a fungicide now would have no effect. (Ward Upham)

Pests:
Emerald Ash Borer Found in Leavenworth County

Emerald Ash Borer
Leavenworth County has been added to the Emerald Ash Borer quarantine already in place in Johnson and Wyandotte counties in Kansas.  The following information is taken directly from the Kansas Department of Agriculture website at http://agriculture.ks.gov/divisions-programs/plant-protect-weed-control/emerald-ash-borer .

Leavenworth County EAB Find Background - On July 16, 2014, an adult EAB was caught on a girdled tree trap placed on K-5 southeast of Lansing by the Kansas Department of Agriculture (KDA) in cooperation with the Kansas Department of Transportation (KDOT) and the Kansas Forest Service (KFS).  A second EAB was also caught on a second girdled trap tree at Kenneth W. Bernard Community Park by KDA in cooperation with the City of Lansing and the KFS. Regulatory officials with the USDA’s Animal and Plant Health Inspection Service’s Plant Protection and Quarantine (USDA-APHIS-PPQ) confirmed the presence of EAB on July 17, 2014.

Immediately after confirmation by USDA, Kansas expanded an emergency intrastate quarantine, currently in place in Wyandotte and Johnson counties, to include Leavenworth County to prevent further spread of EAB in Kansas.

The quarantine applies to any corporation, company, society, association, partnership, governmental agency, and any individual or combination of individuals. It prohibits movement of regulated items from the quarantined area, except under specific conditions established in the

        Permanent EAB Quarantine for Wyandotte and Johnson County
        Temporary EAB Quarantine for Leavenworth County

Regulated items under quarantine include the following:
* The emerald ash borer, (Agrilus planipennis [Coleoptera: Buprestidae]), in any living stage of development;
* Firewood of all hardwood (non-coniferous) species;
* Nursery stock of the genus Fraxinus (Ash);
* Green lumber of the genus Fraxinus (Ash);
* Other material living, dead, cut, or fallen, including logs, stumps, roots, branches, and composted and uncomposted chips of the genus Fraxinus (Ash);

Any other article, product, or means of conveyance that an inspector determines presents a risk of spreading emerald ash borer and notifies the person in possession of the article, product, or means of conveyance that it is subject to the restrictions of the regulations.

If you suspect emerald ash borer on your property please call 785-862-2180 or e-mail your name, address, phone number and pictures of the suspect tree to ppwc@kda.ks.gov.  For answers to common questions, check out our Kansas Emerald Ash Borer Frequently Asked Questions and Do I Have Emerald Ash Borer?  (Ward Upham)

Fall Armyworms on Turf

Fall armyworm
The last time we had a significant outbreak of fall armyworm on turf was August, 2000. Armyworms are so-called because they invade fields or landscapes as large groups and can cause a lawn to turn brown seemingly overnight.

Young worms are ½ to 3/4 inch long. Mature ones are 1 ½ inches long. Body color may vary from green to almost black but light stripes will be visible along the length of the body. Look for a whitish inverted "Y" on the top of the black head. It normally takes 2 to 3 weeks to progress from egg to pupa. The adult is a moth.

Armyworm damage can resemble drought damage but close inspection of the turf will reveal the larvae. Look for active feeding during early morning or evening hours or on cloudy days. Larvae feed on foliage and the resulting dehydration causes to turf to quickly brown. Normally, armyworm damage does not kill established turf.

Carbaryl (Sevin), acephate (Orthene, Acephate), spinosad (Conserve; Captain Jack’s Dead Bug Brew; Borer, Bagworm, Leafminer and Tent Caterpillar Spray) and other insecticides are effective caterpillar killers. Treat in late afternoon, when the caterpillars are likely to begin feeding. Do not mow for 3 days after treatment. (Ward Upham)

Contributors:  Ward Upham, Extension Associate


0 Comments

    Authors

    Ward Upham runs the Horticulture Response Center in the Department of Horticulture and Natural Resources at Kansas State University. Other contributors include K-State Extension Specialists.

    RSS Feed

      Subscribe to the newsletter by entering your e-mail and clicking the link below

    Subscribe

    Archives

    March 2023
    February 2023
    January 2023
    December 2022
    November 2022
    October 2022
    September 2022
    August 2022
    July 2022
    June 2022
    May 2022
    April 2022
    March 2022
    February 2022
    January 2022
    December 2021
    November 2021
    October 2021
    September 2021
    August 2021
    July 2021
    June 2021
    May 2021
    April 2021
    March 2021
    February 2021
    January 2021
    December 2020
    November 2020
    October 2020
    September 2020
    August 2020
    July 2020
    June 2020
    May 2020
    April 2020
    March 2020
    February 2020
    January 2020
    December 2019
    November 2019
    October 2019
    September 2019
    August 2019
    July 2019
    June 2019
    May 2019
    April 2019
    March 2019
    February 2019
    January 2019
    December 2018
    November 2018
    October 2018
    September 2018
    August 2018
    July 2018
    June 2018
    May 2018
    April 2018
    March 2018
    February 2018
    January 2018
    December 2017
    November 2017
    October 2017
    September 2017
    August 2017
    July 2017
    June 2017
    May 2017
    April 2017
    March 2017
    February 2017
    January 2017
    December 2016
    November 2016
    October 2016
    September 2016
    August 2016
    July 2016
    June 2016
    May 2016
    April 2016
    March 2016
    February 2016
    January 2016
    December 2015
    November 2015
    October 2015
    September 2015
    August 2015
    July 2015
    June 2015
    May 2015
    April 2015
    March 2015
    February 2015
    January 2015
    December 2014
    November 2014
    October 2014
    September 2014
    August 2014
    July 2014
    June 2014

    Categories

    All
    All America Selections
    All-America Selections
    Amaryllis
    Anthracnose
    Ants
    Aphids
    Apples
    Apricots
    Army-cutworm-moths
    Ash-borer
    Ashes-in-the-garden
    Asparagus
    Bacterial-wilt
    Bagworms
    Bark-shedding
    Beans
    Bermudagrass
    Bird-feeding
    Bitter-cucumber
    Blackberries
    Blackspot
    Black-walnuts
    Blister Beetles
    Blossom End Rot
    Blossom-End Rot
    Blueberries
    Botryosphaeria
    Breaking-dormancy-early
    Breaking-dormancy-early
    Bristly Rose Slug
    Broccoli
    Brownheaded-ash-sawfly
    Brown-patch-on-fescue
    Brown-rot-of-fruit
    Budworms
    Buffalograss
    Bulbs
    Bulb Storage
    Butterflies
    Butterfly Gardening
    Cabbage
    Cabbage Worms
    Caddo Sugar Maples
    Calcareous
    Cantaloupe
    Carpenter Bees
    Cauliflower
    Cedar Apple Rust
    Cherry Leaf Spot
    Chickweed
    Chiggers
    Christmas Cacti
    Christmas Trees
    Cicada
    Cicada Killer Wasps
    Codling Moth Control
    Cold Frames
    Cole Crops
    Colorado Potato Beetle
    Columnar Trees
    Compost
    Conservation Trees
    Container Gardening
    Controlling Volunteer Trees
    Cool Season Vegetables
    Cool-Season Vegetables
    Core Aeration
    Corn Earworm
    Corn Gluten Meal
    Crabapples
    Crabgrass Control
    Crickets
    Crop Rotation
    Cucumber
    Cucumber Beetles
    Daylilies
    Deadheading Flowers
    Dormant-seeding-turfgrass
    Dothistroma Needle Blight
    Drip-irrigation
    Dr-seuss-gardening
    Dutch-elm-disease
    Early Blight
    Eggplant
    Elm Flea Weevil
    Elm Leaf Beetle
    Elm Pocket Gall
    Emerald Ash Borer
    Euonymus Scale
    European Pine Sawfly
    Excessive Rain
    Fall Armyworms
    Fall Colors
    Fall Gardening
    Fall Lawn Seeding
    Fall-webworm
    Family-heritage-gardening
    Fertilizing-cole-crops
    Fertilizing-flowers
    Fertilizing Lawns
    Field-bindweed
    Field Dodder
    Firewood
    Flatid Planthoppers
    Flooding
    Floral Arrangement Care
    Flourescent Lights
    Flowerbed Design
    Flowering
    Frost On Lawns
    Fruit
    Fruit Baskets
    Fruit Damage From Cold
    Fruit Trees
    Fungus Gnats
    Galls
    Garden Hoses
    Gardening Calendar
    Garden Seed
    Garden Spiders
    Garden Tool Care
    Garlic
    Goldenrod Soldier Beetle
    Grapes
    Grasshoppers
    Grass Seed
    Green June Beetles
    Growing Cuttings Inside
    Grubs
    Hackberry Caterpillar Butterflies
    Hackberry Psyllids
    Hardiness
    Harlequin Bug
    Harvesting
    Help For New Gardeners
    Henbit
    Herbicide Damage
    High PH Soils
    Holly
    Hollyhock
    Honeysuckle
    Hornworms
    Horseradish
    Houseplants
    Hydrangea
    Ice Melters
    Invasive Plants
    Iris
    Iron Chlorosis
    Irrigation
    Itch Mites
    Japanese Beetles
    Junipers
    Kansas Garden Guide
    Kentucky Bluegrass
    Knotweed
    Lacebugs
    Ladybird Beetles
    Landscape Design
    Lawn
    Lawn Calendar For Cool Season Grass
    Lawn Calendar For Cool-Season Grass
    Lawn Calendar For Warm Season Grass
    Lawnmower Care
    Lawn Seeding
    Leaf Scorch
    Leaves
    Lettuce
    Lilac
    Lilac Borers
    Little Barley
    Marcescence
    Maximizing Garden Space
    Melons
    Millipedes
    Mimosa Webworm
    Mole Control
    Mouse Damage
    Mowing
    Mulch
    Mums
    Mushrooms
    Mycosphaerella Leaf Spot
    Nantucket Pine Tip Moth
    Native Prairie Flowers
    Needle Drop On Conifers
    New Gardener Resources
    Nightcrawlers
    Nuts
    Oak
    Oak Leaf Itch Mite
    Onions
    Orchids
    Organic Matter
    Organic Sources Of Nitrogen
    Ornamental Grass
    Overseeding Lawns
    Overwintering Geraniums
    Paperwhite Bulbs
    Pawpaw Trees
    Peaches
    Pears
    Peas
    Peonies
    Peony
    Peppers
    Perennial Garden Clean Up
    Perennial Garden Clean-up
    Pesticide Effectiveness
    Pine Wilt
    Planting Calendar
    Plastic Mulch
    Plum
    Poinsettia
    Poison Ivy
    Poisonous Plants
    Pokeweed
    Poor Drainage
    Potatoes
    Powdery Mildew
    Powdery Mildew On Lawn
    Power Raking
    Propagating-woody-plants
    Prop Up Fruit Limbs
    Pruning
    Publications
    Quince
    Rabbits
    Raccoons
    Rain-barrels
    Raspberries
    Recommended-plants-for-ks
    Rhubarb
    Roasting Pumpkin Seeds
    Roots
    Rose
    Rose Rosette
    Roundup For Lawns
    Salad Garden
    Sawfly Larvae
    Scale
    Scale Insects
    Screen Trees
    Sedum
    Seed Germination
    Seed Germination
    Seed Tape
    Septoria Leaf Spot
    Shrub Pruning
    Shrubs
    Sidedressing
    Slime Molds
    Slugs
    Smut
    Soil
    Soil Preparation
    Soil Temperature
    Spider Mites
    Spiders
    Spirea Aphid
    Spittlebugs
    Spray Water PH
    Spreaders
    Spring Bulbs
    Spring Flowering Shrubs
    Squash
    Squash Bugs
    Squash Vine Borer
    Squirrel Damage
    Starting Seed
    Stink Bugs
    Storing Power Equipment
    Storm Damage
    Stratification
    Straw-bale-gardening
    Strawberries
    Succession Planting Of Vegetables
    Sunflowers
    Sunscald
    Survey
    Sweet Corn
    Sweet Potatoes
    Tall Fescue
    Tan/White Drupelets
    Termites
    Thatch Control
    Ticks
    Tomatoes
    Transplant Fertilization
    Tree Health
    Tree Leaves And Turf
    Tree Planting
    Trees
    Tubakia
    Tubakia-leaf-spot
    Turf-in-shade
    Twig-girdlers
    Vegetable-flowersfruit
    Vegetables
    Vegetable Seed
    Vegetable Transplants
    Velvet Ants
    Vinegar As Herbicide
    Walnut Caterpillars
    Warm Fall
    Water Damage
    Watering
    Watermelon
    Water Teepees
    Weeds In Flower Beds
    Weeds In Turf
    Weird Squash
    White Grubs
    Whitelined-sphinx-caterpillar
    Wildflower Establishment
    Wildflower-establishment
    Wildlife
    Wild Violet Control
    Wind Chill
    Winter Damage
    Winterizing Water Lines
    Winter Mulching Vegetables
    Winter Squash
    Wood Chips
    Worms From Oaks
    Yellowjackets
    Yellow Nutsedge

Powered by Create your own unique website with customizable templates.