Video of the Week:
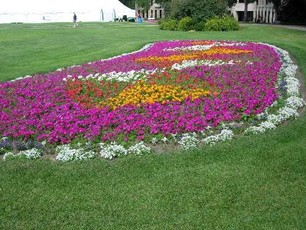
Prairie Flowers: Hardy for Kansas
Fruit:
Approaching Time for Peach Leaf Curl Control
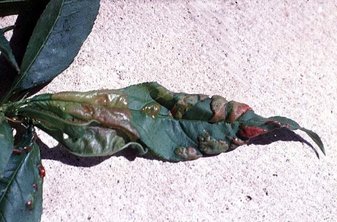
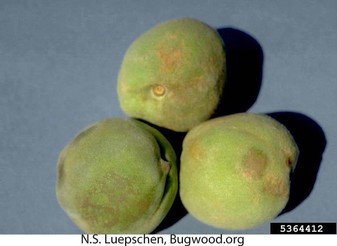
If you have ever seen emerging peach leaves that are puckered, swollen, distorted and reddish-green color, you have seen peach leaf curl. Uncontrolled, this disease can severely weaken trees due to untimely leaf drop when leaves unfurl in the spring. Fortunately, peach leaf curl is not that difficult to control if the spray is applied early enough. However, by the time you see symptoms, it is much too late. As a matter of fact, fungicides are ineffective if applied after buds begin to swell.
Don't spray when temperatures are below 40 degrees or will fall below freezing before the spray dries. Usually we can wait until March to spray but an extended warm period in February that encourages early bud swell may require spraying in late February. Though peach leaf curl can be controlled by a single fungicide application either in the fall after leaf drop, it is more commonly controlled in the spring.
There are several fungicides labeled for this disease including chlorothalonil (Ortho Garden Disease Control, Fertilome Broad Spectrum Fungicide, GardenTech Fungicide Disease Control and Daconil). Thoroughly cover the entire tree during application. Note that it is much easier to achieve good spray coverage if the tree is pruned before spraying. (Ward Upham)
Pruning Overgrown Apple Trees
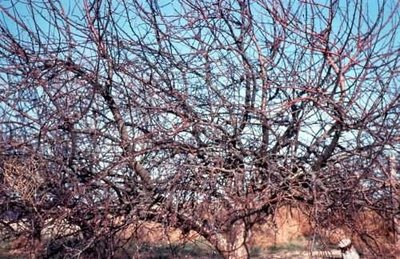
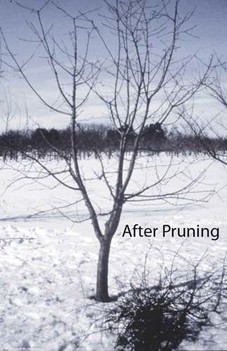
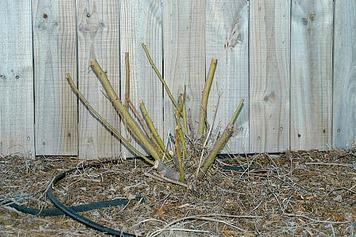
Apple trees that are not pruned for several years will often produce so many branches that little energy is left for fruit production. Overgrown apple trees are also difficult to harvest and spray. Gardeners who have such a tree are often at a loss as to how to get it back in shape.
Often the best recommendation for such a tree is to make one pruning cut at ground level and start over with a new tree. However, trees may have sentimental value that will make revitalization worth the time and effort. Realize that this will be a multi-year process because no more than 30 percent of the tree should be removed in one year. Here are some steps to follow:
1. Remove all dead wood. This does not count toward the 30 percent.
2. Remove suckers from the base of the tree.
3. Choose approximately six of the best branches to keep as scaffold branches. Remove all others.
Branches should be cut flush to the branch collar. The collar is the natural swelling that occurs where a branch connects to the trunk or to a larger branch. Removing the collar would leave a larger wound that would take additional time to heal. Do not paint wounds. Wounds heal more quickly if left open. Candidates for removal include branches with narrow crotch angles, which are more likely to break in wind and ice storms, and those that cross branches you will save. This may be all that is possible the first year if the 30 percent threshold has been reached.
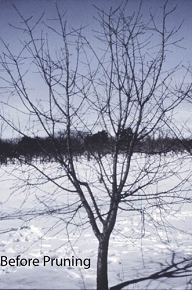
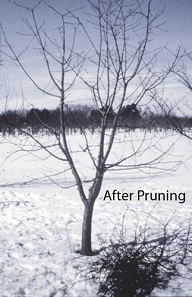
4. Thin the branches on each scaffold branch. Remove crowded branches to open up the tree to light and allow humidity to escape. Shorten each scaffold branch by cutting back to a side branch. When you are through, the tree should have enough wood removed so that a softball can be thrown through the tree.
Severe pruning often will cause an apple tree to produce vigorous side shoots from the trunk called water sprouts. Main branches will also produce suckers that grow straight up. The suckers and water sprouts should be removed throughout the growing season so the center of the tree stays open. Removing water sprouts and suckers is the most time consuming and difficult practice necessary to bring an overgrown apple back into shape. (Ward Upham)
Often the best recommendation for such a tree is to make one pruning cut at ground level and start over with a new tree. However, trees may have sentimental value that will make revitalization worth the time and effort. Realize that this will be a multi-year process because no more than 30 percent of the tree should be removed in one year. Here are some steps to follow:
1. Remove all dead wood. This does not count toward the 30 percent.
2. Remove suckers from the base of the tree.
3. Choose approximately six of the best branches to keep as scaffold branches. Remove all others.
Branches should be cut flush to the branch collar. The collar is the natural swelling that occurs where a branch connects to the trunk or to a larger branch. Removing the collar would leave a larger wound that would take additional time to heal. Do not paint wounds. Wounds heal more quickly if left open. Candidates for removal include branches with narrow crotch angles, which are more likely to break in wind and ice storms, and those that cross branches you will save. This may be all that is possible the first year if the 30 percent threshold has been reached.
4. Thin the branches on each scaffold branch. Remove crowded branches to open up the tree to light and allow humidity to escape. Shorten each scaffold branch by cutting back to a side branch. When you are through, the tree should have enough wood removed so that a softball can be thrown through the tree.
Severe pruning often will cause an apple tree to produce vigorous side shoots from the trunk called water sprouts. Main branches will also produce suckers that grow straight up. The suckers and water sprouts should be removed throughout the growing season so the center of the tree stays open. Removing water sprouts and suckers is the most time consuming and difficult practice necessary to bring an overgrown apple back into shape. (Ward Upham)
Pruning Fruit Trees
 |  |
Fruit trees can be pruned from now through March as long as the wood isn’t frozen. Following are some general recommendations on pruning mature fruit trees followed by more specific instructions on each species. If you have young fruit trees, see the accompanying article in this newsletter.
General Recommendations
- Take out broken, damaged or diseased branches
- If two branches form a narrow angle, prune one out. Narrow angles are weak angles and tend to break during wind or ice storms.
- Take out all suckers. Suckers are branches that grow straight up. They may originate from the trunk or from major branches
- If two branches cross and rub against one another, one should be taken out.
- Cut back or remove branches that are so low they interfere with harvest or pruning. If cutting back a branch, always cut back to another branch or a bud. Do not leave a stub.
- Cut back branches to reduce the total size of the tree, if necessary.
- Thin branches on the interior of the tree.
Follow the steps above in order but stop if you reach 30% of the tree. For a short video on pruning, click here.
Specific Instructions
Peach and Nectarine: Peach and nectarine require more pruning than any other fruit trees because they bear fruit on growth from the previous year. Not pruning results in fruit being borne further and further from the center of the tree allowing a heavy fruit crop to break major branches due to the weight of the fruit. Prune long branches back to a shorter side branch
Apple: Apples tend to become overgrown if not pruned regularly. Wind storms and ice storms are then more likely to cause damage. Also, trees that are not pruned often become biennial bearers. In other words, they bear a huge crop one year and none the next. Biennial bearing is caused by too many fruit on the tree. Though pruning helps, fruit often needs to be thinned as well. The goal is an apple about every 4 inches. Spacing can vary as long as the average is about every 4 inches.
Cherry, Pear, Plum: Light pruning is usually all that is needed. Simply remove branches that are causing or will cause a problem according to the general recommendations above. (Ward Upham)
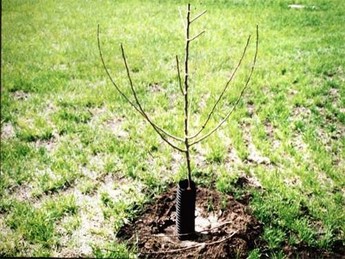
Pruning Young Fruit Trees

Young fruit trees should be pruned to begin developing a strong structure of the main or scaffold limbs. This will help prevent limb breakage over the years when the scaffolds carry a heavy fruit load. Apple, apricot, cherry, plum and pear trees generally are trained using the central leader system. The growth pattern for these trees is for a center branch to be dominant and to grow straight up. Peach and nectarine trees are normally pruned using the open center method because they do not have a strong tendency for one shoot or branch to dominate the growth of other shoots or branches. In this system, the tree is pruned to a vase-like pattern with no central leader.
Regardless of the system used, the three to four scaffold branches should:
• Be no lower than 18 inches from the ground. This makes it easier to prune and harvest the tree once it matures.
• Form wide angles (about 60 to 80 degrees) with the trunk. Wide angles are much stronger than narrow angles and are less likely to break under wind or ice loads.
• Be distributed on different sides of the tree for good balance.
• Be spaced about 6 to 10 inches apart on the trunk with no branch directly opposite or
below another. (Ward Upham)
Flowers:
Handling Tips for Valentine's Day Roses
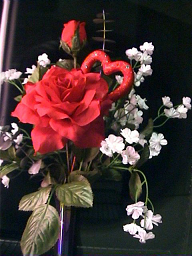
If you are fortunate enough to receive roses from a loved one this Valentine's Day, follow these guidelines to help extend the life of your flowers.
For floral arrangements:
1) Keep the vase filled or floral foam soaked with warm water. Add fresh, warm water daily. If the water turns cloudy, replace it immediately. If possible, recut stems by removing one to two inches with a sharp knife. Do this under water. This allows the stems to draw in water instead of air.
2) Keep flowers in a cool spot (65 to 72 degrees Fahrenheit), away from direct sunlight, heating or cooling vents, directly under ceiling fans, or near radiators.
3) If a rose starts to wilt, remove it from the arrangement, and recut the stem under water. Submerge the entire rose in warm water. The rose should revive in one to two hours.
For loose stems:
1) If you can't get your flowers in a flower food solution right away, keep them in a cool place.
2) Fill a clean, deep vase with water and add the flower food obtained from your florist. Be sure to follow the directions on the package.
3) Remove leaves that will be below the waterline. Leaves in water will promote bacterial growth.
4) Recut stems under water with a sharp knife and place the flowers in the vase solution you've prepared. (Ward Upham)
Pests:
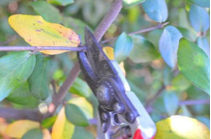
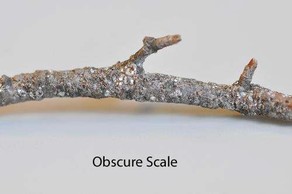
Check Plants for Scale Insects
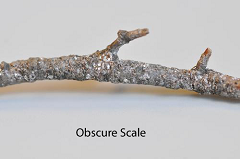
The dormant season is a good time to check woody plants for scale insect infestations. This time of year, deciduous plants do not have leaves, so scale is more easily seen.
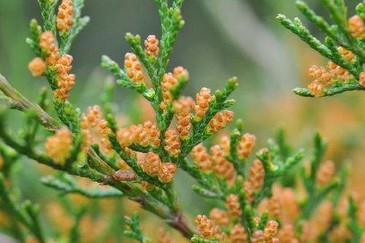
If an infestation is detected, make plans to apply a dormant oil for control by March 1. Be sure the temperature is 40 degrees or above before spraying. Scale insects are easily overlooked because they are small and immobile most of their lives and they do not resemble most other insects. Many of them resemble small shells that are oval or circular, but some have more unusual shapes like oyster shells. Coloring varies, but can include white, tan, and brown.
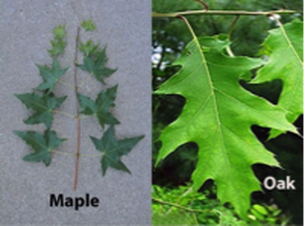
Plants that should be inspected for scales include apples, pears, other fruit trees, bush fruits, lilac, crabapple, oak, ash, elm, lilac, maple, linden, arborvitae, juniper, pine, spruce and yew. Manhattan euonymus, a broadleaf evergreen, is especially noted for having scale problems.
Plants are not harmed if only a few scales are present. But scale population can increase dramatically during the growing season. Heavy scale infestations can damage fruit crops, destroy branches and kill entire plants. (Ward Upham)
If an infestation is detected, make plans to apply a dormant oil for control by March 1. Be sure the temperature is 40 degrees or above before spraying. Scale insects are easily overlooked because they are small and immobile most of their lives and they do not resemble most other insects. Many of them resemble small shells that are oval or circular, but some have more unusual shapes like oyster shells. Coloring varies, but can include white, tan, and brown.
Plants that should be inspected for scales include apples, pears, other fruit trees, bush fruits, lilac, crabapple, oak, ash, elm, lilac, maple, linden, arborvitae, juniper, pine, spruce and yew. Manhattan euonymus, a broadleaf evergreen, is especially noted for having scale problems.
Plants are not harmed if only a few scales are present. But scale population can increase dramatically during the growing season. Heavy scale infestations can damage fruit crops, destroy branches and kill entire plants. (Ward Upham)


 RSS Feed
