Video of the Week:
Harvesting Lettuce
Turfgrass:
Controlling Yellow Nutsedge in Lawns
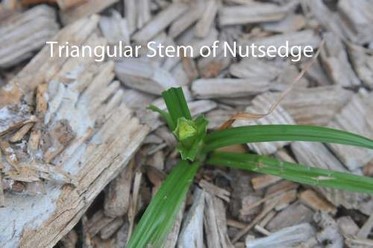
Yellow nutsedge is a relatively common problem in lawns, especially in wet years or in lawns with irrigation. Although it looks much like a grass, it is a sedge. Unlike grasses, sedges have triangular stems, and the leaves are three-ranked instead of two-ranked, which means the leaves come off the stems in three different directions. Yellow nutsedge is pale green to yellow and grows rapidly in the spring and early summer. Because of this rapid shoot growth, it sticks up above the rest of the lawn only a few days after mowing. This weed is a good indicator of poor drainage, but it can be introduced into well-drained sites through contaminated topsoil or nursery stock. As with many weeds, nutsedge is less competitive in a dense, healthy lawn than in an open, poor lawn.
Nutsedge is difficult to control culturally because it produces numerous tubers that give rise to new plants. Pulling nutsedge will increase the number of plants because dormant tubers are activated. However, it is possible to control nutsedge by pulling, but you must be persistent. If you are, eventually the nutsedge will die out.
If you were going to treat with an herbicide, it would be better to leave the nutsedge plants undisturbed so the herbicide can be maximally translocated to the roots, rhizomes, and tubers. Several herbicides are available for nutsedge control. SedgeHammer, which used to be called Manage, is the most effective and safe for most turfgrasses. It is also the most expensive, but if an infestation is not too severe, one application should take care of the problem. The SedgeHammer label says to apply it after nutsedge has reached the three- to eight-leaf stage. Waiting until this growth stage apparently results in improved translocation of the active ingredient to the underground tubers and rhizomes. However, research has shown that the application should go down by June 21. If the initial spray is after June 21, mature daughter tubers may be stimulated to grow.
Small packages of SedgeHammer are available to homeowners. Using a non-ionic surfactant with the SedgeHammer will give better control. (Ward Upham)
Ornamentals:
Anthracnose on Sycamore
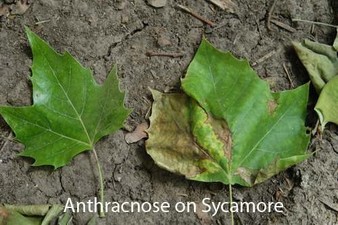
We are starting to see anthracnose on sycamore. Anthracnose is a fungal disease favored by cool, wet weather. Young leaves may wither and turn black. On older leaves, look for brown areas that follow the major veins of the leaves. In some cases, the petiole (leaf stem) is infected, which causes leaf drop. The leaf may look perfectly fine, so look for browned areas on the petiole.
In severe cases, the tree drops heavily infected leaves and may be completely defoliated. Healthy trees will leaf out again in a few weeks. Defoliation this early in the year does not affect overall tree health. Trees have plenty of time to produce new leaves and make the energy reserves needed to survive the winter.
Other types of trees that are affected by anthracnose include birch, elm, walnut, oak and especially ash. Anthracnose seldom causes significant damage to trees in Kansas, so chemical controls are usually unnecessary. Also, fungicides do not cure infected leaves. Applying fungicides now will not help. (Ward Upham)
Miscellaneous:
Straw Bale Gardening
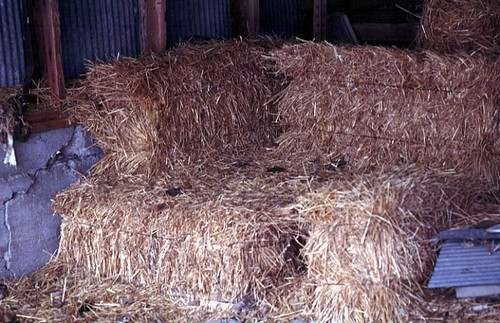
There has been growing interest in straw bale gardening. What better place to try this than in Kansas where straw is so abundant. First, some pointers.
• These are the “small” straw bales that are about 2 feet high and 3 feet long.
• Place the bale on edge so the twine doesn’t rot.
• Bales can be placed anywhere including concrete or asphalt. Just make sure there is plenty of sun and watering is convenient
Bale Conditioning
• Water the bales and keep them wet for 3 days. The bale will start to heat up as it breaks down.
• On days 4, 5 and 6, sprinkle fertilizer on the top of each bale with 1 cup of ammonium sulfate (21-0-0) or ½ cup of urea (46-0-0). Water the fertilizer in. This speeds the decomposition process.
• On days 7, 8 and 9, continue to sprinkle fertilizer on each bale but cut the amount in half.
• Stop fertilizing on day 10 but keep the bale moist.
• Check for heat on the top of each bale for each day after day 10. When the temperature drops to below 100, the bale can be planted.
Planting
• Pocket Method: Make a hole for each plant several inches deep and fill with growing medium.
• Flat Bed Method: Cover the top of the bale with 3 to 4 inches of growing medium.
• The growing medium can be well-aged manure, compost or potting soil.
Number of Plants per Bale
• Cantaloupe: 2
• Cucumber: 3-4
• Peppers: 3-5
• Squash (winter) 2
• Squash (summer) 2-3
• Tomatoes 2-3
Watering
Watering will be the most challenging aspect of management. The straw will dry quickly. A drip irrigation system on a timer can work well but may take some time to set up. Gardeners may also use soda bottles or milk jugs to water by poking drip holes in the lid, filling with water and then turning upside down next to the target plant.
This information was taken from an excellent publication from Washington State University that includes much more detail as well as images. See http://cru.cahe.wsu.edu/CEPublications/FS109E/FS109E.pdf . (Ward Upham)
Contributors: Ward Upham, Extension Associate
 RSS Feed
