K-State Research and Extension Horticulture Newsletter
  • Newsletters
  • About
  • Contact
  • Pest of the Week

Horticulture Newsletter 2016, No. 13

3/29/2016

0 Comments


Video of the Week:
​Self-watering Planter Saves Time

Turfgrass:
Proper Timing for Crabgrass Preventers

crabgrass
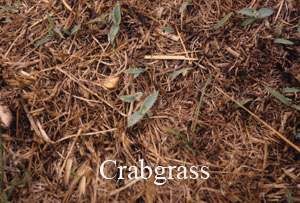
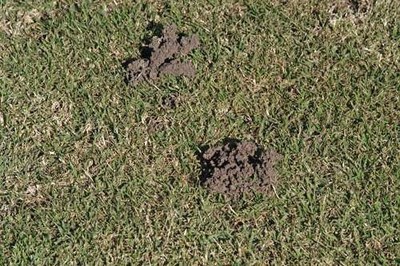
Crabgrass preventers are another name for preemergence herbicides that prevent crabgrass seeds from developing into mature plants. Many people have a somewhat foggy idea of how they work. They do not keep the seed from germinating but kill the young germinating plant.
 
Crabgrass preventers are just that – preventers. With few exceptions they have no effect on existing crabgrass plants, so they must be applied before germination. Additionally, preventers do not last forever once applied to the soil.
 
Microorganisms and natural processes begin to gradually break them down soon after they are applied. If some products are applied too early, they may have lost much of their strength by the time they are needed. Most crabgrass preventers are fairly ineffective after about 60 days, but there is considerable variation among products. (Dimension and Barricade last longer. See below.)
 
For most of Kansas, crabgrass typically begins to germinate around May 1 or a little later. April 15 is normally a good target date for applying preventer because it gives active ingredients time to evenly disperse in the soil before crabgrass germination starts. However, this year, we may want to go a week or two early.  However, for southeast Kansas, this week would be more appropriate, and for northwest Kansas, mid-April would be best.
 
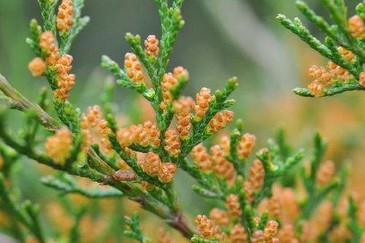
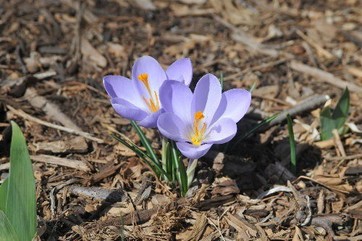
This year, it may be bet to base timing on the bloom of ornamental plants. The Eastern Redbud tree is a good choice for this purpose. When the trees in your area approach full bloom, apply crabgrass preventer. A follow-up application will be needed about 8 weeks later unless you are using Dimension or Barricade. Products that do require a follow-up application include pendimethalin (Scotts Halts) and Team (Hi-Yield Crabgrass Control).
 
Dimension and Barricade are the only two products that give season-long control of crabgrass from a single application. In fact, they can be applied much earlier than April 15 and still have sufficient residual strength to last the season. Barricade can even be applied in the fall for crabgrass control the next season.
 
Dimension can be applied as early as March 1. Because of the added flexibility in timing, these products are favorites of lawn care companies who have many customers to service in the spring. Though Dimension is usually not applied as early as Barricade, it is the herbicide of choice if it must be applied later than recommended. It is the exception to the rule that preemergence herbicides do not kill existing weeds. Dimension can kill crabgrass as long as it is young (two- to three-leaf stage). Dimension is also the best choice if treating a lawn that was planted late last fall. Normally a preemergence herbicide is not recommended unless the lawn has been mowed two to four times. But Dimension is kind to young tall fescue, perennial ryegrass, and Kentucky bluegrass seedlings and some formulations can be applied as early as two weeks after the first sign of germination. However, read the label of the specific product you wish to use to ensure that this use is allowed. Lawns established in the fall can be safely treated with Dimension the following spring even if they have not been mowed.
 
Note that products containing Dimension and Barricade may use the common name rather than the trade name. The common chemical name for Dimension is dithiopyr and for Barricade is prodiamine. Remember, when using any pesticide, read the label and follow instructions carefully.
 
We recommend crabgrass preventers be applied before fertilizer so that the grass isn’t encouraged to put on too much growth too early. However, it may be difficult to find products that contain preemergents without fertilizer. Those that don’t contain fertilizer are listed below. I didn’t find any products containing Barricade that did not also have a fertilizer. If anyone knows of other products that should be listed, let us know and we will publish them in a later newsletter.
 
Pendimethalin
- Scotts Halts
 
Team (Benefin + Trifluralin)
- Hi-Yield Crabgrass Control
 
Dimension
- Hi-Yield Turf & Ornamental Weed and Grass Stopper
- Bonide Crabgrass & Weed Preventer
- Green Light Crabgrass Preventer
​(Ward Upham)

How Low Should You Go

lawn mower
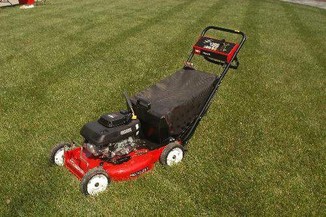
We often are asked whether it is good to mow lower in the spring. The answer is yes and no. It doesn’t hurt to mow lower than normal the first mowing or two. As a matter of fact, it can actually speed green-up by removing old, dead grass and allowing the soil to warm up more quickly.  But the mowing height should be raised to normal after the first or second cutting to discourage crabgrass and encourage deep rooting.
 
Crabgrass seed must have light to germinate, and a high mowing height will help shade the soil. Also, root depth and mowing height are related on upright growing grasses such as tall fescue and Kentucky bluegrass — the higher the height of cut, the deeper the root system. A deeper root system means a more drought-resistant turf.
 
So, how low should you go on the first cutting? On tall fescue and Kentucky bluegrass, you can mow as low as 1 to 1½ inches. Be careful you don't go so low that you scalp the turf.   After that, raise the mowing height for Kentucky bluegrass to 2 to 3 inches but 3 to 3½ inches for tall fescue. (Ward Upham)

Vegetables:
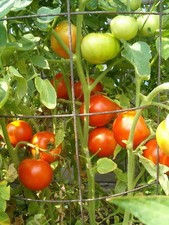
Starting Tomatoes Early

Tomatoes with water teepees
If you would like to have your tomato plants produce earlier in the year, there are certain things to keep in mind. Most people who try to get a jump on the season set their tomatoes out early and hope they do well. However, that is often not a good plan, as tomatoes have to have certain requirements before they will grow well. Those requirements are an acceptable soil temperature for root growth and an acceptable air temperature for both plant growth and fruit set.
 
Root Growth: Tomatoes need a soil temperature of at least 55 degrees to do well. Plastic mulch is  most commonly used to warm the soil. Several days may be needed to raise the soil temperature. Check the soil temperature 2.5 inches deep in the soil at about 11:00 a.m. If that is not possible, check the temperature before leaving for work and again when your return and use the average of the two. You may wish to lay a drip irrigation line before installing the plastic to make watering more convenient. See accompanying article on laying plastic mulch.
 
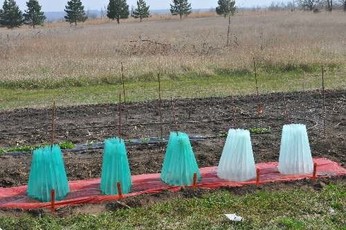
Air Temperature: Plants must be protected from frost. Hot caps or water teepees are placed over the young plants to provide protection as well as a higher average temperature to encourage growth. Eventually the plants will outgrow the cover and start to develop flowers. But if the temperature goes below 55 degrees at night, tomato flowers may not set. The plant is not hurt, but the blossom will not set fruit, or, if it does set fruit, the fruit is often misshapen.
 
How early can you transplant? Start with a date about 2 weeks earlier than normal. (Ward Upham)

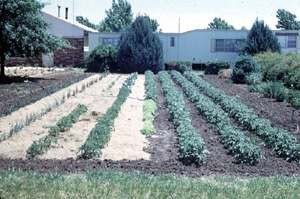
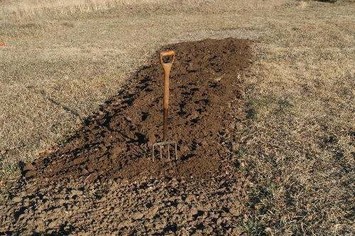
Laying Plastic Mulch

plastic mulch
Plastic mulch is sometimes used to start vegetables such as tomatoes and melons earlier than normal. Commercial growers use a machine to lay the mulch, but home gardeners must do this by hand. Following are some tips on how this is done.
 
1. Fertilize according to soil test. You won't be able to add fertilizer after the plastic is down.
 
2. Work the soil so that the bed can be easily shaped.
 
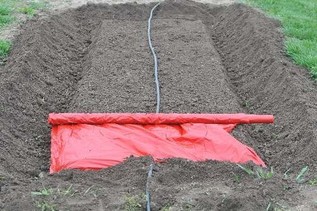
3. Use a garden hoe to form a trench along all edges of the plastic. The soil should be pulled to the outside of the bed. The trench should be formed six inches in from the edge of the plastic and extend along both sides and both ends. The trench should be deep and wide enough to bury six inches of plastic.
 
4. Lay trickle irrigation tube down the center of the bed. This isn't absolutely necessary but it makes it much easier to water. Overhead watering will hit the plastic and roll off.
 
5. Lay the plastic down and cover the edges with soil. You may need to slit the edge of the plastic where the trickle irrigation tube enters the end of the bed.
 
6. Plant when the soil temperature reaches the correct temperature for the crop (55 degrees for tomatoes and 60 degrees for melons) at a 2.5-inch depth. Check the temperature at about 11:00 a.m. to get a good average temperature. Check for several days in a row to ensure the temperature is stable. (Ward Upham)

Miscellaneous:
Transplant Solutions and Sidedressings

fertilizing vegetable transplants
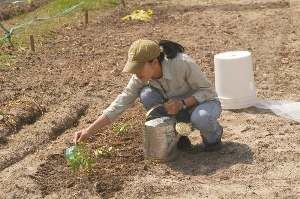
Transplant solutions are mild fertilizer solutions that are applied to newly transplanted vegetables and flowers. Transplant solutions are also called starter solutions or root stimulators. Early-season plants not given a transplant solution often develop a purplish tinge to the leaves caused by a phosphorus deficiency. Surprisingly, the soil may have plenty of phosphorus but plants often have difficulty taking up nutrients in cool soils. The starter solution places soluble nutrients near the roots so the plants get off to a good, strong start.
 
Transplant solutions (root stimulators) are available for sale but it is also possible to make your own transplant solution from a fertilizer that contains more phosphorus than nitrogen or potassium such as a 5-10-5, 10-20-10 or 11-15-11. Mix 2 to 3 tablespoons of one of the above fertilizers in a gallon of water several hours before use. The fertilizer won't completely dissolve but enough will go into solution to get plants off to a good start. Use about 1 cup of transplant
solution for each transplant.
 
Sidedressing is a fertilization done after the plants are established. A fertilizer containing primarily nitrogen is used to keep plants growing and productive. Nitrate of soda (16-0-0) is often used at the rate of 2 pounds fertilizer per 100 feet of row. More commonly available lawn fertilizers such as a 30-3-3, 29-5-4 or something similar can also be used but cut the rate in half.
 
Be sure any lawn fertilizer used does not contain weed preventers or weed killers. Note that most fertilizers weigh about 1 pound per pint of product.  We have a sidedressing sheet available that lists crops, rate of fertilizer application and timing of application(s) for many common vegetables as well as annual flowers. The sheet can be viewed at  http://www.hfrr.ksu.edu/doc1991.ashx   (Ward Upham)

Organic Sources of Nitrogen Fertilizer

Picture
Most of the soil tests we receive for vegetable gardens are high in phosphorus and potassium, leaving nitrogen as the nutrient needed most. However, many of our organic fertilizers contain similar amounts of all three nutrients. So, what can we use that provides more nitrogen than phosphorus and potassium? Following is a short list of such fertilizers.


​
Product                               Analysis                   Pounds/ 100 sq ft                       Notes
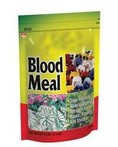
Blood Meal                                      12-0-0                                              5 - 10                          Can burn plants if overapplied
Cottonseed Meal                         6-0.4-1.5                                            10                               May have pesticide carryover
Soybean Meal                                  7-2-1                                                  8
 
Feed stores will often sell these products. Colorado State University has an excellent publication on organic fertilizers at  http://www.ext.colostate.edu/mg/Gardennotes/234.html  (Ward Upham)

​Contributors:  Ward Upham, Extension Associate

0 Comments

Horticulture Newsletter 2016, No. 12

3/22/2016

0 Comments


Video of the Week:
Caring for Knockout Roses

Upcoming Events:

​Hands-On Mushroom Cultivation Workshop
 
Friday, April 1 or Saturday, April 2
 
Topics Covered:
Growing oyster mushrooms on straw and sawdust
Inoculating shiitake mushroom logs (hands-on)
Growing winecap mushrooms in woodchips or straw mulch
Log selection and harvest
 
Each participant will receive:
Oyster Mushroom Production Bag
Inoculated Shiitake Log
 
Cost of the workshop: $25
 
For details, see  http://www.reno.k-state.edu/docs/Mushroom%20workshop%20flyer.pdf  or call
620-662-2371.

Vegetables:
​Frost Proof Vegetable Plants 

cool season vegetables
Certain vegetables can withstand cold spring temperatures as long as they have been toughened up by gradually exposing them to sunlight and outdoor temperatures. This “hardening off” process usually takes about a week.
 
Reducing watering and temperature is the key to toughening up transplants. If possible, move transplants outside for a portion of each day. Start by placing them in a shady, protected location and gradually move them into a more exposed, sunny location as the week progresses. Hardened off cabbage, broccoli, cauliflower and onions can withstand temperatures near 20 F without being killed.  Lettuce plants are not quite as tough but will be okay if exposed to temperatures in the mid 20s.

Don’t hesitate to put these plants out now if extreme cold is not forecast. (Ward Upham)

Asparagus Time

Asparagus
Asparagus is one of those vegetables where freshness is incredibly important. If you have never eaten asparagus fresh out of the garden, try it. It may convince you to grow some of your own. For those who have an asparagus patch, the new spears should be appearing soon. The first asparagus that comes through the ground always seems to take a long time to reach harvest size. That is because asparagus growth is temperature dependent. The higher the day and nighttime temperatures, the faster it grows. Also, the longer the spear, the quicker the growth. As the season progresses and spears get longer, the growth rate increases.
 
Harvest asparagus by snapping or cutting. Snapping is quick and easy. Simply bend the stalk near the base until it breaks. Snapped ends dry quickly so refrigerate or use soon after harvest. If you cut asparagus, use a sharp knife to detach the spears slightly below ground level. This base is woodier than snapped asparagus, so it doesn't lose water as quickly. Cut off woody ends before cooking. (Ward Upham)

Herbicides for Home Gardens

vegetable garden
Though mulches and hoeing are usually all that is needed for small vegetable gardens, homeowners with large areas may need the help of herbicides to keep ahead of the weeds. One preemergence and one postemergence herbicide can be used on home vegetable gardens.
 
The preemergence herbicide is trifluralin. Preemergence herbicides kill weed seeds as they germinate. They usually have no effect on weeds that have emerged. Therefore, they must be put on either before weeds come up in the spring or after weeds have been physically removed. The preemergence herbicide trifluralin is sold under the trade names of Treflan, Preen, Miracle-Gro Garden Weed Preventer, Gordon's Garden Weed Preventer Granules and Monterey Vegetable and Ornamental Weeder.
 
The postemergence herbicide is sethoxydim. This product only kills grasses; broadleaves are not affected. It can be sprayed directly over the top of many vegetables. Sethoxydim is sold as Poast, Monterey Grass Getter, and Hi-Yield Grass Killer. A second postemergence herbicide called fluazifop-p-butyl is labeled for commercial growers as Fusilade, but I haven't found vegetables listed on the homeowner labels, “Over the Top Grass Killer” and “Grass-No-More.” Also, the other homeowner products mentioned above often do not have as many vegetables on the label as the commercial products. Even among the homeowner products with the same active ingredient, there may be slight differences among labels. Check product labels to be sure the crop is listed. Here is a list of herbicides and the crops for which they are labeled. Many of these crops have application restrictions. For example, trifluralin can be used on asparagus, but must be applied before spears emerge. (Ward Upham)

Picture

Fruit:
Apple Tree Sprays

Cedar-Apple rust
Two common diseases on apple trees are cedar apple rust and apple scab. Though some apple varieties are resistant to these diseases — including Liberty, Jonafree, Redfree, Freedom, Williams Pride and Enterprise — most varieties are susceptible. For a listing of the disease resistance of various cultivars, go to: http://extension.missouri.edu/explorepdf/agguides/ hort/g06022.pdf

Fungicide sprays during April and May are critical to preventing disease on susceptible varieties. With the warm spring this year, we may have to start sprays in March. The first spray should go down when leaves appear. A fungicide that is available to homeowners and very effective for control of apple scab and cedar apple rust is myclobutanil (Immunox). There are several formulations of Immunox but only one is labeled for fruit. Check the label.
 
Sprays should be done on a 7- to 10-day schedule to keep the protective chemical cover on the rapidly developing leaves and fruit. An insecticide will need to be added to this mixture after petal drop to prevent damage from codling moths that cause wormy apples. Methoxychlor or malathion can be used as an insecticide. In order to protect bees, DO NOT use any insecticide during bloom.  Check the malathion label before purchase as not all labels list fruit.
 
Although gardeners may continue to use myclobutanil throughout the season, certain other fungicides are more effective on summer diseases such as sooty blotch and fly speck. Consider switching to Captan or to a fruit spray mixture about June 1. A spreader-sticker can be added to the fungicide-insecticide chemical mixture to improve the distribution and retention of the pest control chemicals over the leaves and fruit. A hard, driving rain of about 1 inch or more will likely wash chemicals from the leaves and fruit. In such cases, another application should be made. You can find information on controlling insects and diseases on fruit trees in our publication titled "Fruit Pest Control for Home Gardens" at http://www.ksre.ksu.edu/bookstore/pubs/c592.pdf  Below is the spray schedule I use. Sprays are applied ever 10 days until 2 weeks before harvest.
 
Leaves Appear: Immunox
Petal Drop: Add malathion to the Immunox and so the mixture is Immunox + malathion
June 1: Replace Immunox with Captan. The mixture is now Captan + malathion

Stop spraying 2 weeks before harvest. (Ward Upham)

Turfgrass:
Core Aeration of Cool-Season Grass

core aerator
If you are planning to core-aerate your tall fescue or Kentucky bluegrass lawn this spring, March or early-April is the time. Coring early in the spring gives cool-season lawns a chance to recover before crabgrass and other warm-season annual weeds start to germinate.
 
Core-aerating is one of the best things you can do for your lawn. It relieves compaction, hastens thatch decomposition, increases water infiltration and helps promote better root growth. Pay attention to the soil moisture level when coring. The soil should easily crumble when worked between the fingers. If it is too wet, the machine's tines will plug and it will merely punch holes in the wet soil, which increases compaction. If it is too dry, the tines will not be able to penetrate deeply enough to be of benefit. (Ward Upham)

Ornamentals:
​Hackberry Psyllid, the Tiny "Gnat" Invading Homes

Hackberry psyllid
It is rare to find a hackberry tree without round growths on the underside of the leaves. These bumps, or galls, are the result of a tiny insect known as the hackberry psyllid. Hackberry is the only known host of this pest.
 
The adults of these insects are tiny and resemble miniature cicadas. They are dark reddish-brown with mottled wings. Most emerge from the galls during warm days in September and are very annoying as they gather around window screens seeking entry into the house. They are tiny enough to crawl through the openings in most screens. In the spring, the adults become active about the time the leaf buds open. The female lays her eggs on the underside of the developing leaves. Egg hatch occurs in 7 to 10 days, and the young nymphs begin to feed immediately. The leaf reacts to the feeding by producing a pouch or gall that entirely encloses the nymph.
 
Control is difficult. Adults that invade homes can be collected by using a vacuum sweeper but the bag should be discarded or the adults will escape. Since these insects do not seriously affect the vitality of the hackberry tree, control is usually not recommended. (Ward Upham)

0 Comments

Horticulture Newsletter 2016, No. 11

3/15/2016

0 Comments


Video of the Week:
Pruning Fruit Trees​

Fruit:
Frost Tolerance of Apricots and Peaches

Peach flowers
Growers of apricots and peaches often wonder at what temperature fruit buds are killed especially in years where we have an early spring.  These two tree fruits bloom very early and are often caught by a late frost. The following will give you some guidelines but remember that the actual damage is going to be influenced by the weather before the temperature drops. An extended warm spell before the cold snap may result in more damage due to a loss in cold hardiness. The stages listed are for the fruit buds.
 
Apricot
 
Stage               10% Kill (°F)         90% Kill (°F)
First white             24                              14
First Bloom          25                               19
Full Bloom            27                              22
In the Shuck         27                               24
Green Fruit          28                               25

Peach

Stage              10% Kill (°F)          90% Kill (°F)
Swollen bud          18                                2
Half-inch green   23                                5
Pink                         25                               18
Bloom                     27                               24
Petal fall                28                               25
Fruit set                 28                               25

To check for low temperature injury to fruit buds or blossoms, use a sharp knife and cut them in half longitudinally (from top to bottom). If the tiny seed in the center is white to cream color no damage has been done. But if the seed in several buds or blossoms is dark brown or black, it has been killed.It is possible to give some protection to blossoms from freezing by covering the tree with a bed spread, blanket or similar fabric. Old-fashioned Christmas lights  distributed around the tree will help to give additional protection. The newer, smaller Christmas lights do not give off enough heat and are not recommended. Of course the practicality of this method of protection depends upon the size and number of trees.
 
Sprinkling the tree with water throughout the freezing period can also protect the blossoms. Sprinklers should be started before the temperature drops to freezing to be sure ice does not block the garden hose or water line. Continue until the temperature warms. With this protection method, there is the potential of creating an ice storm. If temperatures remain below freezing for several hours, ice will accumulate on the branches and limbs. The weight from the ice may cause branches and limbs to break causing severe, and possibly permanent, damage to the tree structure. Also, if water drainage from the soil is slow and the water displaces oxygen from the roots, damage to trees may result. (Ward Upham)

Vegetables:
Controlling Weeds in Home Garden Asparagus Beds

asparagus emerging
The best time to control weeds in asparagus is early spring before the asparagus emerges. A light tilling (or hoeing) that is shallow enough to avoid the crowns will eliminate existing weeds. Many gardeners like to mix in organic matter during the same operation.
 
Herbicides can be used before asparagus emerges. Glyphosate (Roundup, Killzall) will kill weeds that are actively growing, and the preemergence herbicide trifluralin can be used to kill weed seeds as they germinate. Trifluralin is found in several products, but not all of them list asparagus on the label. Those that do have asparagus on the label include Miracle-Gro Weed Preventer Granules and Monterey Vegetable and Ornamental Weeder. Mulch can also be used to keep weeds from invading.
 
No herbicides can be used during harvest. The end of harvest presents another opportunity. Remove all fern and spears and apply Roundup to control virtually all of the weeds present.  Past the harvest season and after regrowth of the asparagus, options are limited. Products that contain sethoxydim can be applied to asparagus to kill grassy weeds. Sethoxydim has no effect on broadleaves including asparagus. Two sethoxydim products available to homeowners and
labeled for asparagus are Monterey Grass Getter and Hi-Yield Grass Killer. With broadleaves, the only option is to pull them and look forward to next year. (Ward Upham)

Remove Fern and Fertilize Aspargus

old asparagus ferns
If you haven’t removed last year’s growth from asparagus plants, now is the time. Asparagus comes up around the first of April in Manhattan but will be earlier in southern Kansas and a bit later further north.

Also, asparagus benefits from a fertilizer application early spring. Fertilize according to a soil test or add 1 to 2  pounds of a 10-20-10 fertilizer per 20 feet of row before growth starts. If a soil test shows that only nitrogen is needed, apply 1 pound of a 16-0-0 product or ½ pound of a 30-4-5, 27-3-3 or similar fertilizer per 20 feet of row. Incorporate lightly with a tiller or rake in fertilizer before spears emerge. Fertilize again at the same rate after the last harvest. (Ward Upham)

Flowers:
Preventing Weeds in Flower Beds

flower bed
Often mulch does a good enough job in perennial flower beds to prevent weeds but sometimes the mulch needs a little help. In annual beds, judicious hoeing will keep weeds down until the foliage forms a canopy that prevents weed germination.  However, a lack of time may have you considering an easier way than hoeing or pulling weeds that come through mulch. Preemergence herbicides can help though you should not expect 100% control.
 
Preemergence herbicides do not keep the weed seed from germinating but kill the young plant as it starts to grow. It is necessary to water these products in (1/4 inch of water) so that the young weed root will contact the herbicide. Be aware that most of these products are more effective on grassy weeds such as crabgrass rather than broadleaves such as dandelions or spurge.
 
These herbicides often have no effect on existing plants, so they must be applied before the weed seed germinates. Additionally, preventers do not last forever once applied to the soil. Microorganisms and natural processes begin to gradually break them down soon after they are applied. However, all should last long enough so that you get canopy cover before the herbicide wears off.
 
Read the label for information on when to apply the product. Also, be sure the ornamental plants within the bed area are on the label before purchasing the product. See below for products we can use.
 
Dimension (dithopyr)
- Hi-Yield Turf & Ornamental Weed and Grass Stopper
- Bonide Crabgrass & Weed Preventer

​Treflan (trifluralin)
- Hi-Yield Herbicide Granules Weed and Grass Preventer
- Miracle Gro Garden Weed Preventer
- Preen Weed Preventer
(Ward Upham)

Turfgrass:
Managing Turf in the Shade

shaded turf
Turfgrasses differ in their capacity to grow in shade. Among Kansas turfgrasses, tall fescue is the best adapted to shade though it isn’t all that good. Although the fine fescues (i.e., creeping red, chewings, hard and sheep) have better shade tolerance, they lack heat tolerance and typically decline during hot Kansas summers. The warm-season grasses have the poorest shade tolerance, although zoysia does better than Bermuda or buffalo. Where shade is too heavy for fescue, there are other courses of action. The most obvious is to either remove trees, or to prune limbs and thin the tree canopies. Grass will do better under openly spaced trees than under closely spaced trees. Pruned limbs and thinned canopies will allow more sunlight to directly reach the turfgrass. If possible, raise the mowing height in the shade to compensate for the more upright growth of the leaves, and to provide more leaf area for photosynthesis. The thin, weak turf in the shade may tempt you to fertilize more.
 
Remember the problem is lack of light, not lack of fertility. Too much nitrogen in the spring causes the plant to grow faster and may result in weak plants. The nitrogen rate for shaded grass should be cut back to at least half of that for grass in full sun. Late fall fertilization after tree leaves have fallen, on the other hand, is important for shaded cool-season turfgrasses and should be applied at a full rate. Irrigate infrequently but deeply. Light, frequent irrigation may encourage tree feeder-roots to stay near the surface, which increases competition between the trees and the turf. Restrict traffic in the shade.
 
Many times, the best choice for shaded areas is switch from a turfgrass to a more shade-tolerant plant. For example, English ivy and periwinkle (Vinca minor) are much more shade tolerant than any turfgrass adapted to our area. Another option is simply to mulch the area where turf doesn’t grow well. The trees will love the cool, moist soil and the absence of competition. (Ward Upham)

Ornamentals:
Brown Coloration on Junipers

Juniper male
Certain eastern redcedar and various other junipers are showing a brownish cast when viewed from a distance. This may be the male flowers. Male flowers are on the tips of the leaves and look somewhat like a cross between a miniature hand grenade and a pinecone. Shaking the branches on dry days will often result in a cloud of pollen being released.
 
Most junipers are dioecious, meaning they have both male and female plants. About half the junipers (the males) will have this coloration. The female flowers are much less obvious. If you have clients who are concerned about this brown coloration, have them check the plants to ensure the male flowers are the cause. If they are, assure them that this is normal and will fade with time. (Ward Upham)

Miscellaneous:
Adding Organic Matter in the Spring

adding organic matter
Organic matter is a good way to improve garden soil as it improves a heavy soil by bettering tilth, aeration and how quickly the soil absorbs water. However, organic matter added in the spring should be well decomposed and finely shredded/ground. Manures and compost should have a good earthy smell without a hint of ammonia. Add a 2-inch layer of organic matter to the surface of the soil and work the materials into the soil thoroughly. Be sure soils are dry enough to work before tilling as wet soils will produce clods.
 
To determine if a soil is too wet to work, grab a handful and squeeze. If water comes out, it is much too wet. Even if no water drips out, it still may not be dry enough to work. Push a finger into the soil you squeezed. If it crumbles, it is dry enough, but if your finger just leaves an indentation, more time is needed. Be sure to take your handfuls of soil from the depth you plan to work the soil because deeper soils may contain more moisture than the surface. (Ward Upham)
 
Contributors:  Ward Upham, Extension Associate

0 Comments

Horticulture Newsletter 2016, No. 10

3/8/2016

0 Comments


Video of the Week:
Pruning Grape Vines

Vegetables:
Time to Plant Potatoes Approaching

planting potatoes
St. Patrick’s Day is just around the corner, so it is time to get seed potatoes in the ground. Actually any time from mid- to late-March is fine for potato planting. Be sure to buy seed potatoes rather than using those bought for cooking. Seed potatoes are certified disease free and have plenty of starch to sprout as quickly as soil temperatures allow. Most seed potatoes can be cut into four pieces, though large potatoes may yield more, and small less.
 
Each seed piece should be between 1.5 and 2 ounces and include at least one eye to ensure there is enough energy for germination. Each pound of potatoes should yield 8 to10 seed pieces. Cut the seed 2 to 3 days before planting so freshly cut surfaces have a chance to suberize, or toughen, and form a protective coating. Storing seed in a warm location during suberization will speed the process. Plant each seed piece about 1 to 2 inches deep and 8 to 12 inches apart in rows. Though it is important to plant potatoes in March, emergence is slow. It is often mid- to late-April before new plants poke their way through the soil. As the potatoes grow, pull soil up to the base of the plants. New potatoes are borne above the planted seed piece, and it is important to keep sunlight from hitting the new potatoes. Exposed potatoes will turn green and produce a poisonous substance called solanine. Keeping the potatoes covered will prevent this. (Ward Upham)

Rhubarb

rhubarb
Rhubarb is a perennial vegetable that can be a bit tricky to grow in Kansas. It is native to northern Asia (possibly Siberia) and so is adapted to cold winters and dry summers. However, it is susceptible to crown rot and should not be subjected to “wet feet” and therefore should be grown in a well-drained soil. The addition of organic matter can increase drainage as well as raise the soil level so that crown rot is less likely.

Also, have a soil test done as rhubarb does best with a pH below 7.0.
 
Rhubarb should be planted from mid-March to early April in Kansas. Mix 5 to 10 pounds of well-rotted barnyard  manure into the soil for each 10 square feet of bed before planting.
 
Rhubarb is propagated from crowns (root sections) that contain one or two buds. Plants should be spaced 2 to 3 feet apart in the row with 4 to 5 feet between rows. The crowns are planted shallow so that the buds are just one-half to 1 inch below the soil surface. Firm soil around the crowns and make sure they are not in a depression that holds water. Recommended varieties include Canada Red, Crimson Red, McDonald and Valentine.
 
Rhubarb needs rejuvenated at least every 5 to 10 years and should be dug and divided in the same time period as new plantings are established. Use a cleaver or axe to cut crowns into sections that each contain one or two buds. Plant as described above.
 
Newly transplanted rhubarb should not be harvested the first year so the plant can recover from the transplant process. Only a few stalks should be harvested the second year to allow the plant to continue to build up its energy reserves. The harvest season for plants that are three years or older usually lasts about 8 weeks. Harvest only the largest and best stalks by pulling them slightly to the side so that they break away from the plant. Never harvest over one-third of the leaf stalks at one time. Only the leaf stalk (petiole) is eaten as the leaf blade contains oxalic acid and is poisonous.
 
Mulches can be used to reduce moisture loss, prevent weed growth and provide winter protection. However, it should be pulled away in the spring to allow the soil to warm so that early growth is encouraged. (Ward Upham)

Fruit:
Pruning Raspberries and Blackberries

berry canes
Raspberries and blackberries are perennial plants with biennial canes. In other words, a single plant will last many years but an individual cane will only live for two. In a cane’s first year, it will grow but will not produce fruit. The second year, it will fruit and then die. Though these canes can be removed after they have finished fruiting, many gardeners wait until now to remove them.
 
Dead canes are not difficult to identify. They are a much lighter color than live canes and are dry and brittle. These canes should be removed and discarded. The remaining canes should be thinned but the type of growth determines exactly how this should be done.
 
Black and purple raspberries and thornless blackberries tend to grow in a clump. Remove all the canes but 5 to 7 of the largest and healthiest in each clump. Cut back the remaining canes to living tissue if there was winter damage. Thornless blackberries will also produce a few suckers that come up some distance from the clump. These should be removed or dug and transplanted to increase the planting.
 
Red raspberries and thorny blackberries sucker badly and will fill the row with new plants. Prune out small canes within the row so that there are strong canes 4 to 6 inches apart. Head back all the remaining canes to about 5 feet. Keep aisles free of new suckers during the summer by mowing.
 
We now have what is called ever-bearing red raspberries and everbearing thorny blackberries. These are the exception to the rule in that they will bear fruit on first-year canes. Therefore, you can cut all canes to the ground in the winter and still have fruit. Examples include Heritage red raspberry and Prime-Jim, Prime-Jan, Prime Ark 45 and Prime Freedom blackberries. For more detail and line-drawings that illustrate pruning techniques, see our publication titled, “Raspberries and Blackberries” at  http://www.ksre.ksu.edu/bookstore/pubs/mf720.pdf. (Ward Upham)

Strawberry Mulch Removal

mulch on strawberry bed
Research done in Illinois has shown that the straw mulch should be removed from strawberry plants when the soil temperature is about 40 degrees F. Fruit production drops if the mulch remains as the soil temperature increases.  If a thermometer is not available, remove the mulch as new growth starts in the spring.
 
Do not completely remove all the straw as there are likely to be freezing temperatures that can injure or kill blossoms. Keep the mulch between rows to conveniently recover the berries when freezing temperatures are predicted. Also, remove only enough mulch that the leaves peak through. The remaining mulch will help keep berries from rotting due to contact with the soil. (Ward Upham)

An Old-Time Concoction for Mildew Control on Peach

mildew on peaches
The following “recipe” was a recommendation for the control of mildew on peach made in 1849. We list it to show the good-old-days may not have been so good.
 
Mix 26 gallons of urine with 6.5 gallons of pigeon dung and allow to ferment for 48 hours. Then add 2.2 pounds of aconite (Monk’s Hood) branches and 3.8 gallons of water. Apply mixture to peach leaves. A single application in April was said to provide year-long control.

We have not done any efficacy studies, nor do we plan to. The preceding was from a fascinating book titled, “The Truth About Garden Remedies” by Jeff Gillman. (Ward Upham)

Turfgrass:
Nightcrawlers in the Lawn

middens from nightcrawlers
​If you have mounds of soil in your lawn, nightcrawlers may be the cause. These bumps are randomly spaced rather than a "run" that is characteristic of moles.
 
Nightcrawlers are large worms -- usually 4 to 8 inches or more. They belong to a group of earthworms known as deep-burrowers. The deep-burrowers build large, vertical, permanent burrows that may reach as deep as 5 or 6 feet.
​
Nightcrawlers pull plant material down into their burrows to feed on later. The bumps you see on top of the ground are called "middens" and are a mixture of plant residues and castings (worm feces). These middens may be used for protection and food reserves. The burrows can have a significant positive effect on soil by opening up channels for water and air to penetrate. Roots also like these channels because they ease root penetration and supply nutrients from the casting material lining the burrow. The middens, however, are a source of aggravation for homeowners. They can make it hard to mow or even walk on a lawn because they become very hard when they dry.
 
Getting rid of the middens is difficult. Rolling the lawn while the middens are soft may help temporarily, but mounds will be rebuilt when nightcrawlers become active again. Also, there is nothing labeled for nightcrawler control.
 
Some gardeners want to protect the nightcrawlers because of their positive effect on soils. Pesticides that may be used for other pests vary widely in their toxic effects on earthworms. One that has no effect is Dylox (Proxol). Malathion may be slightly toxic while Sevin and copper are extremely toxic. Avoid using the latter group while nightcrawlers are active. (Ward Upham)
 
Contributors:  Ward Upham, Extension Associate

0 Comments

Horticulture Newsletter 2016, No.9

3/1/2016

0 Comments


Video of the Week:
Growing Asparagus

Vegetables:
​Tomato Trial

tomato
We now have 3 years worth of  data on 12 different varieties of tomato.  Tom Fowler, Horticulture Specialist with the University of Missouri Extension Service, took data on large tomato plantings in 2013, 2014 and 2015.  Though his study included many more than 12 varieties, we have focused on the 12 that were grown all three years.  A single year’s data is often unreliable as the weather may have played a large part in results.  A variety that does very well under certain conditions, may not do well under less favorable conditions. Other varieties may be more forgiving and yield well under a wider range of conditions.  Two years data is better at balancing weather effects but we often like to see 3 years to feel more comfortable in making recommendations.
 
The data below is from an average of all three years. We list both yield in pounds per plant and individual fruit size in ounces.
 
                                     Lbs/Plant      Ounces/Fruit
Celebrity                      14.66                    6.25
Beefmaster                  12.84                   7.56
Crista                             12.71                     6.18
Big Beef                         12.60                   6.37
Hy-Beef                         12.33                   5.50
Jet Star                          10.76                   5.65
Rutgers                         10.43                   4.31
BHN 961                        9.82                    7.06
Black Krim                   9.69                    6.62
Florida 91                     9.25                     6.63
Supersonic                   8.69                     6.62
Amana Orange           6.58                      11.82

These are all modern varieties except for the heirlooms Amana Orange, Rutgers and Black Krim.
 
Remember these results are from north of Kansas City and include only 12 varieties.  Variety performance differs by location.  New gardeners or those that want to try a new tomato variety should use this list as a guide. However, pay attention to what other local gardeners have had good success with and to the recommendations of your local garden center. They may be able to point to a variety that does especially well in your area.  (Ward Upham)

Bolting and Buttoning in Cole Crop Plants

broccoli transplant
Broccoli, cabbage and cauliflower are cole crops that have a tendency to bolt (go to seed) or button (produce an extremely small head) if plants are not grown properly. These crops need to be kept actively growing through their production cycle, including growing transplants from seed. If they slow down due to under-fertilization or are stunted due to overgrowing their container, buttoning or bolting is more likely.  Therefore, be sure to properly fertilize plants grown from seed and ensure they have enough light.  The easiest way fertilize transplants is to use a potting soil with fertilizer already added.  Light may be more of a challenge.  Often natural sunlight is not sufficient unless the plants are in a greenhouse and additional light is needed.  Click here for a video on how to build a grow light.
 
If you are not growing your own transplants but rather selecting plants from a retailer, choose small, stocky dark green plants.  Even after transplanting, these plants need to be well-fertilized. Fertilize at transplanting with a starter solution and continue to fertilize every 2 to 3 weeks until harvest. Both buttoning and bolting are irreversible. Once a seed stalk starts for form, nothing can be done to force the plant to produce a normal crop. (Ward Upham)

Pruning:
Cut Back Ornamental Grasses

cutting down ornamental grasses
March is a good time to remove dead foliage from ornamental grasses. Grasses green up earlier if foliage is removed and are more attractive without a mixture of dead and live leaves. A number of tools can be used including hand clippers, weed whips (if the foliage is of a small enough diameter), weed whips with a circular blade, or even a chain saw. Use the top of the chainsaw bar to cut so the saw doesn't pull in debris and clog.

Also, it is often helpful to tie foliage together before cutting so it doesn't interfere and is easier to dispose of.   Burning is another option — but only if it is safe and legal to do so. Note that these grasses may not burn long, but they burn extremely hot. Even so, the crown of the plant is not damaged and new growth appears relatively quickly.
 
If the center of the clump shows little growth, the plant would benefit from division. Dig up the entire clump and separate. Then replant the vigorous growth found on the outer edge of the clump. (Ward Upham)

Pruning Deciduous Shrubs

shrub before pruning
shrub after pruning
​Gardeners are eager to get out and do something in the landscape this time of year. One chore that can be taken care of during March is pruning certain shrubs. Often, gardeners approach pruning with trepidation, but it is not as difficult as it may seem. Remember, not all shrubs need to be pruned (i.e., witch hazel), and certain shrubs, which will be identified later in this article, should not be pruned this time of year. Shrubs are pruned to maintain or reduce size, rejuvenate growth, or to remove diseased, dead or damaged branches. Deciduous shrubs are those that lose leaves each winter. Evergreen shrubs maintain foliage all year and include yews and junipers.
 
Deciduous shrubs are placed into three groups:
• Those that flower in the spring on wood produced last year;
• Those that flower later in the year on current seasons’ growth; and
• Those that may produce flowers, but those flowers are of little ornamental value.
 
Shrubs that flower in the spring should not be pruned until immediately after flowering.  Though pruning earlier will not harm the health of the plant, the flowering display will be reduced or eliminated. Examples of these types of plants include forsythia, lilac, flowering quince, Vanhoutte spirea, bridal wreath spirea and sweet mockorange.
 
Shrubs that bloom on current seasons’ growth or that do not produce ornamental flowers are best pruned in March.  Examples include Rose-of-Sharon, pyracantha, Bumald spirea, and Japanese spirea.  Pruning during the spring allows wounds to heal quickly without threat from insects or disease.  There is no need to treat pruning cuts with paints or sealers. In fact, some of these products may slow healing.

There are three basic methods used in pruning shrubs: thinning, heading back, and rejuvenating.
 
Thinning is used to thin out branches from a shrub that is too dense. It is accomplished by removing most of the inward growing twigs by either cutting them back to a larger branch or cutting them back to just above an outward- facing bud. On multi-stemmed shrubs, the oldest canes may be completely removed.
 
Heading back is done by removing the end of a branch by cutting it back to a bud and is used for either reducing height or keeping a shrub compact.  Branches are not cut back to a uniform height because this results in a "witches-broom" effect.
 
Rejuvenation is the most severe type of pruning and may be used on multi-stem shrubs that have become too large, with too many old branches to justify saving the younger canes. All stems are cut back to 3- to 5-inch stubs. This is not recommended for all shrubs but does work well for spirea, forsythia, pyracantha, ninebark, Russian almond, little leaf mock orange, shrub roses and flowering quince. (Ward Upham)

Miscellaneous:
Repotting Houseplants​

rootbound houseplant
As outdoor plants break dormancy and start to grow in response to the longer days and warmer spring temperatures, houseplants usually put on a spurt of growth as well. Eventually, these indoor plants out-grow their containers and need to be repotted.
 
To check if your plants are becoming root bound and need a larger pot, inspect the root system. First, knock the plant out of its pot. Watering several hours before this operation will allow the plant to be removed more easily. On pots that are 8 inches in diameter or less, place one hand over the top of the pot with the stem of the plant passing between two fingers, and turn the plant upside down. Then rap the edge of the pot against a table. The root ball should come away from the pot. On pots that are more than 8 inches in diameter, a bit more encouragement may be needed. Place the pot on its side and rap the top edge of the pot with a rubber mallet. Turn the plant a few degrees, and repeat the procedure until the root ball releases.

Once the plant is free, take a look at the root ball. If you see a clear network of roots, the plant needs to be moved to a larger pot. If the original pot is less than 10 inches, move up an inch in size; if 10 inches or larger, increase the size 2 inches. If the pot has one or several large holes in the bottom for drainage, cover the holes with pot shards (pieces of a broken clay pot) or gravel so that the potting mix is not washed out during watering.
 
It is essential that the plant sit at the same level it was in the old pot. Add enough potting mix to the bottom of the pot to ensure this. This mix will need to be firmed before the plant is placed on top of it so it doesn't settle over time. After the plant is placed, fill in around the original root ball with potting soil. Again, firm this soil with a slender stick, or tap the bottom of the pot on the table. If this firming is not done, new soil will be so light and airy that water will tend to move through it rather than through the entire root ball.
 
Water the plant thoroughly after repotting, but be especially careful not to overwater for about two weeks. The new soil tends to stay wet until roots penetrate. Overwatering can lead to rot. Most plants need to be repotted annually though vigorous growers may need to move up sooner. Slow-growing plants may stay in the same pot for more than a year. (Ward Upham)

Plants Breaking Dormancy Early

crocus
Plants that become dormant in preparation for winter must have a certain number of "chilling hours" before the buds will begin growth the next spring. "Chilling" hours are those in which the temperature remains between 32 and 45 degrees F.

Plants differ in the number of chilling hours needed, with those adapted to colder climates usually requiring more than those adapted to warmer zones. Even plants within the same species can differ markedly in the number of chilling hours required for bud break. For example, apple varieties range from a low of 250 (or fewer) chilling hours to a high of 1700.
 
The chilling requirements of some plants have been met already this winter. For these plants, dormancy is over and warm periods can lead to bud swell or even flowering.  If spring-flowering bulbs flower now, the floral parts may be damaged by a cold snap but the plants itself will likely be OK.  It all depends on the severity of the cold snap.
 
So what do you do if you have a plant that has swollen buds? Actually, there is not much you can do to slow the bud development process because it is completely dependent on weather. However, watering during dry weather may help in an indirect way. Roots can suffer drought damage during the winter. A tree with a damaged root system and damaged buds will be slower to recover than one with just damaged buds. Readily available soil moisture will aid in keeping the plant healthy so it will be better able to recover from cold damage. Also, it is important to determine if the swollen buds are flower buds or leaf buds. Even if the flower buds are killed by cold temperatures, the health of the plant should not be affected. If, in addition to the swollen buds, you also see small buds on the stems, then the swollen buds are flower buds and the small buds are leaf buds.

Leaf buds are more hardy than flower buds but even they can be killed if they have lost their winter hardiness.  Even if the leaf buds swell and are killed by a cold snap, a healthy tree will still be able to survive. There are secondary buds that remain dormant unless the primary bud is killed. Secondary bud growth may be slower and less vigorous, but the tree will eventually recover. (Ward Upham)
 
Contributors: Ward Upham, Extension Associate

0 Comments

    Authors

    Ward Upham runs the Horticulture Response Center in the Department of Horticulture and Natural Resources at Kansas State University. Other contributors include K-State Extension Specialists.

    RSS Feed

      Subscribe to the newsletter by entering your e-mail and clicking the link below

    Subscribe

    Archives

    January 2023
    December 2022
    November 2022
    October 2022
    September 2022
    August 2022
    July 2022
    June 2022
    May 2022
    April 2022
    March 2022
    February 2022
    January 2022
    December 2021
    November 2021
    October 2021
    September 2021
    August 2021
    July 2021
    June 2021
    May 2021
    April 2021
    March 2021
    February 2021
    January 2021
    December 2020
    November 2020
    October 2020
    September 2020
    August 2020
    July 2020
    June 2020
    May 2020
    April 2020
    March 2020
    February 2020
    January 2020
    December 2019
    November 2019
    October 2019
    September 2019
    August 2019
    July 2019
    June 2019
    May 2019
    April 2019
    March 2019
    February 2019
    January 2019
    December 2018
    November 2018
    October 2018
    September 2018
    August 2018
    July 2018
    June 2018
    May 2018
    April 2018
    March 2018
    February 2018
    January 2018
    December 2017
    November 2017
    October 2017
    September 2017
    August 2017
    July 2017
    June 2017
    May 2017
    April 2017
    March 2017
    February 2017
    January 2017
    December 2016
    November 2016
    October 2016
    September 2016
    August 2016
    July 2016
    June 2016
    May 2016
    April 2016
    March 2016
    February 2016
    January 2016
    December 2015
    November 2015
    October 2015
    September 2015
    August 2015
    July 2015
    June 2015
    May 2015
    April 2015
    March 2015
    February 2015
    January 2015
    December 2014
    November 2014
    October 2014
    September 2014
    August 2014
    July 2014
    June 2014

    Categories

    All
    All America Selections
    All-America Selections
    Amaryllis
    Anthracnose
    Ants
    Aphids
    Apples
    Apricots
    Army-cutworm-moths
    Ash-borer
    Ashes-in-the-garden
    Asparagus
    Bacterial-wilt
    Bagworms
    Bark-shedding
    Beans
    Bermudagrass
    Bird-feeding
    Bitter-cucumber
    Blackberries
    Blackspot
    Black-walnuts
    Blister Beetles
    Blossom End Rot
    Blossom-End Rot
    Blueberries
    Botryosphaeria
    Breaking-dormancy-early
    Breaking-dormancy-early
    Bristly Rose Slug
    Broccoli
    Brownheaded-ash-sawfly
    Brown-patch-on-fescue
    Brown-rot-of-fruit
    Budworms
    Buffalograss
    Bulbs
    Bulb Storage
    Butterflies
    Butterfly Gardening
    Cabbage
    Cabbage Worms
    Caddo Sugar Maples
    Calcareous
    Cantaloupe
    Carpenter Bees
    Cauliflower
    Cedar Apple Rust
    Cherry Leaf Spot
    Chickweed
    Chiggers
    Christmas Cacti
    Christmas Trees
    Cicada
    Cicada Killer Wasps
    Codling Moth Control
    Cold Frames
    Cole Crops
    Colorado Potato Beetle
    Columnar Trees
    Compost
    Conservation Trees
    Container Gardening
    Controlling Volunteer Trees
    Cool Season Vegetables
    Cool-Season Vegetables
    Core Aeration
    Corn Earworm
    Corn Gluten Meal
    Crabapples
    Crabgrass Control
    Crickets
    Crop Rotation
    Cucumber
    Cucumber Beetles
    Daylilies
    Deadheading Flowers
    Dormant-seeding-turfgrass
    Dothistroma Needle Blight
    Drip-irrigation
    Dr-seuss-gardening
    Dutch-elm-disease
    Early Blight
    Eggplant
    Elm Flea Weevil
    Elm Leaf Beetle
    Elm Pocket Gall
    Emerald Ash Borer
    Euonymus Scale
    European Pine Sawfly
    Excessive Rain
    Fall Armyworms
    Fall Colors
    Fall Gardening
    Fall Lawn Seeding
    Fall-webworm
    Family-heritage-gardening
    Fertilizing-cole-crops
    Fertilizing-flowers
    Fertilizing Lawns
    Field-bindweed
    Field Dodder
    Firewood
    Flatid Planthoppers
    Flooding
    Floral Arrangement Care
    Flourescent Lights
    Flowerbed Design
    Flowering
    Frost On Lawns
    Fruit
    Fruit Baskets
    Fruit Damage From Cold
    Fruit Trees
    Fungus Gnats
    Galls
    Garden Hoses
    Gardening Calendar
    Garden Seed
    Garden Spiders
    Garden Tool Care
    Garlic
    Goldenrod Soldier Beetle
    Grapes
    Grasshoppers
    Grass Seed
    Green June Beetles
    Growing Cuttings Inside
    Grubs
    Hackberry Caterpillar Butterflies
    Hackberry Psyllids
    Hardiness
    Harlequin Bug
    Harvesting
    Help For New Gardeners
    Henbit
    Herbicide Damage
    High PH Soils
    Holly
    Hollyhock
    Honeysuckle
    Hornworms
    Horseradish
    Houseplants
    Hydrangea
    Ice Melters
    Invasive Plants
    Iris
    Iron Chlorosis
    Irrigation
    Itch Mites
    Japanese Beetles
    Junipers
    Kansas Garden Guide
    Kentucky Bluegrass
    Knotweed
    Lacebugs
    Ladybird Beetles
    Landscape Design
    Lawn
    Lawn Calendar For Cool Season Grass
    Lawn Calendar For Cool-Season Grass
    Lawn Calendar For Warm Season Grass
    Lawnmower Care
    Lawn Seeding
    Leaf Scorch
    Leaves
    Lettuce
    Lilac
    Lilac Borers
    Little Barley
    Marcescence
    Maximizing Garden Space
    Melons
    Millipedes
    Mimosa Webworm
    Mole Control
    Mouse Damage
    Mowing
    Mulch
    Mums
    Mushrooms
    Mycosphaerella Leaf Spot
    Nantucket Pine Tip Moth
    Native Prairie Flowers
    Needle Drop On Conifers
    New Gardener Resources
    Nightcrawlers
    Nuts
    Oak
    Oak Leaf Itch Mite
    Onions
    Orchids
    Organic Matter
    Organic Sources Of Nitrogen
    Ornamental Grass
    Overseeding Lawns
    Overwintering Geraniums
    Paperwhite Bulbs
    Pawpaw Trees
    Peaches
    Pears
    Peas
    Peonies
    Peony
    Peppers
    Perennial Garden Clean Up
    Perennial Garden Clean-up
    Pesticide Effectiveness
    Pine Wilt
    Planting Calendar
    Plastic Mulch
    Plum
    Poinsettia
    Poison Ivy
    Poisonous Plants
    Pokeweed
    Poor Drainage
    Potatoes
    Powdery Mildew
    Powdery Mildew On Lawn
    Power Raking
    Propagating-woody-plants
    Prop Up Fruit Limbs
    Pruning
    Publications
    Quince
    Rabbits
    Raccoons
    Rain-barrels
    Raspberries
    Recommended-plants-for-ks
    Rhubarb
    Roasting Pumpkin Seeds
    Roots
    Rose
    Rose Rosette
    Roundup For Lawns
    Salad Garden
    Sawfly Larvae
    Scale
    Scale Insects
    Screen Trees
    Sedum
    Seed Germination
    Seed Germination
    Seed Tape
    Septoria Leaf Spot
    Shrub Pruning
    Shrubs
    Sidedressing
    Slime Molds
    Slugs
    Smut
    Soil
    Soil Preparation
    Soil Temperature
    Spider Mites
    Spiders
    Spirea Aphid
    Spittlebugs
    Spray Water PH
    Spreaders
    Spring Bulbs
    Spring Flowering Shrubs
    Squash
    Squash Bugs
    Squash Vine Borer
    Squirrel Damage
    Starting Seed
    Stink Bugs
    Storing Power Equipment
    Storm Damage
    Stratification
    Straw-bale-gardening
    Strawberries
    Succession Planting Of Vegetables
    Sunflowers
    Sunscald
    Survey
    Sweet Corn
    Sweet Potatoes
    Tall Fescue
    Tan/White Drupelets
    Termites
    Thatch Control
    Ticks
    Tomatoes
    Transplant Fertilization
    Tree Health
    Tree Leaves And Turf
    Tree Planting
    Trees
    Tubakia
    Tubakia-leaf-spot
    Turf-in-shade
    Twig-girdlers
    Vegetable-flowersfruit
    Vegetables
    Vegetable Seed
    Vegetable Transplants
    Velvet Ants
    Vinegar As Herbicide
    Walnut Caterpillars
    Warm Fall
    Water Damage
    Watering
    Watermelon
    Water Teepees
    Weeds In Flower Beds
    Weeds In Turf
    Weird Squash
    White Grubs
    Whitelined-sphinx-caterpillar
    Wildflower Establishment
    Wildflower-establishment
    Wildlife
    Wild Violet Control
    Wind Chill
    Winter Damage
    Winterizing Water Lines
    Winter Mulching Vegetables
    Winter Squash
    Wood Chips
    Worms From Oaks
    Yellowjackets
    Yellow Nutsedge

Powered by Create your own unique website with customizable templates.