K-State Research and Extension Horticulture Newsletter
  • Newsletters
  • About
  • Contact
  • Pest of the Week

Why Do Houseplants Lose Leaves After Being Brought Inside?

11/8/2017

0 Comments

 
Picture
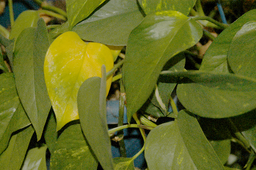
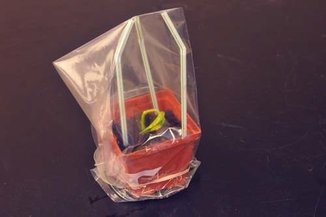
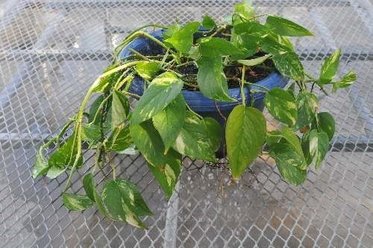
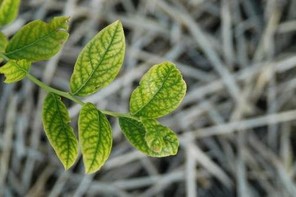
Newly bought houseplants or those brought in from outside often lose at least a portion of their leaves. In order to understand why this occurs, we need to look at how these plants are grown and what the plant needs to do to adapt to its new environment. Houseplants are normally produced either under shade outdoors in southern states or in greenhouses. Also, many homeowners move their houseplants outside during the summer. Regardless, the plants receive much more sunlight than they do in an indoor environment. Research done in Florida in the late 1970s revealed that tropical plants grown under high light conditions produce "sun leaves" while those grown under low light conditions have "shade leaves." These leaf types differ structurally in that sun leaves have less chlorophyll (the substance that plants use to convert sunlight to energy) and the chlorophyll that is present is located deeper inside the leaf. Sun leaves also tend to be thick, small and numerous while shade leaves are more thin, larger, and fewer in number. When plants are moved from one light condition to another they need time to adjust. This process is known as acclimatization. If they are forced to acclimatize too quickly, they will drop their sun leaves and produce a new set of shade leaves. If the acclimatization process is slower and less drastic, the plant can convert their sun leaves to the shade leaves that do better under low light. If going from shade to sun, this process is reversed. 
​
Some houseplants are acclimatized before they are sold but many are not. So how do we help our new houseplants or those moved inside acclimatize to their new home environment? Houseplants should start out in an area of the home that receives plenty of light and then gradually moved to their permanent, darker location. This process should take 4 to 8 weeks depending on the degree of difference in light levels between the initial and final location of the plant. Remember, plants need to be acclimatized whether they are moved from a sunny location to one that receives less light or from shade to sun. Understanding plant processes allows us to anticipate potential problems. Acclimatization gives our houseplants a greater  chance of retaining leaves and avoiding the stress of completely replacing them. (Ward Upham)

0 Comments

Caring for Houseplants During the Winter Months

10/17/2017

0 Comments

 
Picture
Houseplants need varying amounts of water and fertilizer at different times of the year. They need the most during summer when light levels are high and days are long. They need the least during the short days of winter. The primary reason for this is light.  Light produces the fuel for plant growth. More light allows more growth, which results in a greater demand for water and nutrients. When light is limiting, the need for water and nutrients decreases dramatically. Therefore, it becomes easy to overwater and overfertilize during the winter months. Excess water and fertilizer can harm a plant by damaging the root system. Overwatering can suffocate roots by eliminating oxygen and excess fertilizer can burn roots.  Therefore, it is best not to fertilize at all during the middle of winter (December-January) and to fertilize sparingly during November and February (maybe 1/4 a normal rate).
​
It is never wise to water on a set schedule. Rather, allow the potting soil to tell you when watering is needed. Check to see if the soil is moist 1-inch deep by inserting your finger into the potting mix. Don't water unless the mix is dry.  (Ward Upham)

0 Comments

Moving Houseplants Inside for the Winter

9/18/2017

0 Comments

 
Picture
Many people with houseplants move some of them outside for the summer to give them better growing conditions and help them recover from the stress of an indoor environment. But as fall approaches and night temperatures approach 50 F, it is time to think about bringing plants inside for the winter. Plants that have spent the summer outside should be inspected for insects and disease before bringing them inside. A sharp spray from a garden hose can remove insects or mites from houseplant foliage. Insects in the potting soil can be forced out by soaking the pot in a tub of lukewarm water for about 15 minutes.Houseplants that have been kept outdoors are accustomed to receiving much more sunlight than they do indoors. So how do we help houseplants acclimatize to the lower light levels inside? Houseplants brought in from outside should be started out in an area of the home that receives plenty of light, and then gradually moved to their permanent, darker location. This process should take four to eight weeks depending on the degree of difference in light levels between the initial and final location of the plant. Understanding plant processes allows us to anticipate potential problems. Acclimatization gives houseplants a greater chance of retaining leaves and avoiding the stress of completely replacing them. (Ward Upham)

0 Comments

Miscellaneous: Watering Houseplants While on Vacation

5/30/2017

0 Comments

 
Picture
We are approaching the time of year when many people take vacation. In the rush to get everything done before leaving, don't forget your houseplants will probably need watering while you are gone. The best alternative is to have someone water them for you. However, if this is not possible, there are alternatives.
       
1. Well-watered plants can be placed inside a plastic bag. Prop up the bag by using wooden dowels or something similar to keep the plastic off the leaves. Make sure the enclosed plants will not receive full sun as heat buildup may cook them. Bright, indirect light is best. Plants should keep for about a week with this method.
       
2. This method requires an old dish drying rack, a bathtub in a bathroom with some natural light and some shoelaces. Place the drying rack upside down in the tub and add several inches of water.  Push one end of a shoelace through a drainage hole on the bottom of a pot and into the potting soil of your houseplant. The other end of the shoelace dangles into the water. What you have made is a wick system that will replace water in the pot as the plant uses it. Plants can last a couple of weeks if you have enough natural light.
       
3. There are numerous commercial products that can be used to automatically water houseplants in your absence. The advantage of these products is that the houseplant does not normally need to be moved. All require a reservoir from which water is either siphoned or pumped to individual houseplants. Houseplants should last as long as the water holds out. (Ward Upham)

0 Comments

Miscellaneous: Moving Houseplants Outside for the Summer

5/9/2017

0 Comments

 
Picture
It is often helpful to set many houseplants outside for the summer so they can recover from the low light levels endured during the winter months. As soon as night temperatures stay consistently above 55 degrees F, houseplants can be moved to their summer home. Choose a spot that has dappled shade, is protected from the wind and is close to water. A porch or a spot that receives shade from trees or buildings will work well.
     
Putting houseplants in full sun will cause the leaves to photooxidize or sunburn because the leaves have become adapted to low light levels inside the house. Where possible, sink the pots into the ground to help moderate root temperatures and reduce watering frequency.
     
If you have a number of plants, dig a trench 6 to 8 inches deep (or deeper if you have larger pots) and long enough to accommodate all of your plants without crowding. Place peat moss under and around the pots. Peat moss holds water, helps keep the pots cool and reduces evaporation from clay pots. About every two weeks, rotate the pots a quarter turn to break off any roots that have penetrated the peat moss surrounding the pot and to equalize the light received on all sides of the pot. Water as needed. If the potting soil is dry a half-inch deep in the pot, it is time to water. (Ward Upham)

0 Comments

Horticulture Newsletter 2017, No. 8

2/21/2017

0 Comments


Video of the Week:
​Making Your Own Seed Tape

Vegetables:
Cure the Itch by Planting Peas

Picture
If you are tired of winter and hunger for spring, try planting peas as soon as the soil dries and the soil temperature reaches 40 degrees. We have several types of peas we can plant in Kansas. Probably the most common is the shelling pea and the old standard in this group is Little Marvel. Though Little Marvel is still on our recommended list, we have a number of others that do well including Green Arrow, Knight, Maestro, Burpeeana and Mr. Big. All of these are early maturing types that allow us to harvest a crop before the hot weather arrives and stops production. Snow peas are those commonly used in stir-fry that have a crisp edible pod.
 
Recommended varieties include Dwarf Grey Sugar and Mammoth Melting Sugar. Sugar snap peas resemble shelling peas but have a thick, fleshy pod and can be eaten fresh, steamed or cooked. Like snow peas, they are not shelled but eaten pod and all. We recommend Sugar Bon, Sugar Ann, Super Sugar Snap and Sugar Sprint.
 
Peas should be planted shallow, about one-half inch deep, to encourage rapid germination and emergence. Seed in the row should be spaced 2 inches apart. Many people often plant two rows 6 to 8 inches apart so the floppy plants can support one another. For some older varieties, this may not be enough. They may need trellising to support the growing vines. Fencing may be needed to keep rabbits away. (Ward Upham)

Lettuce

Picture
Though lettuce is most often planted directly from seed in late March to early April, it can be started from transplants. Transplants allow lettuce to mature earlier so that it escapes the excessive heat that can lead to a strong flavor and bitterness.
 
Seed should be started four to five weeks before transplanting. Because transplants are placed at the same time as direct seeding, now would be a good time to begin. Use a seed starting mix and plant shallow as lettuce requires light for germination. A soil media temperature of 60 to 68 degrees will encourage germination. Watch the media temperature carefully, as seed can enter a thermal dormancy if germination temperatures are excessive. Also, a cooler temperature of 55 to 60 degrees should be used once the plants emerge.
 
Time to maturity varies depending on the type of lettuce, with leaf lettuce being the quickest, followed by bibb, romaine, and buttercrunch lettuce. Head or crisphead lettuce is the slowest and is least likely to mature before becoming bitter.
 
Spacing also varies with type. Leaf lettuce plants are spaced 4 to 6 inches apart, buttercrunch, bibb, and romaine are set at 6 to 8 inches and head lettuce should be at least 8 inches apart in the row. Lettuce does not have an extensive root system and requires regular watering if rainfall is lacking.
 
Fertilize before planting according to soil test. Plants should also be sidedressed when about 1/3 grown. Sidedressing is done with fertilizers that have more nitrogen than phosphorus and potassium. Use 1/3 cup of nitrate of soda (16-0-0) or 1/4 cup of a 27-3-3, 29-5-4 or similar fertilizer per 10 feet of row. The latter fertilizers are lawn fertilizers but will work well for sidedressing as long as they do not contain weed killers or weed preventers. (Ward Upham)

Soil Temperature and Vegetables

Picture
One of the most neglected tools for vegetable gardeners is a soil thermometer. Soil temperature is a much better measure of when to plant than air temperature or the calendar. Planting when soil is too cool can cause seeds to rot and transplants to sit there.
 
A number of vegetables can germinate and grow at cool temperatures. For example, peas will germinate and grow well at a soil temperature of 40 F. Though lettuce, parsnips, and spinach can sprout at a soil temperature of 35 F, they prefer at least 45 F for best germination and growth. Radishes also do well at a soil temperature of 45 F. Warm-season crops such as tomatoes, sweet corn and beans prefer at least 55 F for germination (or transplanting), but others such as peppers, cucumbers, melons and sweet potatoes need it even warmer, about 60 F.
 
Taking soil temperature accurately is a bit of a science. First, use a metal soil thermometer, which is sold in many garden, auto parts and hardware stores. Take temperature 2.5 inches deep at about 10 to 11 a.m. Temperature variations throughout the day and night affect soil temperature, with lowest readings after dawn and warmest around mid-afternoon. The late-morning reading gives a good average temperature. If taking the soil temperature at this time is not practical, take a reading before you leave for work and a second when you return home and use the average. Also be sure to get a consistent reading for four to five days in a row before planting, and make sure a cold snap is not predicted.
 
An excellent guide sheet on this subject is published by the Alabama Cooperative Extension System and is titled “Soil Temperature Conditions for Vegetable Seed Germination.” It can be found at http://www.aces.edu/pubs/docs/A/ANR-1061/ANR-1061.pdf   (Ward Upham)

Ornamentals:
Forcing Stems of Woody Plants for Indoor Blooms

Picture
Stems of a number of woody plants can be forced into bloom for indoor display. Of course, some are easier to force than others. Three of the easiest are forsythia, pussywillow, and flowering quince. These plants have now gone through enough cold weather to satisfy their chilling requirement and should bloom if given the right conditions.
 
Remember that the flower buds on forsythia are killed as temperatures reach –10 degrees F. If your area has had temperatures this far below zero, use one of the other woody plants.
 
Choose a day that is above freezing for collecting branches for blooming. Keep the stem length to 3 feet or less. As you cut, place the stems in a bucket of water. Once you have the number of branches you want, bring them into the house and soak them in warm water for several hours -- a bathtub works well for this. This ensures that the stems and buds are fully hydrated. Next, place them in a container that has a warm, preservative solution and place them in an environment with high humidity and plenty of light.
 
Make your preservative solution by dissolving packets of floral preservative in water. These packets can often be obtained from your local florist. You can also make your own preservative by adding a tablespoon of Listerine per gallon of water, but commercial preservatives are preferred. Floral preservatives accomplish two functions; they prevent bacterial growth in your water and provide nutrients and energy for the life processes of the plants.

Many times our houses have a very low relative humidity during the winter. These low humidities can lead to dehydration of flower buds and blossoms. To raise the humidity around your plants, mist the plants or drape a dry cleaner's bag over your stems. If a cleaner's bag is too small, use a painter’s clear plastic drop cloth. Humidifiers can also help raise humidity levels. Normally, forsythia will take about nine days to flower, quince will require between 12 to 20, and pussywillow needs from five to 15 days. The time required will vary depending on indoor conditions and how late in the winter the branches were collected. Most woody plants should be in flower within three weeks of collection and will remain in flower for about a week before blooms start to fade.  (Ward Upham)

Pruning Deciduous Shrubs

Picture
Picture
Gardeners are eager to get out and do something in the landscape this time of year. One chore that can be taken care of now is pruning certain shrubs. Often, gardeners approach pruning with trepidation, but it is not as difficult as it may seem. Remember, not all shrubs need to be pruned (i.e., witch hazel), and certain shrubs, which will be identified later, should not be pruned this time of year. Shrubs are pruned to maintain or reduce size, rejuvenate growth, or to remove diseased, dead or damaged branches. Deciduous shrubs are those that lose their leaves each winter. Evergreen shrubs maintain foliage all year and include yews and junipers.
 
Deciduous shrubs are placed into three groups:
- Those that flower in the spring on wood produced last year;
- Those that flower later in the year on current seasons’ growth; and
- Those that may produce flowers, but those flowers are of little ornamental value.

Shrubs that flower in the spring should not be pruned until immediately after flowering. Though pruning earlier will not harm the health of the plant, the flowering display will be reduced. Examples of these types of plants include forsythia, lilac and mock orange. Shrubs that bloom on current seasons’ growth or that do not produce ornamental flowers are best pruned in late winter to early spring. Examples include Rose-of-Sharon, pyracantha, Bumald spirea and Japanese spirea.
 
Pruning during the spring allows wounds to heal quickly without threat from insects or disease. There is no need to treat pruning cuts with paints or sealers. In fact, some of these products may retard healing. There are three basic methods used in pruning shrubs: thinning, heading back and rejuvenating. Thinning is used to thin out branches from a shrub that is too dense. It is accomplished by removing most of the inward growing twigs by either cutting them back to a larger branch or cutting them back to just above an outward- facing bud. On multi-stemmed shrubs, the oldest canes may be completely removed.
 
Heading back is done by removing the end of a branch by cutting it back to a bud and is used for either reducing height or keeping a shrub compact. Branches are not cut back to a uniform height because this results in a "witches-broom" effect.
 
Rejuvenation is the most severe type of pruning and may be used on multi-stem shrubs that have become too large, with too many old branches to justify saving the younger canes. All stems are cut back to 3- to 5-inch stubs. This is not recommended for all shrubs but does work well for spirea, forsythia, pyracantha, ninebark, Russian almond, little leaf mock orange, shrub roses and flowering quince. (Ward Upham)

Miscellaneous:
An Easy Way to Propagate Houseplants

Picture
Houseplant growers don’t need a lot of equipment to propagate a houseplant. Gardeners can get by with a coffee cup, potting soil, 3 drinking straws, a plastic bag and a rubber band. Start by making a slit or hole in the bottom of the coffee cup so that it drains excess water. Then fill the cup with moist potting soil. Do not use garden soil as it does not drain well. Too much water (and too little oxygen) will harm cuttings.
 
Prepare the Cutting
- Remove about a 4-inch or smaller piece from the tip of the plant. The cut should be made just below a node. A node is where a leaf attaches to the stem.
- Remove the leaf or leaves from the bottom node. This is where roots will form.
- If there are just a few leaves on the tip, fine. However, if there is a cluster of leaves, remove most of them below the tip. This will cut down on water loss as the plant makes new roots.
 
Plant the Cutting
- Push the bottom end of the cutting into the soil. The remaining leaves should not contact the soil. A rooting hormone may be used if desired but usually is unnecessary with houseplants.
 
Make a Greenhouse
- Place 3 straws equidistant from each other near the outside edge the cup full of potting soil. They will support the plastic bag so that it does not contact the leaves and cause them to rot.
- Place the plastic bag over the cup like a tent and use the rubber band to secure the open end of the bag to the sides of the cup.
 
Grow the Cutting
- Place the cutting in bright, indirect light. Do not place in full sunlight as the cutting may overheat.
- Keep the cutting warm. A temperature of 72 degrees is ideal. Roots should form in about 10 days. Check by removing the plastic bag and pulling gently on the cutting. If it doesn’t pull out easily, roots have started to form and the plastic bag can be left off. (Ward Upham)

Leaching Houseplants

Picture
Everyone knows that someone stranded in the ocean should not drink the water. The salt content of that water will make a bad situation worse.  What many people don’t realize is that this same principle can harm plants.
 
Fertilizers are salts. They must be salts in order for the plant roots to take them up. However, salt levels can build up over time and eventually may harm plant roots leading to scorched leaves and unhealthy plants. Though this can happen under field conditions, especially in low rainfall areas, it is particularly critical with houseplants.
 
Houseplants have a certain soil volume that doesn’t change until a plant is repotted. Salt build-up can be a crucial concern especially if plants are fertilized heavily. Leaching an overabundance of salts can be an important practice to ensure the health of our houseplants. Leaching is not a complicated or difficult process. It consists of adding enough water to wash out excess salts.
 
How much water is enough? Add the amount of water that would equal twice the volume of the pot. This, of course, would need to be done outside or in a bathtub or sink. Water must be added slowly so that it doesn’t overflow the rim of the pot. If salt has formed a crust on the surface of the soil, remove it but don’t take more than 1/4 inch of the underlying media. This may also be a good time to repot the plant. (Ward Upham)
 
Contributors: Ward Upham, Extension

0 Comments

Horticulture Newsletter 2017, No. 4

1/24/2017

0 Comments


Video of the Week:
Pothos and Philodendron: Easy Care Plants

Upcoming Events:

Picture
Join us for the  New-Media Marketing Bootcamp , February 8-9, 2017 in Overland Park, KS. This event is designed for anyone who plays a role in their brand’s social media, from advanced uses to beginners.
 
Get ideas, inspiration and innovative techniques to implement immediately from sessions including:
 
* Claiming and Building the Online Hub of Your Business: Basic DIY Website Platforms
* Learn to Love Your Photos: Clever Phone Photo Tips to Help you Stand Out
* Integrating Facebook Ads into Your Marketing Plan
* Simple Graphic Tools to Make Your Content Shine
*Facebook Deeper Dive: Analyzing Performance of Your Page AND featuring for Retail Minded, Nicole Leinbach Reyhle
 
More information about  session descriptions, travel information, registration  and more can be found on our website menu under New-Media Marketing Bootcamp. Question?  Contact us at newmedia@ksu.edu

Vegetables:
Preventing Potatoes from Sprouting in Storage

Picture
Home gardeners have had to rely on proper storage conditions (cool and moist) to prevent potatoes from sprouting. But sprouting will eventually occur even if the gardener does everything right. Research by Mary Jo Frazier, Nora Olsen and Gale Kleinkopf from the University of Idaho have found products that should help home gardeners.

These researchers were looking for an organic method to control potato sprouts. They found essential oils from some herbs and spices to be effective sprout inhibitors. Specifically they found that spearmint oil, peppermint oil and clove oil suppressed sprouting by physically damaging rapidly dividing cells in the sprout. Each of these products is so safe that the FDA has approved them for addition to food.
 
Several application methods were considered though most were only suitable for commercial storage facilities. The only practical method for homeowners was one the researchers labeled a “low-tech” wick method. This was accomplished by placing a small piece of blotter paper saturated with spearmint or peppermint oil in a box with the potatoes. This method was not recommended for the clove oil. Though it was found that peppermint and spearmint oils were equally effective in suppressing sprouts, the peppermint oil was less likely to affect flavor of the potatoes. Reapplication at two- to three-week intervals will be needed for continued sprout suppression. Little to no residue was found on the potatoes from these products due to their high volatility. The first application should be done before sprouting occurs.
 
Blotting paper is much more difficult to find than it was in the past and so you may want to substitute blank newsprint. However, if blotting paper is desired, try herbarium supply houses. Blotting paper is used to press plant specimens. (Ward Upham)

Use a Planting Calendar

Picture
If you start vegetable plants indoors, it is often helpful to list seeding dates on a calendar so that plants are ready for transplanting at the proper time. To do this, choose your transplant date and count back the number of weeks necessary to grow your own transplants. For example, cabbage, broccoli, and cauliflower are usually transplanted in late March to early April. It takes 8 weeks from seeding to transplant size. Therefore, plants should be seeded in early February.
 
Information on how many weeks it takes to grow transplants is available in our January 3 newsletter at:
http://hnr.k-state.edu/extension/info-center/newsletters/2017/January2_2017_1.pdf . Below are examples of some common vegetables grown for transplants and a recommended date for seeding. Dates are Saturdays as this is when many homeowners have the most free time. The dates are not set in stone, and a week earlier or later will not ruin the plants. Also, you may want to seed a week or two earlier if you are in southern Kansas and possibly a week later if you are in northern Kansas. Calendars can be reused year after year by a slight reset of the dates.  Also keep notes on how well the transplants did so you can tweak the planting schedule. Your conditions may result in plants that need a bit more or a bit less time.
 
Crop                                          Seeding Date                                       Transplant Date

Cabbage, Broccoli
& Cauliflower                             February 4                                                  April 1

​Lettuce (if you grow
 transplants)                               February 4                                                  April 1

Peppers                                        March 18                                                      May 13

Tomatoes                                     March 25                                                     May 6

(Ward Upham)

Tomato Trials

Each year we have our Master Gardeners plant and rate a number of tomato varieties.  We also give a set to Tom Fowler with the University of Missouri Extension Service.  He combines our set with a number of additional varieties.  I am still working on data from our Kansas Master Gardeners and will write on those results later.  Following are the results from varieties that Tom grew in both 2015 and 2016.  All data are from the combined results of both years. We list the average fruit size in ounces, the numbers of fruit per plant and the number of pounds per plant.  I have listed the varieties in alphabetical order.

Both 2015 and 2016 were challenging years for northwest Missouri with 2016 being the most diffucult.  It will be interesting to compare what Tom found with the results from our Master Gardeners.  (Ward Upham)

Fruit:
Cloning Apple Trees

Picture
We occasionally receive calls from gardeners who want to know how to treat an apple seed so it will germinate. Usually, the gardener is trying to reproduce an old apple tree that was special for some reason (good quality fruit, planted by grandparents, etc.) Unfortunately, apples grown from seed will not be like the parent. About 1 in every 80,000 apple trees grown from seed will be as good as the apples we are used to eating. Apple trees grown from seed usually have small and inferior quality fruit.

If you want a tree exactly like the parent, you must propagate that tree vegetatively. In the case of apples, this usually means grafting. Apple trees are actually quite easy to graft, even for novices. Don't be afraid to try even if you haven't grafted before. The step that needs to be done at this time of year is the choosing and cutting of scion wood or small branches that will be grafted on top of a rootstock.
 
See the accompanying article in this newsletter on how this is done. However, if you don’t have an existing tree to graft onto, you will need to plant a rootstock this year for grafting onto next. Fruit trees are normally grafted (or budded) onto specially selected rootstocks. These rootstocks usually reduce tree size. For example, a tree that normally would reach 25 feet tall will only reach 10 feet if it is grown on a certain rootstock. Dwarfing rootstocks also allow apples to bear fruit a year or more earlier.
 
A tree on its own roots normally takes 5 to 7 years before it will bear. Semi-dwarf trees bear in 4 to 5 years, and dwarf trees bear in 3 to 4 years. Unfortunately, not all dwarfing rootstocks are well adapted to Kansas. Semi-dwarf trees usually are a better choice for us. Note that rootstock reduces tree size, not fruit size. Therefore, a Golden Delicious tree that only reaches 8 feet tall due to a dwarfing rootstock, will bear the same size fruit as a Golden Delicious tree that is 25 feet tall.
 
Most nurseries only sell trees that are already grafted. A company that does sell rootstocks is Raintree Nursery, Morton, WA, (360) 496-6400,  http://www.raintreenursery.com/Rootstocks/ Another is Cummins Nursery, (865) 233-3539,  http://www.cumminsnursery.com/rootstocks.htm  though there is a minimum shipping and handling fee of $20.
 
It is also possible to buy a tree from a local nursery and graft your clone into it. This will give you one tree that produces two different apples. One disadvantage of this method is that it is possible to prune off the special clone by mistake in later years.
 
This information does not include the details of grafting or budding or subsequent care.  The Missouri Extension Service has an excellent publication on grafting at http://extension.missouri.edu/explorepdf/agguides/hort/g06971.pdf as well as a second publication on budding at http://extension.missouri.edu/explorepdf/agguides/hort/g06972.pdf. Be sure to practice your cuts on wood you prune off in March. After you do about 100 cuts, you will start to get the hang of it. (Ward Upham)

Multiple Grafts on Apple Trees

Picture
Nurseries often sell apple trees that bear more than one variety of fruit. The secret is grafting. All apple trees are grafted, which is done by grafting the apple-producing variety (the scion) on a variety chosen for its dwarfing effects (the rootstock). A tree with more than one variety simply has more than one fruiting variety grafted onto a single rootstock. Grafting allows growers to have a single tree that could produce Jonathan, Red Delicious and Golden Delicious apples. These trees can be a unique attraction and a good conversation point in a fruit garden. If space is limited, a multiple grafted tree may allow growers to have a greater variety of fruit than with individual varieties on separate trees.

​However, there are some possible drawbacks. Whoever prunes the trees may not recognize the individual grafts and may unknowingly prune off one of the varieties. Also, varieties may vary in vigor, and stronger varieties can crowd weaker ones. There also may be a difference in susceptibility to disease among varieties and among different kinds of fruit. Some may have resistance to a disease and not require protection, but others are susceptible and do require protection. If the susceptible fruits are protected, the more resistant ones will be sprayed unnecessarily. (Ward Upham)

Miscellaneous:
Growing Your Own Firewood

Picture
In order to avoid energy costs, some homeowners are turning to wood for heat. Plant species is an important consideration as not all trees have the same density and therefore, heat value. The greater the dry weight, the better.
 
The highest value for trees commonly found in Kansas is osage orange (hedgeball tree) at 4,800 pounds per cord. Osage orange has a gnarly growth habit and a nasty set of thorns. This species also sparks which isn’t a problem in a
wood-fired boiler but certainly would be in an open fireplace.

Black locust is next with 4,200 pounds per cord. Black locust is a fast grower and also has excellent burning qualities and makes a nice bed of coals. However, it is hard to split, suckers, and has some relatively small thorns, especially on young trees.
 
Buroak and red oak come in at 3,800 and 3,500 pounds per cord respectively but are not fast growers. Mulberry, however, has the same weight as red oak but grows more quickly. Silver maple has less heat value (3,000 pounds per cord) but is a very fast growing tree.
 
Black locust would be my first choice for this purpose though you may wish to plant rows of several species. However, each situation is different and another species may work better for you. So how do you set out your plantation? Dr. Wayne Geyer, our late forestry professor, did many woody biomass studies over a period of 35 years. Following are some recommendations that have come out of his studies.
 
- Plant locust a few rows in from a field edge to reduce suckering in the field.
- Plant on a close spacing, 4 to 6 feet apart. This maximizes yield and reduces side branching.
- Control weeds the first two years.
- Harvest every 5 years, most trees will resprout and can be reharvested.
- Plant about 1 acre per year for 5 years if you wish to supply the majority of the firewood needed to heat your home.
 
Trees mentioned above and available from the Kansas Forest Service include osage orange, bur oak, red oak and silver maple. (Ward Upham)

0 Comments

Horticulture Newsletter 2017, No.2

1/10/2017

0 Comments


Video of the Week:
Low Light Indoors? No Problem!

Upcoming Events:

Picture
Great Plains Growers Conference
January 12, 13 & 14, 2017
St. Joseph, MO
For more information, go to  http://www.greatplainsgrowersconference.org

Ornamentals:
Caddo Sugar Maples

Picture
Sugar maples often have significant problems with our Kansas weather. Our hot, often dry summers and windy conditions can shorten the life of these trees. However, some sugar maples are better adapted to Kansas conditions than others. Our John C. Pair Horticulture Center has evaluated sugar maples for well over 20 years and has identified selections that are much better adapted to Kansas. Of particular interest are the Caddo sugar maples which originated from an isolated population in Caddo, County, Oklahoma. These are true sugar maples and are considered an ectotype and are more drought tolerant, better adapted to high pH soils and more resistant to leaf scorch and tatter than the norm. Just how resistant to scorch is impressive. The last three weeks of August in 2003 saw temperatures at our research station over 100 degrees each day with no rain for the month prior. All other sugar maples in the trial had severely scorched leaves. Not a single leaf of any of the caddo maples was scorched. Leaf water potential readings taken pre-dawn showed all other trees in the trial past the wilting point while the Caddo maples were barely stressed.
 
Another interesting characteristic of caddo maples is that they tend to retain their leaves in the winter and therefore have been suggested as screens or for use in windbreaks. Dr. John Pair, the late director of the Horticulture Center, selected and released two Caddo maples over 10 years ago. Both these selections color early and have consistent good red fall color. Drought tolerance and resistance to leaf scorch and leaf tatter are exceptional. However, neither will do well in a heavy clay soil that is frequently saturated. These trees can be damaged or killed if planted in wet sites.

The first selection, ‘Autumn Splendor’, has the traditional sugar maple growth pattern and needs plenty of room to mature. ‘John Pair’ is smaller and more compact and more likely to fit a residential landscape. This tree is also noted for a dense, uniform crown. If you are in the market for a sugar maple, consider these before making a final decision. (Ward Upham)

Miscellaneous:
Newer Lights Available for Indoor Gardens

Picture
Many gardeners use fluorescent lights to start young vegetable and flower plants during the spring or to grow certain houseplants all year long. Traditionally, we have used fixtures with T-12 lamps suspended a few inches above the tops of the plants. However, T-12 lamps are fading away due to newer lamps that are a better choice for indoor gardens. These are known as T-8 and T-5 lamps. The number after the “T” refers to the diameter of the lamp in eighths of an inch. Therefore, a T-12 lamp is 12/8 or 1.5 inches in diameter and are what most people are familiar with. A T-8 is 8/8 or 1 inch in diameter, and a T-5 is 5/8 of an inch in diameter.
 
So, does a smaller diameter mean less light? Not at all. In fact, the T-5 can be the brightest of the three. Another advantage for these newer lamps is they use less electricity per lumen. The traditional 48-inch T-12 is rated at 40 watts. However, there are newer styles of T-12's that are 34 watts. The T-8 is rated at 32 watts and the T-5 at 28 watts.
 
This sounds too good to be true. Are there drawbacks? Maybe so or maybe not. First is cost if you have to replace T-12 fixtures to convert to a T-8 system. However, newer fixtures may be able to handle either T-12's or T-8's. Therefore, if you purchased fluorescent fixtures in the last few years, check to see if they are rated for T-8's before replacing them. Note that lamp costs are comparable between T-12's and T-8's. The T-5 lamps may be more expensive so check prices before converting.
 
The question becomes, is it worth it? If you have a T-12 fixture that is rated for T-12's only and are satisfied with your results, then maybe not. However, if you are investing in new fixtures or have fixtures that can use either T-12's or T-8's, then go with the T-8's. They will use less energy, last longer and provide more light. Prices for T-5's have been dropping so you may want to consider them as well.
 
The newest technology is LED lighting. LED’s have several advantages over other types of lighting including durability, long life, a cool running temperature and more latitude in choosing specific wavelengths of light. Traditionally, they have been very expensive but costs are dropping rapidly. We are starting to use LED’s as supplemental lighting in the University greenhouses but would suggest only using them on a trial basis at home until you see how they perform for you. (Ward Upham)

All-America Selection Winners for 2017

All-America Selections tests and introduces new flowers and vegetables each year that have done well in trials across North America. This year there were eight vegetable winners and eight flower winners that were national winners.
 
Descriptions and images below are taken directly from All-America Selection materials. For more detailed information including how to grow, see http://all-americaselections.org/product-category/year/2017/
Vegetables:
Picture
Fennel Antares F1
2017 AAS Edible – Vegetable Winner
This winner is a “First in Class,” as AAS has never before trialed and declared a fennel an AAS Winner. What is extremely fun about this winning plant is its many uses: as an edible bulb; for its ornamental fronds; as a seed producer; and as a favorite food of pollinators, namely swallowtail caterpillars. The AAS Judges described Antares as a very uniform, pure white, beautiful plant with a much improved, almost sweet, licorice/anise flavor as compared to other market varieties. It was also 7-10 days slower to bolt than comparison varieties. Many AAS Judges said they plan to plant this easy-to-grow fennel in their own gardens next year!

Picture
Okra Candle Fire F1
2017 AAS Edible – Vegetable Winner
A unique red okra with pods that are round, not ribbed, and a brighter red color than the reddish burgundy okras currently available. This high-performing AAS Winner received high marks for productivity, taste, texture and tenderness as well as the ornamental value of red pods on red stems. One judge noted that Candle Fire okra was quite maintenance free to grow, except for the frequent harvesting, which is a great thing! Candle Fire thrives in the heat and is disease resistant even in hot humid climates like the south where it’s perfect for traditional fried okra. Suitable for both fruit producing and ornamental usage. Aged fruit can be used in flower arrangements. Dry seed can be used as coffee (without caffeine.)

Picture
Pea Patio Pride
2017 AAS Edible – Vegetable Winner
This compact beauty produces sweet, uniform pods that are very tender when harvested early. With only 40 days needed to maturity, Patio Pride can be one of your first spring harvests or one of the last fall harvests from your Southeastern garden! This pea is wonderful when planted in containers and is ideal for succession planting yielding a consistent harvest over many weeks. Plant in patio containers with cool-season flowers for a beautiful combination ornamental and edible display.

Picture
Pepper Mad Hatter F1
2017 AAS Edible – Vegetable Winner
This exotic pepper wins on uniqueness alone! However, the plant’s vigor, earliness, high yields, large size and awesome taste all contribute to its high score among AAS judges. Mad Hatter is a member of the Capsicum baccatum pepper species from South America commonly used in Bolivian and Peruvian cuisine. You can impress your friends by growing this pepper and showing off the novel three-sided shape and deliciously sweet taste. The taste has a refreshing, citrus floral flavor that remains sweet, only occasionally expressing mild heat near the seeds. Be prepared for vigorous and robust plants that are easy to grow because they were bred for North America’s many growing conditions. Use your
abundant harvest raw in salads, pickled or stuffed with cheese…a new favorite!

Picture
Squash Winter Honeybaby F1
2017 AAS Edible – Vegetable Winner
Honeybaby is a very productive variety of winter squash producing numerous fruits on a compact plant. These shorter vines grow 2-3 feet in a semi-bush habit showing great garden vigor. Short, wide fruits are slightly larger, sweet and nutty and meatier than similar comparison varieties. Honeybaby is deliciously steamed, baked or made into soups and stews.

Picture
Tomato Chef’s Choice Yellow F1
2017 AAS Edible – Vegetable Winner
The fourth addition to the popular Chef’s Choice tomato series is Chef’s Choice Yellow which produces hearty beefsteak type tomatoes in a beautiful yellow color. Tomato lovers and culinary gardeners will fall for this large meaty delicacy that has a sweet, citrus-like flavor with just the right amount of acid and the perfect tomato texture. AAS Judges raved about the quantity of the 10-ounce fruits that each 5-foot indeterminate vines produced. You’ll enjoy harvesting 30 or more fruits throughout the season from this disease (Fusarium Wilt, Verticillium wilt, Tomato Mosiac Virus, Crack, and Scab) resistant plant with dark green leaves and well-behaved form. You’ll be the envy of all your tomato-growing friends!

Picture
Tomato Patio Choice Yellow F1
2017 AAS Edible – Vegetable Winner
Patio Choice Yellow is a new compact, determinate tomato developed specifically for small spaces and container gardens. This AAS Winner produces very large yields of ½ ounce bright yellow cherry tomatoes on short vines that grow only 18 inches tall. This mild flavored cherry tomato sets over 100 fruit on compact plants which are perfect for urban or small space food gardeners. Consider using these beautiful tomatoes either fresh or in the oven or sun dried for a deliciously sweet treat. For even easier picking, plant in a hanging basket.

Picture
Watermelon Mini Love F1
2017 AAS Edible – Vegetable Winner
This personal-sized Asian watermelon is perfect for smaller families and smaller gardens. Shorter vines (3-4 feet) still produce up to six fruits per plant and can be grown in smaller spaces. Several judges commented on the crack and split resistant rinds, important for reducing crop loss. For culinary purposes, this deep red fleshed watermelon has a thin but strong rind that can be carved into attractive shapes for fruit salad presentations. Mini Love has a high sugar content resulting in sweet and crisp, juicy flesh that will be a true summer delight for watermelon lovers.

Flowers:
Picture
Celosia Asian Garden
2017 AAS Flower Winner
This spiked beauty claimed victory in North America’s trial sites to become the first ever AAS Winner from Japanese breeding company Murakami Seed. The judges gave this entry high marks in the greenhouse for the good branching, almost bushy growth habit and early to bloom flower spikes. In the garden, Asian Garden Celosia continued to bloom on sturdy stems, keeping the bright pink color all summer long, holding up even through some of the first frosts of the season. The AAS Judges commented on the fact that this celosia was a pollinator-magnet, making this AAS Winner a sure bet for pollinator-friendly gardens.

Picture
Dianthus Interspecific Supra Pink F1
2017 AAS Flower Winner
Supra Pink joins its sister, 2006 AAS Winner Supra Purple, to give us two fantastic colors in an easy-to-grow interspecific dianthus for three-season (spring, summer, fall) garden color. This compact, bushy plant blooms prolifically with novel mottled pink flowers sporting frilly petal edges that hold up even in summer heat and drought. No deadheading needed on this winner. One judge attempted to deadhead this entry but it re-bloomed too fast to do so! Supra Pink grows to just under a foot in height but is a vigorous grower and will deliver fancy, clear pink flowers for a long time as observed over and over by the AAS Judges. Supra Pink was tested as an annual and won the award based on first-year performance, but similar to other dianthus, it may overwinter in some regions.

Picture
Geranium Calliope® Medium Dark Red
2017 AAS Ornamental Vegetative Winner
With an outstanding deep red velvety flower color and great branching habit, Calliope® was unmatched in the AAS Trials when compared to other market varieties. Calliope® Medium Dark Red geranium is an interspecific hybrid with zonal-type flowers and leaves. This AAS Winner has a mounded, semi-spreading growth habit with strong stems supporting the flower heads that are loaded with deep red blossoms. These plants work great in containers, combination plantings, hanging baskets as well as in an in-ground landscape. Gardeners will enjoy exceptional landscape performance in normal conditions as well as in more challenging high heat and drought conditions.

Picture
Penstemon barbatus Twizzle Purple F1
2017 AAS Flower Winner
Vibrant purple blooms present a new and unique color in penstemon! Twizzle Purple was judged as a first-year flowering perennial by judges who were impressed with the upright plant habit and superb flowering performance. This North American native blooms profusely with 1-inch tubular flowers on long slender stalks that grow up to 35 inches high, making this beauty a magnet for pollinators from mid- to late summer. Twizzle Purple can be used to add height to combination planters or in landscapes for high-impact color.

Picture
Verbena EnduraScape™ Pink Bicolor
2017 AAS Flower Winner
EnduraScape™ is described as “tough as nails” because it is the first verbena that can tolerate drought and heat plus survive cooler temperatures down to the low teens. This long-blooming pink bicolor verbena is spectacular in the landscape, edging a walk or border as well as in large containers and baskets. Vigorous plants are sturdy spreaders that pop with abundant soft pink blossoms that darken in intensity toward the center of the bloom. Pink Bicolor is the newest color in the series and the AAS Judges deemed it truly spectacular!

Picture
​Vinca Mega Bloom Orchid Halo F1
2017 AAS Flower Winner
Mega Bloom is an exciting new series of vinca bred to withstand heat and humidity without succumbing to disease. Orchid Halo produces huge bright rich purple blossoms with a wide white eye creating a striking look for the garden, even from a distance. Plants maintain a nice, dense habit with flowers staying on top of the foliage for full flower power color. ​Growers will like the early bloom time, compactness in the greenhouse and plant uniformity.

Picture
Vinca Mega Bloom Pink Halo F1
2017 AAS Flower Winner
Mega Bloom is an exciting new series of vinca bred to withstand heat and humidity without succumbing to disease. Pink Halo produces huge soft pink blossoms with a wide white eye. These flowers present a striking look in the garden, even from a distance. Plants maintain a nice, dense habit with flowers staying on top of the foliage for full flower power color. Growers will like the early bloom time, compactness in the greenhouse and plant uniformity.

Picture
Zinnia Profusion Red
2017 AAS Flower Winner
This newest Profusion Zinnia winner is the fourth color in the single flower series to win the coveted AAS Winner award. The original Profusions were ground-breaking plants because of their compact form, disease resistance, early and continuous blooms all season long and ease in growing. Judges raved about the vibrant, perfectly true red color of this zinnia which doesn’t fade in summer’s intense rays. As one judge stated, “We have waited for years for this true red color in zinnias!” Gardeners will find many uses for the true red zinnia that’s easy to grow and a favorite of pollinators. Uniform plants and outstanding greenhouse and garden performance will be especially important for growers producing Profusion Red for retail sales.
​
Contributors: Ward Upham, Extension Associate

0 Comments

Horticulture Newsletter 2016, No. 46

11/15/2016

0 Comments


Video of the Week:

Upcoming Events:

Picture
Kansas Turfgrass Conference in conjunction with KNLA

Mark the date to attend the Kansas Turfgrass Conference in conjunction with KNLA on December 6, 7 & 8 in Topeka.
 
The conference is an excellent way to learn about turf, nursery and landscape management, visit with old friends, network with new ones, and see all the latest equipment and supplies from local and national vendors.
 
The conference has been approved for Commercial pesticide recertification hours:
1 Core hour       3A - 8 hrs           3B - 9 hrs
 
International Society of Arboriculture CEUs and GCSAA education points will also be available by attending the conference.
 
Take advantage of the discounted preregistration rate and register by November 22! Download a copy of the program, get exhibitor information, or register online  http://2016ktf.eventbrite.com

Picture
Great Plains Growers Conference
January 12, 13 & 14, 2017
St. Joseph, MO
For more information, go to http://www.greatplainsgrowersconference.org/

Fruit:
Reproducing Apple Trees

Picture
Every so often we receive a question about how to make apple seeds germinate. Often, the person is looking for a way to reproduce an apple tree that is dying. Unfortunately, apple trees do not come true from seed. In other words, the apple seed produces trees that differ from the parent. It is extremely unlikely that any apple produced from seed will bear quality fruit. About 1 in every 80,000 apple seedlings will produce commercial quality fruit.
 
So, how do you reproduce an apple that is like the parent? The most common way is by grafting. Grafting is a procedure that joins two plants together. The upper part (or scion) becomes the top part of the tree, while the lower part (or stock) provides the root system or part of the trunk. In apples, the rootstock is often used to dwarf the tree so it is easier to prune, spray and harvest.
 
Apples are relatively easy to graft. How to graft is beyond the scope of this newsletter, but local libraries should have materials that cover the procedure, or you can find an excellent publication on the web at  http://muextension.missouri.edu/explorepdf/agguides/hort/g06971.pdf  (Ward Upham)

Miscellaneous:
Garden Soil Preparation - It's Not Too Late

Picture
Autumn is an excellent time to add organic materials and till garden soils. Winter can still be a good time to take care of this chore as long as the soil isn’t frozen. It is far wiser to till now than to wait until spring when cold, wet conditions can limit your ability to work soils easily. Working soil when it is wet destroys soil structure and results in hard clods that are very slow to break down. On the other hand, dry soil may need to be watered so it can be more easily tilled. Be sure to wait several days after watering to let soil moisture levels moderate. You want the soil moist, not wet or dry, when tilling.
 
There is a limit to how much organic material such as leaves can be added in one application. Normally, a layer 2 inches deep is adequate with 5 to 6 inches being the maximum that can be added at one time. Shredding the material before application encourages faster and more complete decomposition due to increased surface area. Remember, soil preparation is an important key to a successful garden. (Ward Upham)

High pH Soils and What to Do With Them 

Picture
Though there are high pH soils in most parts of the state, alkaline soils tend to be more common in the central and western regions of Kansas. These high pH soils can cause problems for plants by reducing the availability of certain micronutrients. For example, most Kansas soils have more than adequate amounts of iron. However, a high pH can make iron unavailable resulting in a condition known as iron chlorosis. Iron chlorosis reduces the health of plants by reducing photosynthesis. Lowering the pH of such soils will eliminate iron chlorosis.
 
Now would be a good time to have a soil test done to see if your pH is too high. If so, sulfur can be added either now or in the spring to lower the pH. Different textures of soil require different amounts. A sandy soil needs 7 pounds of sulfur per 1,000 square feet to reduce pH one point. A loam soil needs 11 pounds and clay needs 17 pounds to do the same. For example, if you wished to lower pH from 8.5 to 6.5 on a loam soil, you would need 22 pounds of sulfur per 1,000 square feet.
 
So, what pH do we shoot for? For most plants, a pH between 6.0 and 7.0 is preferred. Unfortunately, adding sulfur to lower pH is not as clear-cut a solution as we would like. Here are some other factors to keep in mind.
 
Free calcium carbonate: Some soils have free calcium carbonate, actual particles of limestone mixed in the soil. These "calcareous" soils normally have a pH of 7.3 to 8.5, with 8.2 to 8.3 being most common. In order for us to lower the pH with sulfur, all free calcium carbonate must be neutralized first. A recent soil test showed 6.7 percent free calcium carbonate. One pound of sulfur is needed to neutralize three pounds of calcium carbonate. Assuming 80 pounds for a cubic foot of soil, you would need about 1.75 pounds of sulfur per square foot just to neutralize the free lime. Additional sulfur would be needed to lower pH. Adding this much sulfur to a soil at one time is not recommended.
 
Not all high pH soils are calcareous. Perform this simple test to see if your soil contains appreciable amounts of free lime. Apply one drop of vinegar to dry soil. A vigorous fizz usually means the soil contains at least 3 percent calcium carbonate. A mild fizz suggests a calcium carbonate of between 1 and 2 percent and a fizz that can only be heard suggests the soil has a calcium carbonate content less than 1 percent.
 
How sulfur works: Elemental sulfur does not lower pH directly. It must first be oxidized to the sulfate form with the result being sulfuric acid. The sulfuric acid produces hydrogen, which acidifies the soil and lowers pH. The oxidation takes place primarily through microbial activity.
 
Oxidation takes time: Microbial oxidation of elemental sulfur takes time and depends on:
- number of sulfur oxidizing bacteria present
- temperature (75-104 degrees optimum)
- moisture content of soil (too wet or too dry will slow down process)
- size of sulfur particles (the smaller the better)
 
A single sulfur application normally takes at least 2 years for most the sulfur to react and form sulfuric acid. This, of course, depends on the above factors. So, what do you do about calcareous soils? See the companion article in this week’s newsletter for specific recommendations. (Ward Upham)

Iron Chlorosis and Calcareous Soils

Picture
Iron chlorosis due to high pH soils is a significant problem in Kansas. Though Kansas soils normally contain adequate amounts of iron, a high pH makes that iron unavailable to the plant. Iron plays a major role in the production of chlorophyll. Thus, a lack of iron reduces the amount of chlorophyll and results in yellowing of leaves. Iron chlorosis weakens, and in severe cases, may kill a susceptible plant.

A popular recommendation for high pH soils is adding sulfur to lower pH. This works well for many soils, but not those that are calcareous. Calcareous soils are those that contain actual particles of calcium carbonate (limestone). Calcareous soils can be difficult to practically impossible to acidify because the sulfur must neutralize all the free limestone before the pH is affected long term. In many cases you would need well over a pound of sulfur per square foot just to neutralize the free lime.
 
So, what do you do? That depends on the situation. With vegetable gardens and annual flowerbeds, work products into the soil during the time of year when there are no plants present. Oregon State University suggests mixing 5 pounds of sulfur per 100 square feet into the soil before planting. The idea is to form little pockets of acidity that result in enough iron availability for the plants during the year of application. Note that this must be done each year. Another possibility is to use iron chelates. Iron chelates hold the iron in such a way that the plant can get to it. However, not all iron chelates will work in high pH soils. For soils with a pH over 7.2, use a chelate that contains FeEDDHA (Ethylene diamine-N,N bis(2hydroxyphenylacetic acid)). This can be found in the products Sequestar 6% Iron Chelate WDG, Sequestrene 138 and Millers FerriPlus. Chelates can either be mixed into the soil at planting or sprayed on the foliage early in the season. Reapply as needed. (Ward Upham)

Why Do Houseplants Lose Leaves After Being Brought Inside?

Picture
 ewly bought houseplants or those brought in from outside often lose their leaves. In order to understand why this occurs, we need to look at how these plants are grown and what the plant needs to do to adapt to its new environment. Houseplants are normally produced either under shade outdoors in southern states or in greenhouses. Also, many homeowners move their houseplants outside during the summer. Regardless, the plants receive much more sunlight than they do in an indoor environment. Research done in Florida in the late 1970s revealed that tropical plants grown under high light conditions produce "sun leaves" while those grown under low light conditions have "shade leaves." These leaf types differ structurally in that sun leaves have less chlorophyll (the substance that plants use to convert sunlight to energy) and the chlorophyll that is present is located deeper inside the leaf. Sun leaves also tend to be thick, small and numerous while shade leaves are more thin, larger, and fewer in number. When plants are moved from one light condition to another they need time to adjust. This process is known as acclimatization. If they are forced to acclimatize too quickly, they will drop their sun leaves and produce a new set of shade leaves. If the acclimatization process is slower and less drastic, the plant can convert their sun leaves to the shade leaves that do better under low light. If going from shade to sun, this process is reversed.
 
Some houseplants are acclimatized before they are sold but many are not. So how do we help our new houseplants or those moved inside acclimatize to their new home environment? Houseplants should start out in an area of the home that receives plenty of light and then gradually moved to their permanent, darker location. This process should take 4 to 8 weeks depending on the degree of difference in light levels between the initial and final location of the plant. Remember, plants need to be acclimatized whether they are moved from a sunny location to one that receives less light or from shade to sun. Understanding plant processes allows us to anticipate potential problems. Acclimatization gives our houseplants a greater  chance of retaining leaves and avoiding the stress of completely replacing them. (Ward Upham)

Contributors: Ward Upham, Extension Associate

0 Comments

Horticulture Newsletter 2016, No. 44

11/1/2016

0 Comments


Video of the Week:
Spider Plants and Exotic Ferns

Flowers:
Winterizing Roses

Picture
Though most shrub roses are hardy in Kansas, other types of roses can be more tender. For example, the hybrid teas have certain species in their ancestry that originated in the warm climate of southern China. These roses need protection to reliably survive Kansas winters. Mound soil or compost about 8 to 10 inches high around each plant. If using soil, bring it in from another part of the garden. Do not pull it from between plants because this can damage the rose roots or make them more susceptible to cold.
 
Mounding is normally finished by Thanksgiving. After the ground has frozen, add a 4-inch mulch of straw, leaves or hay for further protection. More soil may be spread on top of the mulch to keep it in place. Do not add the mulch before the ground freezes or mice may invade and feed on the roses over the winter. The purpose of these coverings is not only to moderate the cold, but also to prevent warm days during the winter or early spring from stimulating growth that is tender to returning cold weather. Excessively tall canes should be pruned to a height of 36 inches and tied together to prevent them from being whipped by strong winter winds. Wind can damage the crown of the plant or loosen the surrounding soil.
 
Next spring, remove coverings before new growth starts. If soil was used for mounding, remove from the area so that the level of soil stays constant from year to year. Wait until after the ground thaws, or the tops may begin growing before the roots can provide water. (Ward Upham)

Miscellaneous:
Winter Care of Houseplants

Picture
During the short days of winter, houseplant growth slows, resulting in a need to change how we care for them. Although frequent watering may have been necessary during the long days of summer, the same amount now could cause problems. Excess water fills air spaces within the soil resulting in roots that receive less oxygen than they need. Water by touch, not by calendar.  If the soil is dry an inch deep, it istime to water. Be sure to add enough so that some water flows out the bottom of the pot. This will help wash out excess salts that tend to accumulate within the potting soil. Fertilization also should be reduced. Normally, it is best to apply half the amount of fertilizer for flowering houseplants and one-fourth the amount for foliage houseplants. Too much fertilizer results in plants that become leggy and weak.
 
Location is another factor that should be considered this time of year. Since day length is so short, houseplants may be helped by being moved to areas of the room that receive more light, such as a south-or east-facing window.
 
Avoid placing plants where drafts from doors or direct output from heating ducts may contact them. Relative humidity also tends to be low during the winter. If you do not have a humidifier, frequent misting of the plants or placing them on water-filled trays of pebbles can help raise the humidity. (Ward Upham)

Draining Hoses and Irrigation Lines

Picture
Hoses and shallow irrigation lines may be damaged over the winter if water is not drained. If there is a main shut-off valve for the system, close it and then run through the zones to make sure any pressure has a chance to bleed off. Lawn irrigation systems usually have shallow lines. Though some lines may be self-draining, check to be sure there are no manual drains. If manual drains are present, they should be opened. Be sure to map them so they can be closed next spring before the system is pressurized. If there are no manual drains the system should be blown out with an air compressor.  Lawn irrigation companies often offer this service.
 
Drain hoses by stretching them out and coiling them for storage. Water will drain as you pull the hose toward you for coiling. Store in a protected place. UV light can make hoses brittle over time. (Ward Upham)

Keep Compost Pile Moist

Picture
This is the time of year when there are lots of materials available to compost. Remember that the compost needs to be kept moist so that the bacteria and fungi can break down the raw materials. Use a sprinkler to soak through the pile to the center. Allow the pile to drain. The goal is for the pile to remain moist; not waterlogged. Edges will dry out the quickest and may need a light sprinkling from time to time.
 
If you are interested in composting but don’t know how it is done, see our video at http://tinyurl.com/jn6yppo and/or our publication at http://hnr.k-state.edu/doc/hort-tips/Composting.pdf (Ward Upham)

Roasting Pumpkin Seeds

Picture
Now that Halloween is past, you may be wondering what to do with the pumpkins that were used to decorate for the holiday. Consider roasting the seeds before freezing temperatures destroys the pumpkin fruit. Cut open the pumpkin and remove the seeds and stringy material. Seeds should be washed and dried and the “strings” discarded. Toss the seeds with a little oil before roasting.
 
Flavor can be enhanced by adding a sprinkling of salt to the oiled seeds. Seeds can then be spread on a cookie sheet and roasted for about 25 minutes at 325 degrees F. Times may vary depending on the size and moisture content of the seed. Seeds are done when they turn a golden brown. If seeds are not eaten immediately, store in a zip closure bag in the refrigerator. (Ward Upham)
 
Contributors: Ward Upham, Extension Associate

0 Comments
<<Previous

    Authors

    Ward Upham runs the Horticulture Response Center in the Department of Horticulture and Natural Resources at Kansas State University. Other contributors include K-State Extension Specialists.

    RSS Feed

      Subscribe to the newsletter by entering your e-mail and clicking the link below

    Subscribe

    Archives

    January 2023
    December 2022
    November 2022
    October 2022
    September 2022
    August 2022
    July 2022
    June 2022
    May 2022
    April 2022
    March 2022
    February 2022
    January 2022
    December 2021
    November 2021
    October 2021
    September 2021
    August 2021
    July 2021
    June 2021
    May 2021
    April 2021
    March 2021
    February 2021
    January 2021
    December 2020
    November 2020
    October 2020
    September 2020
    August 2020
    July 2020
    June 2020
    May 2020
    April 2020
    March 2020
    February 2020
    January 2020
    December 2019
    November 2019
    October 2019
    September 2019
    August 2019
    July 2019
    June 2019
    May 2019
    April 2019
    March 2019
    February 2019
    January 2019
    December 2018
    November 2018
    October 2018
    September 2018
    August 2018
    July 2018
    June 2018
    May 2018
    April 2018
    March 2018
    February 2018
    January 2018
    December 2017
    November 2017
    October 2017
    September 2017
    August 2017
    July 2017
    June 2017
    May 2017
    April 2017
    March 2017
    February 2017
    January 2017
    December 2016
    November 2016
    October 2016
    September 2016
    August 2016
    July 2016
    June 2016
    May 2016
    April 2016
    March 2016
    February 2016
    January 2016
    December 2015
    November 2015
    October 2015
    September 2015
    August 2015
    July 2015
    June 2015
    May 2015
    April 2015
    March 2015
    February 2015
    January 2015
    December 2014
    November 2014
    October 2014
    September 2014
    August 2014
    July 2014
    June 2014

    Categories

    All
    All America Selections
    All-America Selections
    Amaryllis
    Anthracnose
    Ants
    Aphids
    Apples
    Apricots
    Army-cutworm-moths
    Ash-borer
    Ashes-in-the-garden
    Asparagus
    Bacterial-wilt
    Bagworms
    Bark-shedding
    Beans
    Bermudagrass
    Bird-feeding
    Bitter-cucumber
    Blackberries
    Blackspot
    Black-walnuts
    Blister Beetles
    Blossom End Rot
    Blossom-End Rot
    Blueberries
    Botryosphaeria
    Breaking-dormancy-early
    Breaking-dormancy-early
    Bristly Rose Slug
    Broccoli
    Brownheaded-ash-sawfly
    Brown-patch-on-fescue
    Brown-rot-of-fruit
    Budworms
    Buffalograss
    Bulbs
    Bulb Storage
    Butterflies
    Butterfly Gardening
    Cabbage
    Cabbage Worms
    Caddo Sugar Maples
    Calcareous
    Cantaloupe
    Carpenter Bees
    Cauliflower
    Cedar Apple Rust
    Cherry Leaf Spot
    Chickweed
    Chiggers
    Christmas Cacti
    Christmas Trees
    Cicada
    Cicada Killer Wasps
    Codling Moth Control
    Cold Frames
    Cole Crops
    Colorado Potato Beetle
    Columnar Trees
    Compost
    Conservation Trees
    Container Gardening
    Controlling Volunteer Trees
    Cool Season Vegetables
    Cool-Season Vegetables
    Core Aeration
    Corn Earworm
    Corn Gluten Meal
    Crabapples
    Crabgrass Control
    Crickets
    Crop Rotation
    Cucumber
    Cucumber Beetles
    Daylilies
    Deadheading Flowers
    Dormant-seeding-turfgrass
    Dothistroma Needle Blight
    Drip-irrigation
    Dr-seuss-gardening
    Dutch-elm-disease
    Early Blight
    Eggplant
    Elm Flea Weevil
    Elm Leaf Beetle
    Elm Pocket Gall
    Emerald Ash Borer
    Euonymus Scale
    European Pine Sawfly
    Excessive Rain
    Fall Armyworms
    Fall Colors
    Fall Gardening
    Fall Lawn Seeding
    Fall-webworm
    Family-heritage-gardening
    Fertilizing-cole-crops
    Fertilizing-flowers
    Fertilizing Lawns
    Field-bindweed
    Field Dodder
    Firewood
    Flatid Planthoppers
    Flooding
    Floral Arrangement Care
    Flourescent Lights
    Flowerbed Design
    Flowering
    Frost On Lawns
    Fruit
    Fruit Baskets
    Fruit Damage From Cold
    Fruit Trees
    Fungus Gnats
    Galls
    Garden Hoses
    Gardening Calendar
    Garden Seed
    Garden Spiders
    Garden Tool Care
    Garlic
    Goldenrod Soldier Beetle
    Grapes
    Grasshoppers
    Grass Seed
    Green June Beetles
    Growing Cuttings Inside
    Grubs
    Hackberry Caterpillar Butterflies
    Hackberry Psyllids
    Hardiness
    Harlequin Bug
    Harvesting
    Help For New Gardeners
    Henbit
    Herbicide Damage
    High PH Soils
    Holly
    Hollyhock
    Honeysuckle
    Hornworms
    Horseradish
    Houseplants
    Hydrangea
    Ice Melters
    Invasive Plants
    Iris
    Iron Chlorosis
    Irrigation
    Itch Mites
    Japanese Beetles
    Junipers
    Kansas Garden Guide
    Kentucky Bluegrass
    Knotweed
    Lacebugs
    Ladybird Beetles
    Landscape Design
    Lawn
    Lawn Calendar For Cool Season Grass
    Lawn Calendar For Cool-Season Grass
    Lawn Calendar For Warm Season Grass
    Lawnmower Care
    Lawn Seeding
    Leaf Scorch
    Leaves
    Lettuce
    Lilac
    Lilac Borers
    Little Barley
    Marcescence
    Maximizing Garden Space
    Melons
    Millipedes
    Mimosa Webworm
    Mole Control
    Mouse Damage
    Mowing
    Mulch
    Mums
    Mushrooms
    Mycosphaerella Leaf Spot
    Nantucket Pine Tip Moth
    Native Prairie Flowers
    Needle Drop On Conifers
    New Gardener Resources
    Nightcrawlers
    Nuts
    Oak
    Oak Leaf Itch Mite
    Onions
    Orchids
    Organic Matter
    Organic Sources Of Nitrogen
    Ornamental Grass
    Overseeding Lawns
    Overwintering Geraniums
    Paperwhite Bulbs
    Pawpaw Trees
    Peaches
    Pears
    Peas
    Peonies
    Peony
    Peppers
    Perennial Garden Clean Up
    Perennial Garden Clean-up
    Pesticide Effectiveness
    Pine Wilt
    Planting Calendar
    Plastic Mulch
    Plum
    Poinsettia
    Poison Ivy
    Poisonous Plants
    Pokeweed
    Poor Drainage
    Potatoes
    Powdery Mildew
    Powdery Mildew On Lawn
    Power Raking
    Propagating-woody-plants
    Prop Up Fruit Limbs
    Pruning
    Publications
    Quince
    Rabbits
    Raccoons
    Rain-barrels
    Raspberries
    Recommended-plants-for-ks
    Rhubarb
    Roasting Pumpkin Seeds
    Roots
    Rose
    Rose Rosette
    Roundup For Lawns
    Salad Garden
    Sawfly Larvae
    Scale
    Scale Insects
    Screen Trees
    Sedum
    Seed Germination
    Seed Germination
    Seed Tape
    Septoria Leaf Spot
    Shrub Pruning
    Shrubs
    Sidedressing
    Slime Molds
    Slugs
    Smut
    Soil
    Soil Preparation
    Soil Temperature
    Spider Mites
    Spiders
    Spirea Aphid
    Spittlebugs
    Spray Water PH
    Spreaders
    Spring Bulbs
    Spring Flowering Shrubs
    Squash
    Squash Bugs
    Squash Vine Borer
    Squirrel Damage
    Starting Seed
    Stink Bugs
    Storing Power Equipment
    Storm Damage
    Stratification
    Straw-bale-gardening
    Strawberries
    Succession Planting Of Vegetables
    Sunflowers
    Sunscald
    Survey
    Sweet Corn
    Sweet Potatoes
    Tall Fescue
    Tan/White Drupelets
    Termites
    Thatch Control
    Ticks
    Tomatoes
    Transplant Fertilization
    Tree Health
    Tree Leaves And Turf
    Tree Planting
    Trees
    Tubakia
    Tubakia-leaf-spot
    Turf-in-shade
    Twig-girdlers
    Vegetable-flowersfruit
    Vegetables
    Vegetable Seed
    Vegetable Transplants
    Velvet Ants
    Vinegar As Herbicide
    Walnut Caterpillars
    Warm Fall
    Water Damage
    Watering
    Watermelon
    Water Teepees
    Weeds In Flower Beds
    Weeds In Turf
    Weird Squash
    White Grubs
    Whitelined-sphinx-caterpillar
    Wildflower Establishment
    Wildflower-establishment
    Wildlife
    Wild Violet Control
    Wind Chill
    Winter Damage
    Winterizing Water Lines
    Winter Mulching Vegetables
    Winter Squash
    Wood Chips
    Worms From Oaks
    Yellowjackets
    Yellow Nutsedge

Powered by Create your own unique website with customizable templates.