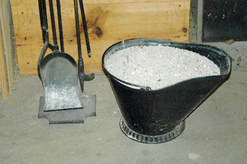
You may have heard that using wood ashes on your garden can help make the soil more fertile. Though ashes do contain significant amounts of potash, they contain little phosphate and no nitrogen. Most Kansas soils are naturally high in potash and do not need more. Also, wood ashes will raise the pH of our soils, often a drawback in Kansas where soils tend toward high pH anyway. Therefore, wood ashes add little benefit, and may harm, many Kansas soils. In most cases it is best to get rid of them. (Ward Upham)
0 Comments
Late fall or early winter is a good time to service power equipment such as mowers, tillers and garden tractors. Run the equipment out of gas or treat the existing gas with a stabilizer as untreated gas can deteriorate over time. If using a stabilizer, run the engine long enough for untreated gas in the carburetor bowl to be burned and replaced. This is also a good time to replace the oil (and filter, if present) since the engine is warm. Check and replace the spark plug if necessary. Some gardeners will also apply a light, sprayable oil into the cylinder through the spark plug hole. Check and clean air filters and replace if necessary. Many mowers and tillers will have a foam prefilter that can become filthy with use. If allowed to become too dirty, engines will run poorly or may not run at all. Sharpen blades, clean tines, tighten screws, replace broken parts and do all the other things needed to keep equipment in good shape. Though such maintenance takes some time and effort, it pays for itself by reducing frustration and lost time due to poorly performing equipment during a hectic spring. (Ward Upham) Though most shrub roses are hardy in Kansas, other types of roses can be more tender. For example, the hybrid teas have certain species in their ancestry that originated in the warm climate of southern China. These roses need protection to reliably survive Kansas winters. Mound soil or compost about 8 to 10 inches high around each plant. If using soil, bring it in from another part of the garden. Do not pull it from between plants because this can damage the rose roots or make them more susceptible to cold. Mounding is normally finished by Thanksgiving. After the ground has frozen, add a 4-inch mulch of straw, leaves or hay for further protection. More soil may be spread on top of the mulch to keep it in place. Do not add the mulch before the ground freezes or mice may invade and feed on the roses over the winter. The purpose of these coverings is not only to moderate the cold, but also to prevent warm days during the winter or early spring from stimulating growth that is tender to returning cold weather. Excessively tall canes should be pruned to a height of 36 inches and tied together to prevent them from being whipped by strong winter winds. Wind can damage the crown of the plant or loosen the surrounding soil. Next spring, remove coverings before new growth starts. If soil was used for mounding, remove from the area so that the level of soil stays constant from year to year. Wait until after the ground thaws, or the tops may begin growing before the roots can provide water. (Ward Upham) Now is the time to start amaryllis if you wish to have them in bloom for Christmas. The amaryllis is a tender bulb that is ready to bloom when purchased. The genus name for this plant is Hippeastrum, which means "horse star," an appropriate name for a plant that produces massive blooms as much as 8 to 10 inches across. These plants can produce 3 to 4 blooms on a 1- to 2-foot stem. Often, a second flower stalk follows the first at about the time the flowers on the first stem fade. The leaves usually start to appear when the flowers begin to open. Amaryllis bulbs can be huge – approaching the size of a grapefruit. The larger the bulb, the larger the flowers and the more expensive the bulb. Regardless of size, amaryllis likes tight quarters. Place in a pot only 1 to 2 inches larger in diameter than the bulb. About half of the bulb should remain exposed. Hold the bulb so the roots hang down into the pot, and add potting mix. Firm the mix around the roots carefully so that they are not snapped off. Water thoroughly and place the plant in a warm, sunny location. Amaryllis likes day temperatures in the 70s and night temperatures in the 60s. The flower bud may start to appear right away or the plant may remain dormant for a period of time, but eventually all mature bulbs do bloom. Move the plant to a cooler location and out of direct sunlight when the flower buds begin to show color so the flowers last longer. Amaryllis can remain in bloom for about a month. Flowers should be cut off after blooming to keep the plant from expending energy to form seeds. Place the plant back in a sunny location until it is warm enough to be placed outside. Sink the pot in the soil in an area that has dappled shade. The plant can be gradually moved to sunnier locations until it receives full sun for a half day. Continue to fertilize with a balanced houseplant fertilizer as you would a normal houseplant. Bring the pot in before first frost and place in a dark location. Withhold all water so the leaves have a chance to dry completely. Leaves can then be cut off close to the top of the bulb. Amaryllis can often be left in the same pot for several years but will eventually need repotting. Again, choose a pot that is only 1 to 2 inches larger in diameter than the bulb and repeat the process described above. Offsets are normally produced by amaryllis and can be given their own pots if desired. These small bulbs have a concave side when removed but develop a round shape when given their own space. They grow quickly and can be mature enough to flower in a couple of years. (Ward Upham) Autumn is an excellent time to add organic materials and till garden soils. Winter can still be a good time to take care of this chore as long as the soil isn’t frozen. It is far wiser to till now than to wait until spring when cold, wet conditions can limit your ability to work soils easily. Working soil when it is wet destroys soil structure and results in hard clods that are very slow to break down. On the other hand, dry soil may need to be watered so it can be more easily tilled. Be sure to wait several days after watering to let soil moisture levels moderate. You want the soil moist, not wet or dry, when tilling. There is a limit to how much organic material such as leaves can be added in one application. Normally, a layer 2 inches deep is adequate with 5 to 6 inches being the maximum that can be added at one time. Shredding the material before application encourages faster and more complete decomposition due to increased surface area. Remember, soil preparation is an important key to a successful garden. (Ward Upham) Though there are high pH soils in most parts of the state, alkaline soils tend to be more common in the central and western regions of Kansas. These high pH soils can cause problems for plants by reducing the availability of certain micronutrients. For example, most Kansas soils have more than adequate amounts of iron. However, a high pH can make iron unavailable resulting in a condition known as iron chlorosis as evidenced by light green leaves with darker green veins. Iron chlorosis reduces the health of plants by reducing photosynthesis. Lowering the pH of such soils will eliminate iron chlorosis. Now would be a good time to have a soil test done to see if your pH is too high. If so, sulfur can be added either now or in the spring to lower the pH. Different textures of soil require different amounts. A sandy soil needs 1.0 to 1.5 pounds of sulfur per 100 square feet to reduce pH one point. A loam soil needs 1.5 - 2.0 pounds and clay needs 2.0 - 2.5 pounds to do the same. For example, if you wished to lower pH from 7.5 to 6.5 on a loam soil, you would need 1.5 - 2.0 pounds of sulfur per 100 square feet. So, what pH do we shoot for? For most plants, a pH between 6.0 and 7.0 is preferred. Unfortunately, adding sulfur to lower pH is not as clear-cut a solution as we would like. Here are some other factors to keep in mind. Free calcium carbonate: Some soils have free calcium carbonate, actual particles of limestone mixed in the soil. These "calcareous" soils normally have a pH of 7.3 to 8.5, with 8.2 to 8.3 being most common. In order for us to lower the pH with sulfur, all free calcium carbonate must be neutralized first. A recent soil test showed 6.7 percent free calcium carbonate. One pound of sulfur is needed to neutralize three pounds of calcium carbonate. Assuming 80 pounds for a cubic foot of soil, you would need about 1.75 pounds of sulfur per square foot just to neutralize the free lime. Additional sulfur would be needed to lower pH. Adding this much sulfur to a soil at one time is not recommended. Not all high pH soils are calcareous. Perform this simple test to see if your soil contains appreciable amounts of free lime. Apply one drop of vinegar to dry soil. A vigorous fizz usually means the soil contains at least 3 percent calcium carbonate. A mild fizz suggests a calcium carbonate of between 1 and 2 percent and a fizz that can only be heard suggests the soil has a calcium carbonate content less than 1 percent. How sulfur works: Elemental sulfur does not lower pH directly. It must first be oxidized to the sulfate form with the result being sulfuric acid. The sulfuric acid produces hydrogen, which acidifies the soil and lowers pH. The oxidation takes place primarily through microbial activity. Oxidation takes time: Microbial oxidation of elemental sulfur takes time and depends on: - number of sulfur oxidizing bacteria present - temperature (75-104 degrees optimum) - moisture content of soil (too wet or too dry will slow down process) - size of sulfur particles (the smaller the better) A single sulfur application normally takes at least 2 years for most the sulfur to react and form sulfuric acid. This, of course, depends on the above factors. So, what do you do about calcareous soils? See the companion article in this week’s newsletter for specific recommendations. (Ward Upham) Newly bought houseplants or those brought in from outside often lose at least a portion of their leaves. In order to understand why this occurs, we need to look at how these plants are grown and what the plant needs to do to adapt to its new environment. Houseplants are normally produced either under shade outdoors in southern states or in greenhouses. Also, many homeowners move their houseplants outside during the summer. Regardless, the plants receive much more sunlight than they do in an indoor environment. Research done in Florida in the late 1970s revealed that tropical plants grown under high light conditions produce ‘sun leaves’ while those grown under low light conditions have ‘shade leaves.’ These leaf types differ structurally in that sun leaves have less chlorophyll (the substance that plants use to convert sunlight to energy) and the chlorophyll that is present is located deeper inside the leaf. Sun leaves also tend to be thick, small and numerous while shade leaves are more thin, larger, and fewer in number. When plants are moved from one light condition to another they need time to adjust. This process is known as acclimatization. If they are forced to acclimatize too quickly, they will drop their sun leaves and produce a new set of shade leaves. If the acclimatization process is slower and less drastic, the plant can convert their sun leaves to the shade leaves that do better under low light. If going from shade to sun, this process is reversed. Some houseplants are acclimatized before they are sold but many are not. So how do we help our new houseplants or those moved inside acclimatize to their new home environment? Houseplants should start out in an area of the home that receives plenty of light and then gradually moved to their permanent, darker location. This process should take 4 to 8 weeks depending on the degree of difference in light levels between the initial and final location of the plant. Remember, plants need to be acclimatized whether they are moved from a sunny location to one that receives less light or from shade to sun. Understanding plant processes allows us to anticipate potential problems. Acclimatization gives our houseplants a greater chance of retaining leaves and avoiding the stress of completely replacing them. (Ward Upham) Knotweed thrives in compacted soils, so a thorough aeration is the first step in control. This weed will not compete in a healthy lawn. Chemically, there are two options. Knotweed is an annual that germinates in late February or early March, so a preemergence herbicide can be used in the late fall (about now). Pendimethalin (Scotts Halts), Surflan (Weed Impede), Barricade, Dimension and XL are labeled for knotweed. (Note: Pendimethalin, Barricade and Dimension can be used on all Kansas turfgrasses, while Surflan and XL can only be used on tall fescue and warm-season grasses such as buffalograss, zoysiagrass and bermuda). The other option is to use a combination postemergence product such as Trimec, Weed-Out, Weed-B-Gon or Weed Free Zone after the knotweed has germinated in the spring but is still young. If spring seeding of the lawn is planned, your options are more limited. Buctril can be used on commercial sites and has a very short residual. It must be used on very young knotweed to get control. Trimec and others require a month before overseeding to thicken up your lawn. Obviously, don't use a preemergence herbicide if you are trying to get new seed established. For homeowners seeding in the spring, tilling will control knotweed adequately without using a herbicide. If seeding without tilling (e.g., overseeding using a slicer-seeder), then use a combination product such as one mentioned above just after the knotweed comes up in the spring, and be sure to wait at least a month before seeding. (Ward Upham) |
AuthorsCynthia Domenghini runs the Horticulture Response Center in the Department of Horticulture and Natural Resources at Kansas State University. Other contributors include K-State Extension Specialists. Archives
March 2024
Categories
All
|